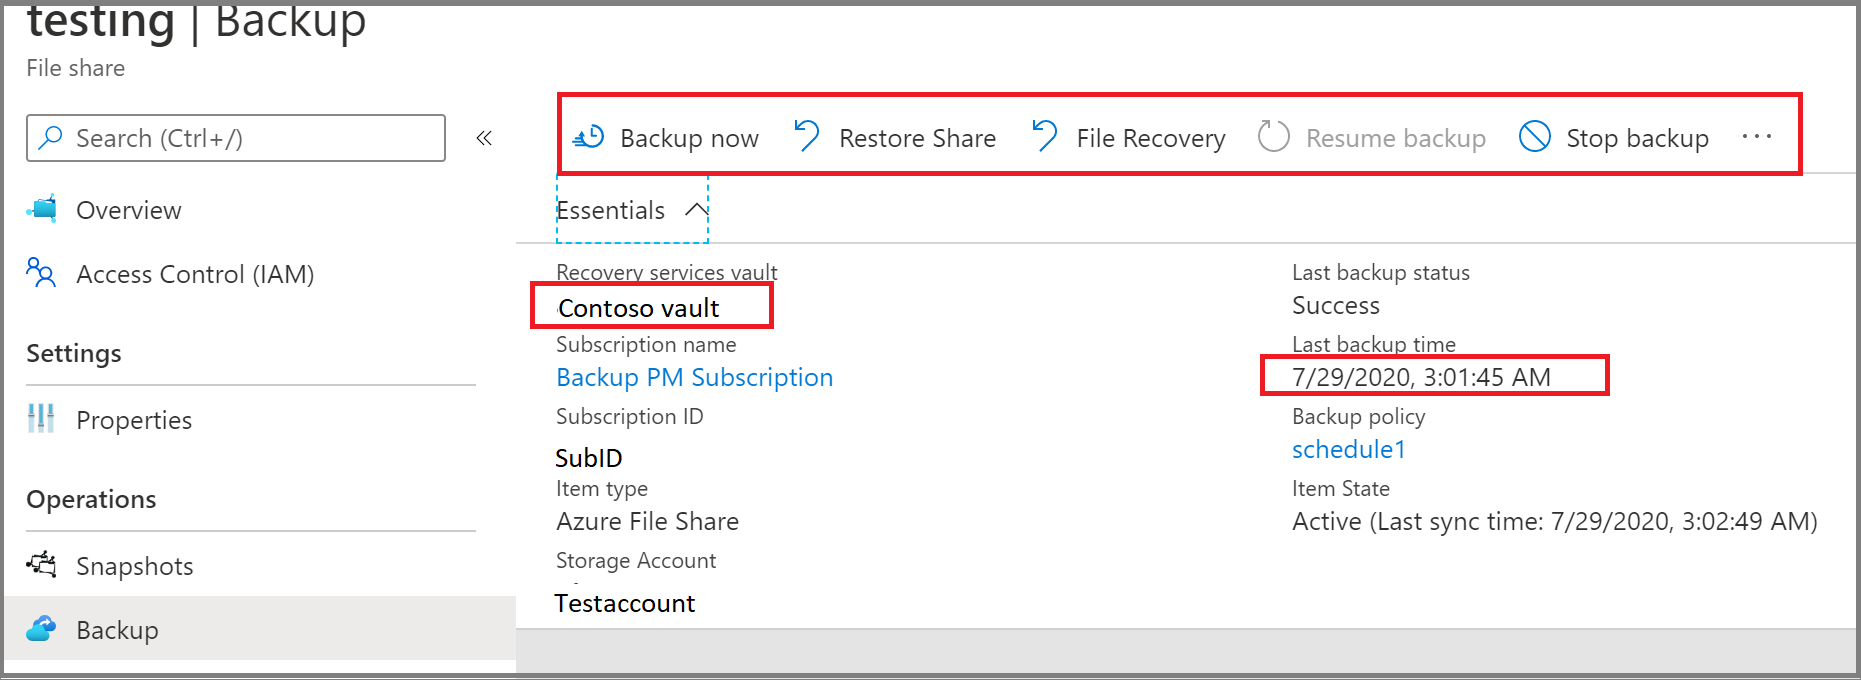
Back up Azure File shares

This article describes how to back up Azure File shares from the Azure portal.

Azure File share backup is a native, cloud based backup solution that protects your data in the cloud and eliminates additional maintenance overheads involved in on-premises backup solutions. The Azure Backup service smoothly integrates with Azure File Sync, and allows you to centralize your file share data as well as your backups. This simple, reliable, and secure solution enables you to configure protection for your enterprise file shares by using snapshot backup and vaulted backup (preview) in a few simple steps with an assurance that you can recover your data in case of any accidental or malicious deletion.

Learn about the Azure File share snapshot-based backup solution.

Note

Vaulted backup for Azure File share is currently in preview and available in limited regions mentioned here.

Prerequisites

  • Ensure the file share is present in one of the supported storage account types. Review the support matrix.
  • Identify or create a Recovery Services vault in the same region and subscription as the storage account that hosts the file share.
  • In case you have restricted access to your storage account, check the firewall settings of the account to ensure that the exception "Allow Azure services on the trusted services list to access this storage account" is granted. You can refer to this link for the steps to grant an exception.

Important

To perform Cross Subscription Backup (CSB) for protecting Azure File share (preview) in another subscription, ensure you register Microsoft.RecoveryServices in the subscription of the file share in addition to the above prerequisites. Learn about the supported regions for Cross Subscription Backup (preview).

Create a Recovery Services vault

A Recovery Services vault is a management entity that stores recovery points that are created over time, and it provides an interface to perform backup-related operations. These operations include taking on-demand backups, performing restores, and creating backup policies.

To create a Recovery Services vault:

  1. Sign in to the Azure portal.

  2. Search for Business Continuity Center, and then go to the Business Continuity Center dashboard.

    Screenshot that shows where to search for and select Business Continuity Center.

  3. On the Vault pane, select +Vault.

    Screenshot shows how to start creating a Recovery Services vault.

  4. Select Recovery Services vault > Continue.

    Screenshot that shows where to select Recovery Services as the vault type.

  5. On the Recovery Services vault pane, enter the following values:

    • Subscription: Select the subscription to use. If you're a member of only one subscription, you'll see that name. If you're not sure which subscription to use, use the default subscription. There are multiple choices only if your work or school account is associated with more than one Azure subscription.

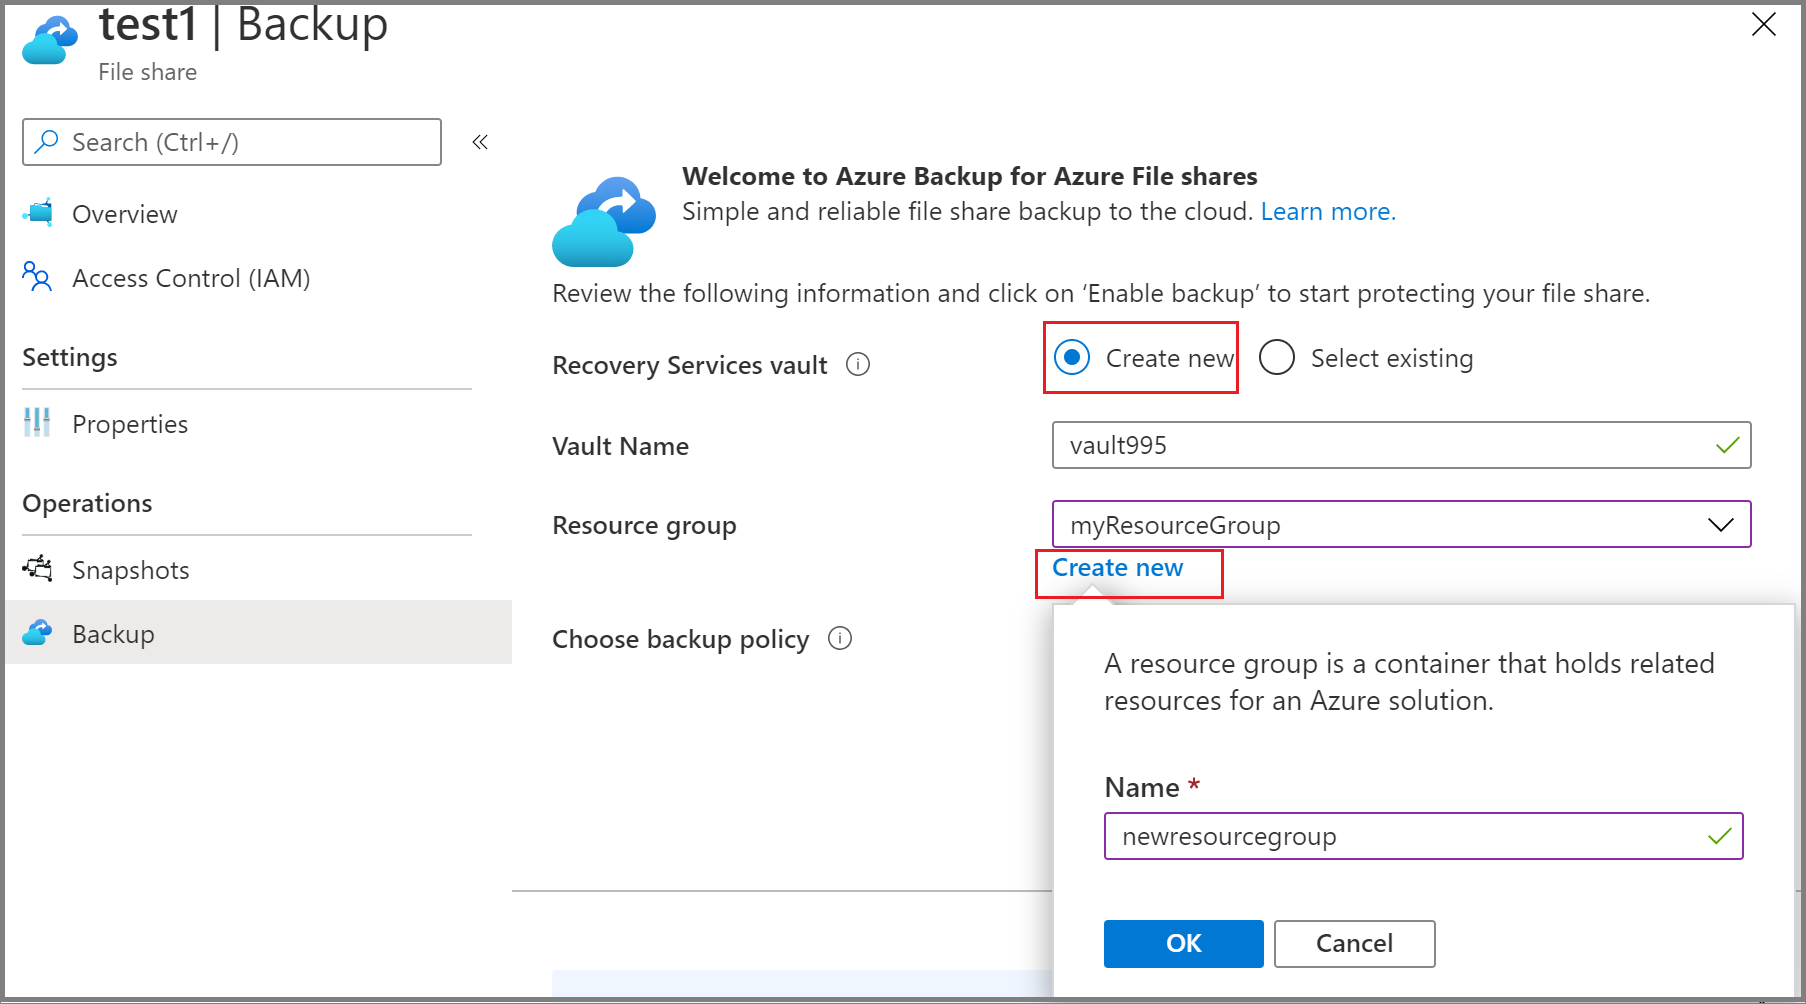
    • Resource group: Use an existing resource group or create a new one. To view a list of available resource groups in your subscription, select Use existing, and then select a resource in the dropdown list. To create a new resource group, select Create new, and then enter the name. For more information about resource groups, see Azure Resource Manager overview.

    • Vault name: Enter a friendly name to identify the vault. The name must be unique to the Azure subscription. Specify a name that has at least 2 but not more than 50 characters. The name must start with a letter and consist only of letters, numbers, and hyphens.

    • Region: Select the geographic region for the vault. For you to create a vault to help protect any data source, the vault must be in the same region as the data source.

      Important

      If you're not sure of the location of your data source, close the window. Go to the list of your resources in the portal. If you have data sources in multiple regions, create a Recovery Services vault for each region. Create the vault in the first location before you create a vault in another location. There's no need to specify storage accounts to store the backup data. The Recovery Services vault and Azure Backup handle that automatically.

      Screenshot that shows fields for configuring a Recovery Services vault.

  6. After providing the values, select Review + create.

  7. To finish creating the Recovery Services vault, select Create.

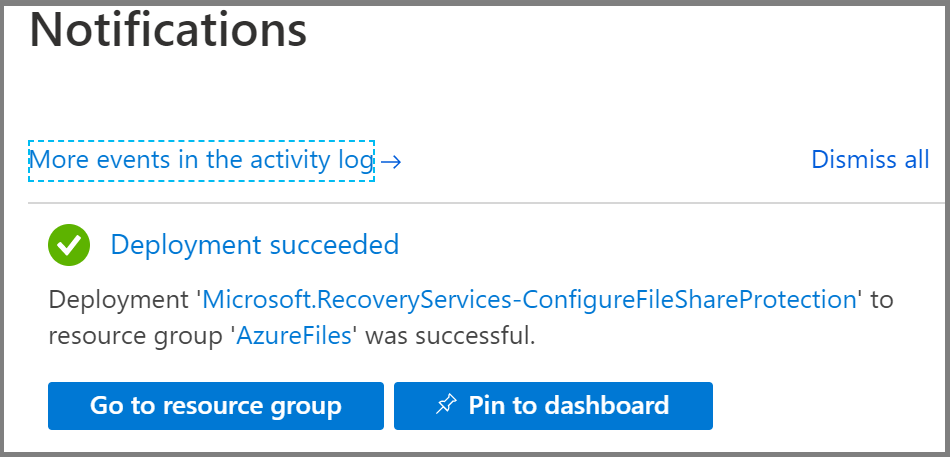
    It can take a while to create the Recovery Services vault. Monitor the status notifications in the Notifications area at the upper right. After the vault is created, it appears in the list of Recovery Services vaults. If the vault doesn't appear, select Refresh.

    Screenshot that shows the button for refreshing the list of backup vaults.

Note

Azure Backup now supports immutable vaults that help you ensure that recovery points once created can't be deleted before their expiry as per the backup policy. You can make the immutability irreversible for maximum protection to your backup data from various threats, including ransomware attacks and malicious actors. Learn more.

Configure the backup

You can configure snapshot backup and vaulted backup (preview) for Azure File share from the Recovery Services vault or File share blade.

Choose an entry point

To configure backup for multiple file shares from the Recovery Services vault, follow these steps:

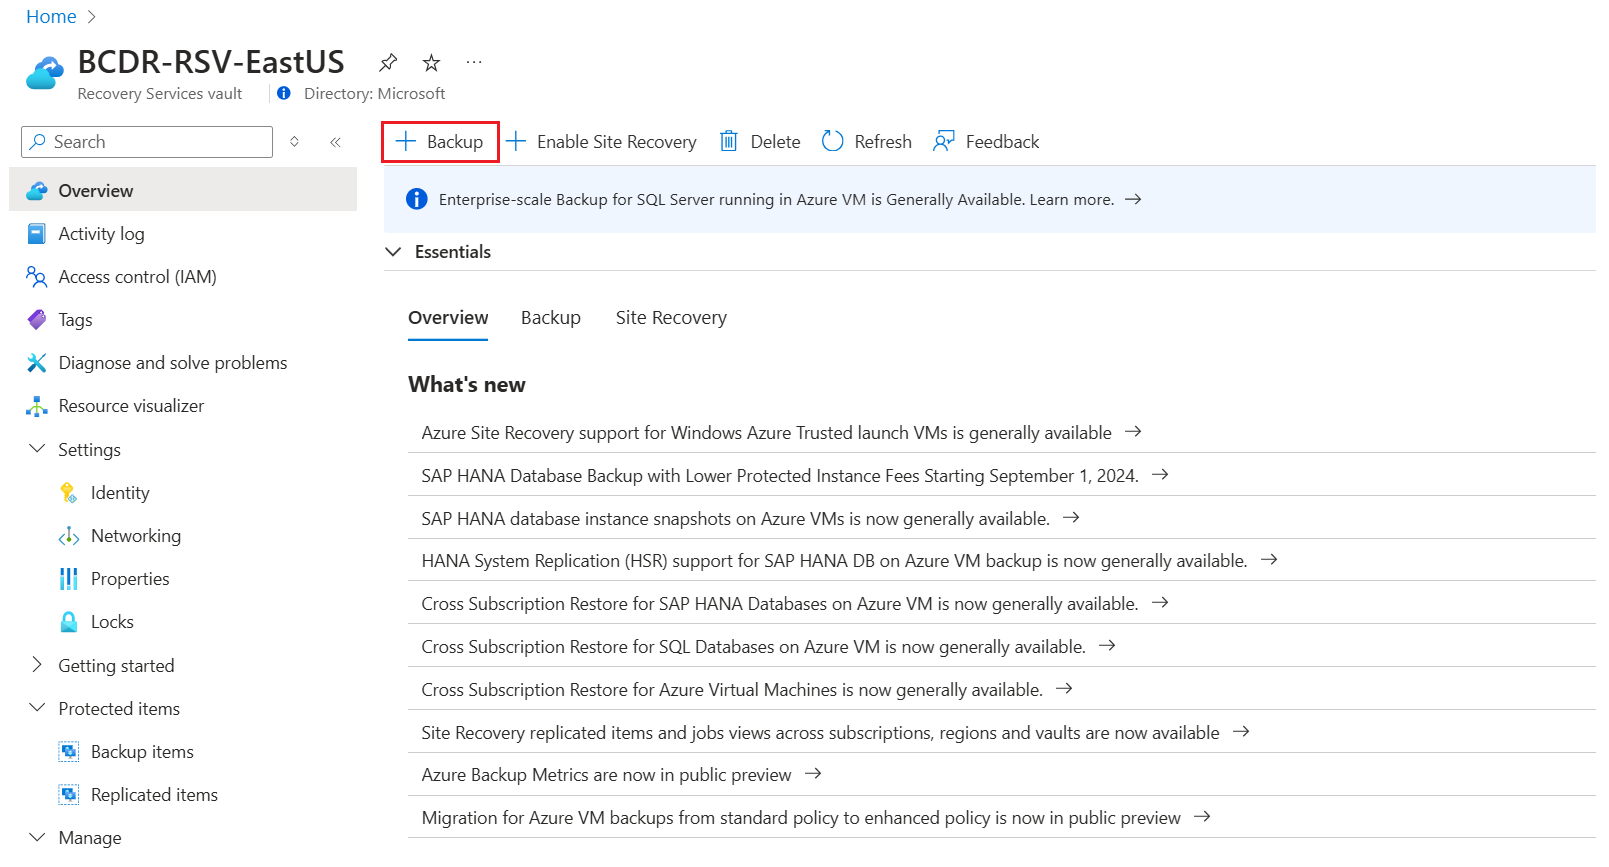
  1. In the Azure portal, go to the Recovery Services vault and select +Backup.

    Screenshot showing to configure Backup for Azure File.

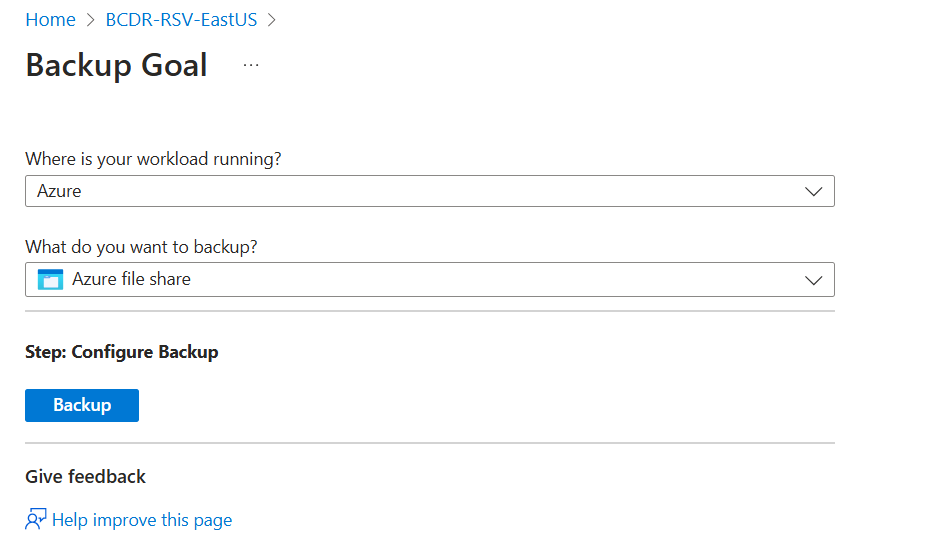
  2. On the Backup Goal pane, select Azure Files (Azure Storage) as the datasource type, select the vault that you want to protect the file shares with, and then select Continue.

    Screenshot showing to select Azure Files.

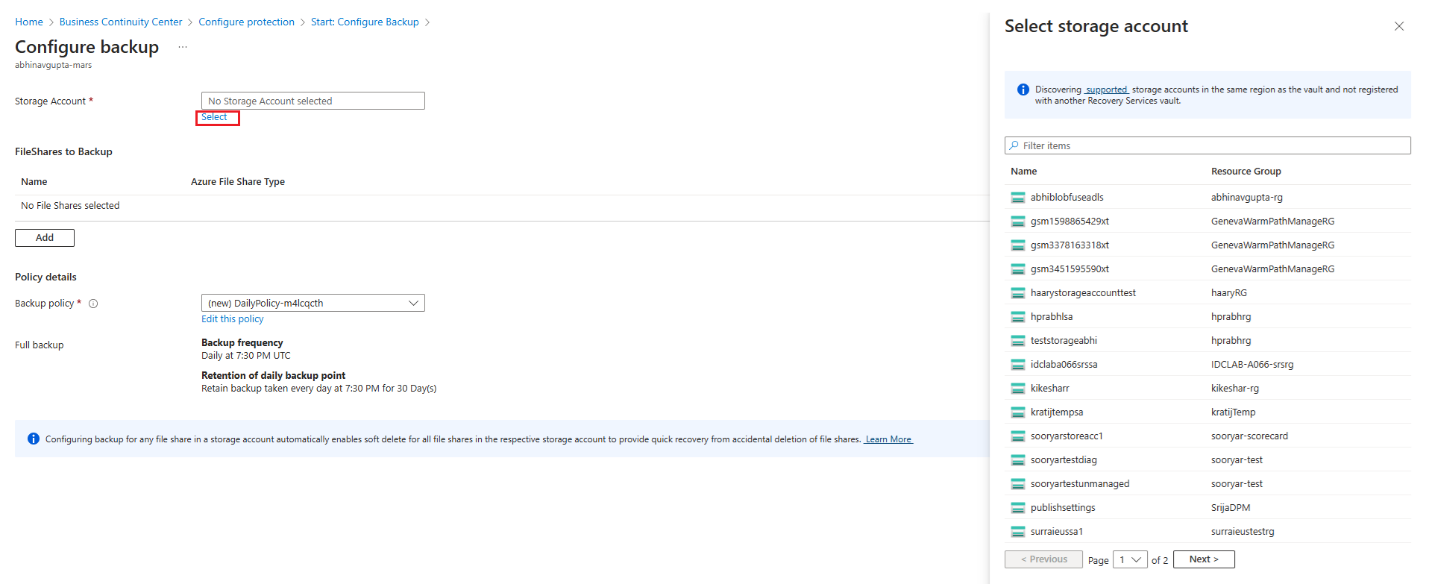
  3. On the Configure backup pane, click Select to select the storage account that contains the file shares to be backed up.

    The Select storage account blade opens on the right, which lists a set of discovered supported storage accounts. They're either associated with this vault or present in the same region as the vault, but not yet associated with any Recovery Services vault.

    Screenshot showing to select a storage account.

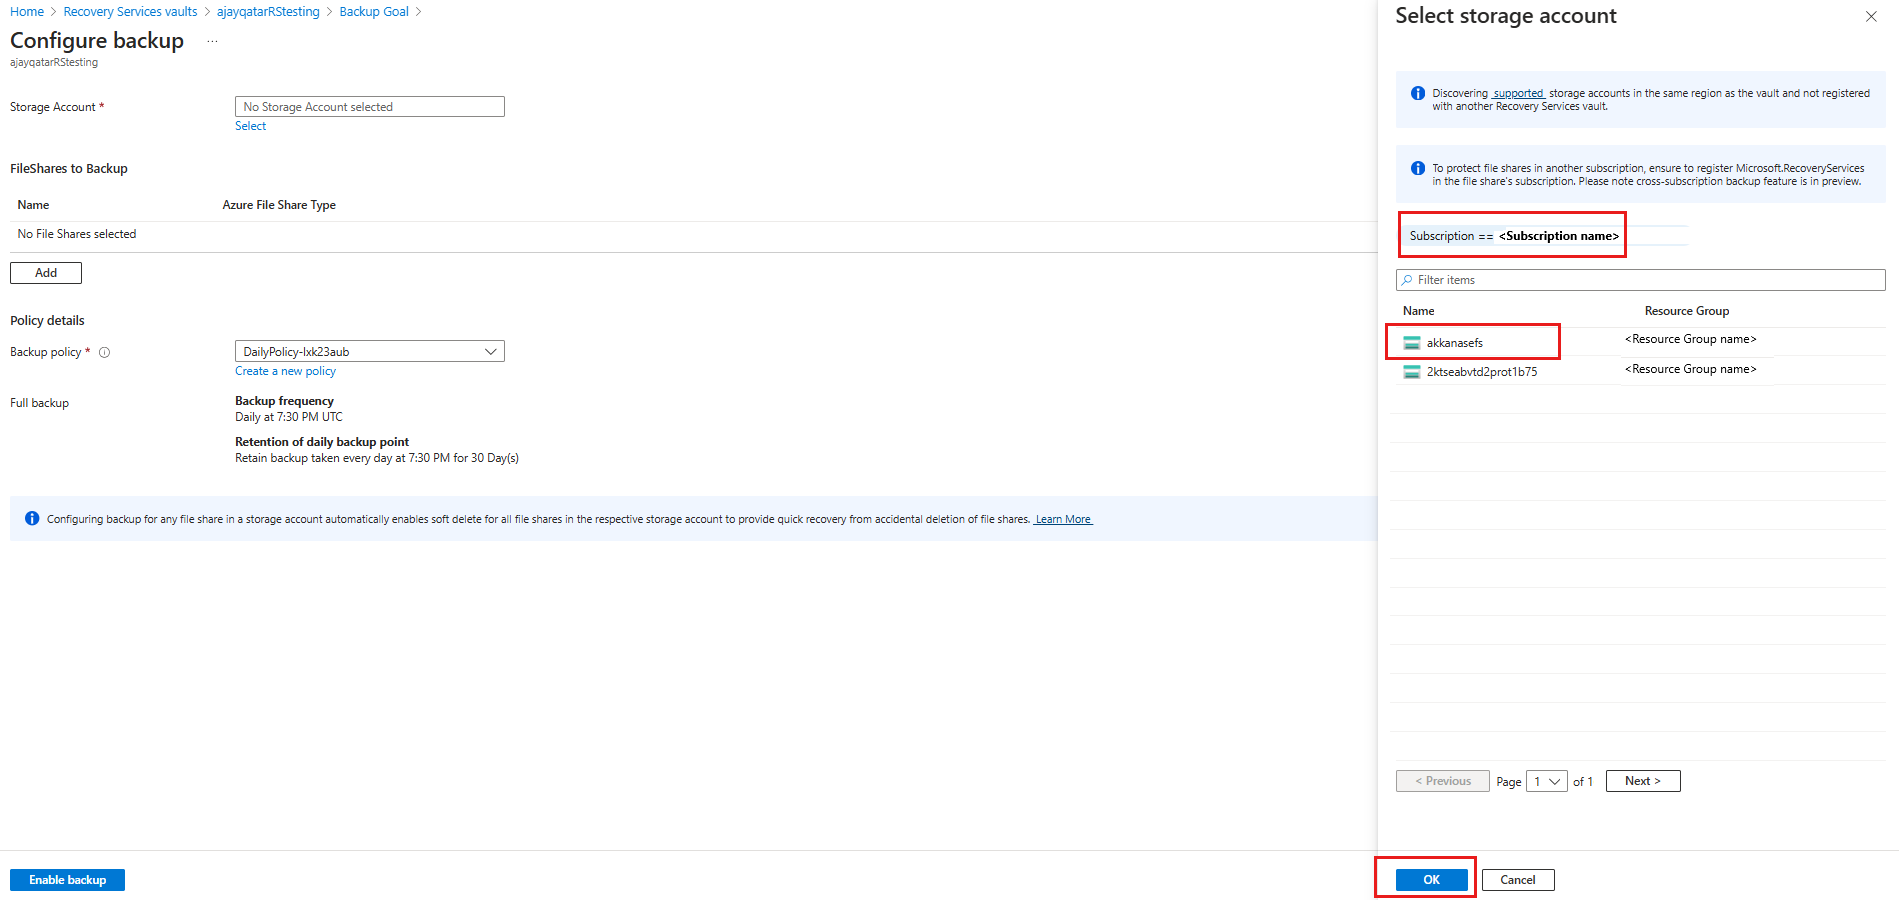
  4. On the Select storage account blade, by default it list the storage accounts from the current subscription. Select an account, and select OK.

    If you want to configure the backup operation with a storage account in a different subscription (Cross Subscription Backup - preview), choose the other subscription from the Subscription filter. The storage accounts from the selected subscription appear.

    Screenshot showing to select one of the discovered storage accounts.

    Note

    If a storage account is present in a different region than the vault, it won't be present in the list of discovered storage accounts.

  5. On the Configure Backup blade, under the FileShares to Backup section, select the file shares type you want to back up, and then select Add.

    Screenshot showing to select the file shares to back up.

  6. The Select file shares context blade opens on the right. Azure searches the storage account for file shares that can be backed up. If you recently added your file shares and don't see them in the list, allow some time for the file shares to appear.

  7. On the Select file shares blade, from the file shares list, select one or more file shares you want to back up, and then select OK.

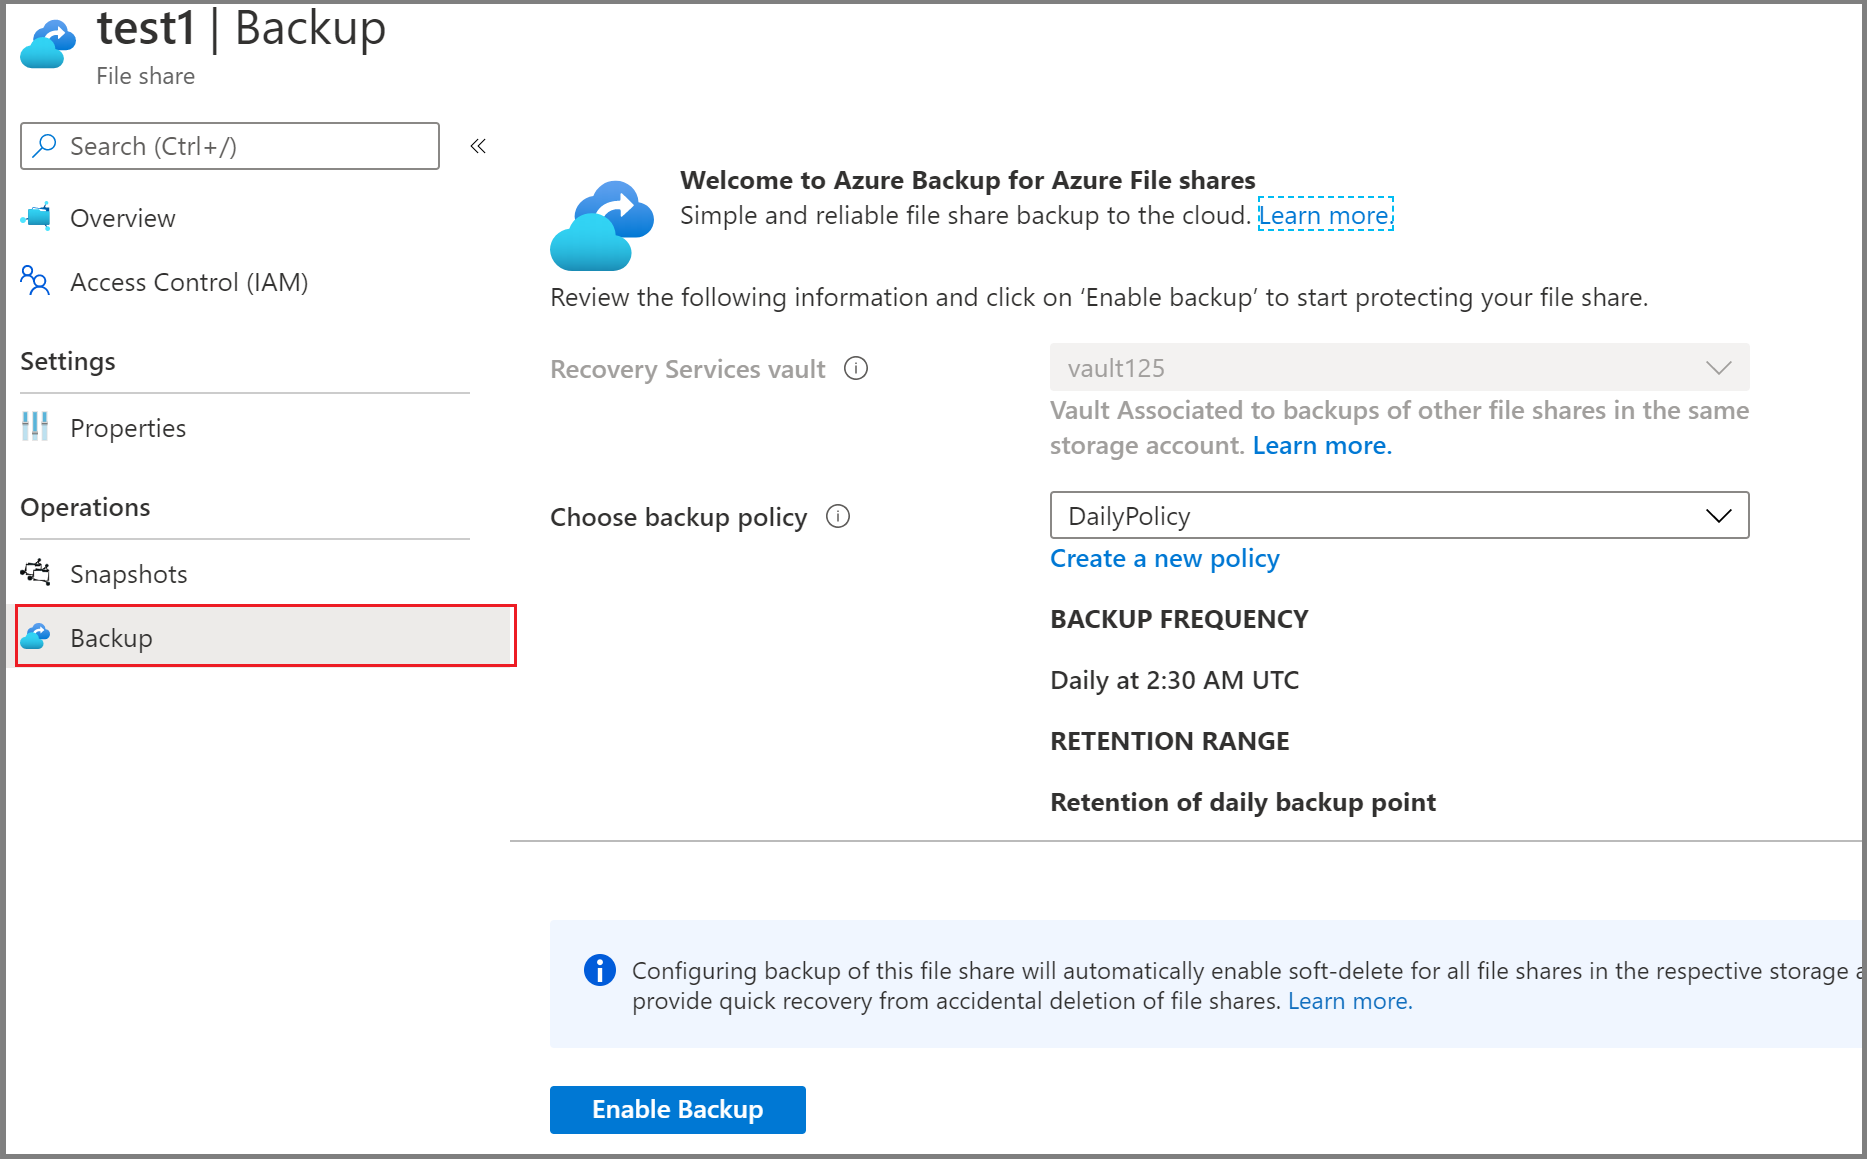
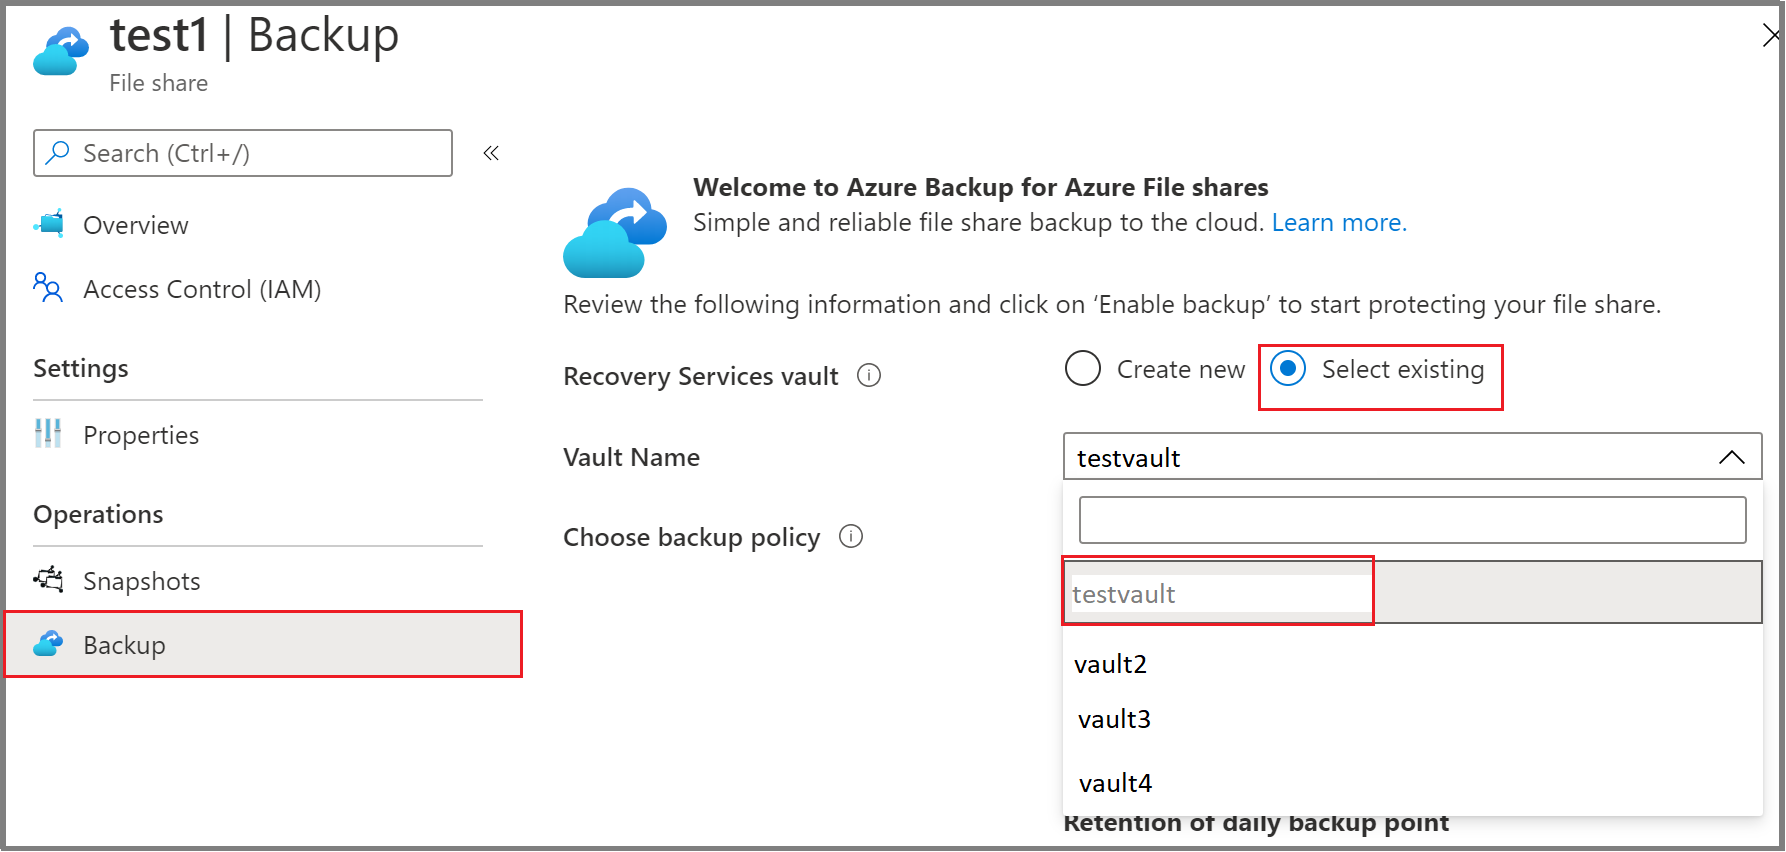
  8. On the Configure Backup blade, under Policy Details, choose an existing backup policy from the list for your file share protection or create a new policy.

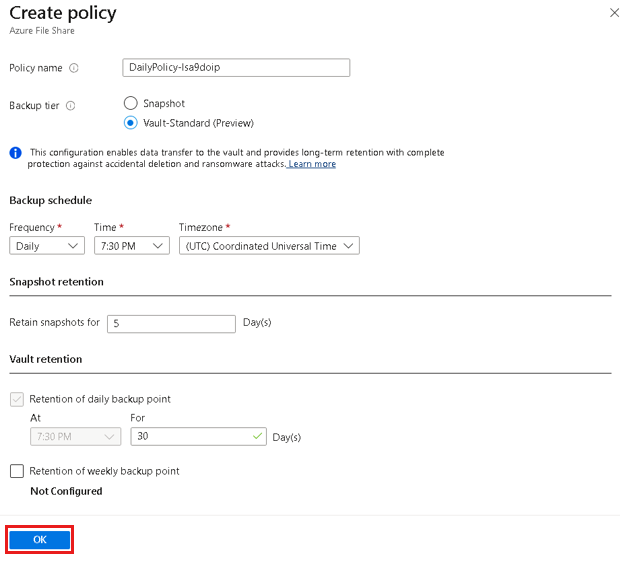
    To create a new backup policy, you can configure the following attributes in the backup policy:

    1. On the Configure Backup blade, select Create new under Policy Details.

    2. On the Create policy blade, provide the policy name.

    3. On Backup tier, select one of the following tiers:

      • Snapshot: Enables only snapshot-based backups that are stored locally and can only provide protection in case of accidental deletions.
      • Vault-Standard (Preview): Provides comprehensive data protection.
    4. Configure the backup schedule as per the requirement. You can configure up to six backups per day. The snapshots are taken as per the schedule defined in the policy. In case of vaulted backup, the data from the last snapshot of the day is transferred to the vault.

    5. Configure the Snapshot retention and Vault retention (preview) duration to determine the expiry date of the recovery points.

      Note

      The vault tier (preview) provides longer retention than the snapshot tier.

    6. Select OK to create the backup policy.

      Screenshot shows how to create a new backup policy for Azure File share.

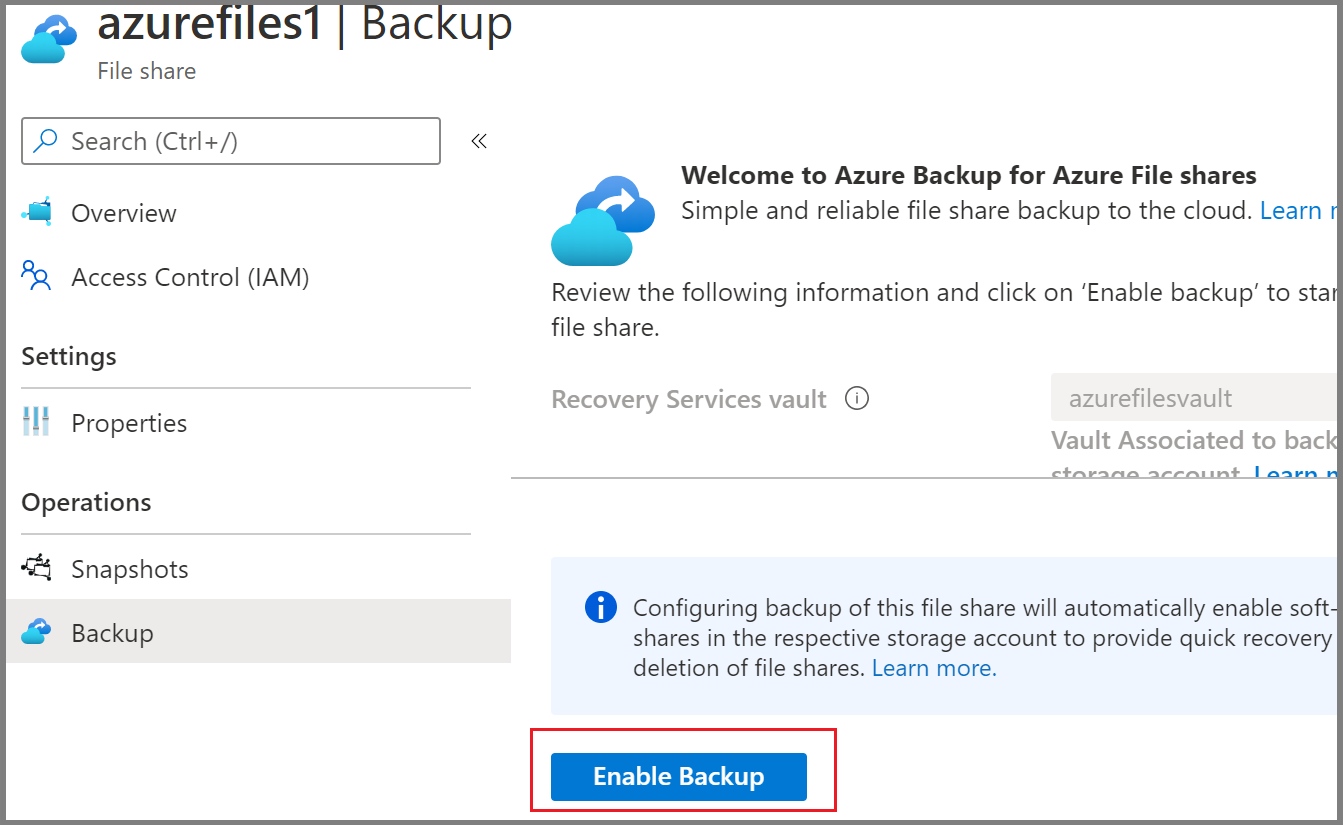
  9. On the Configure Backup blade, select Enable Backup to start protecting the file share.
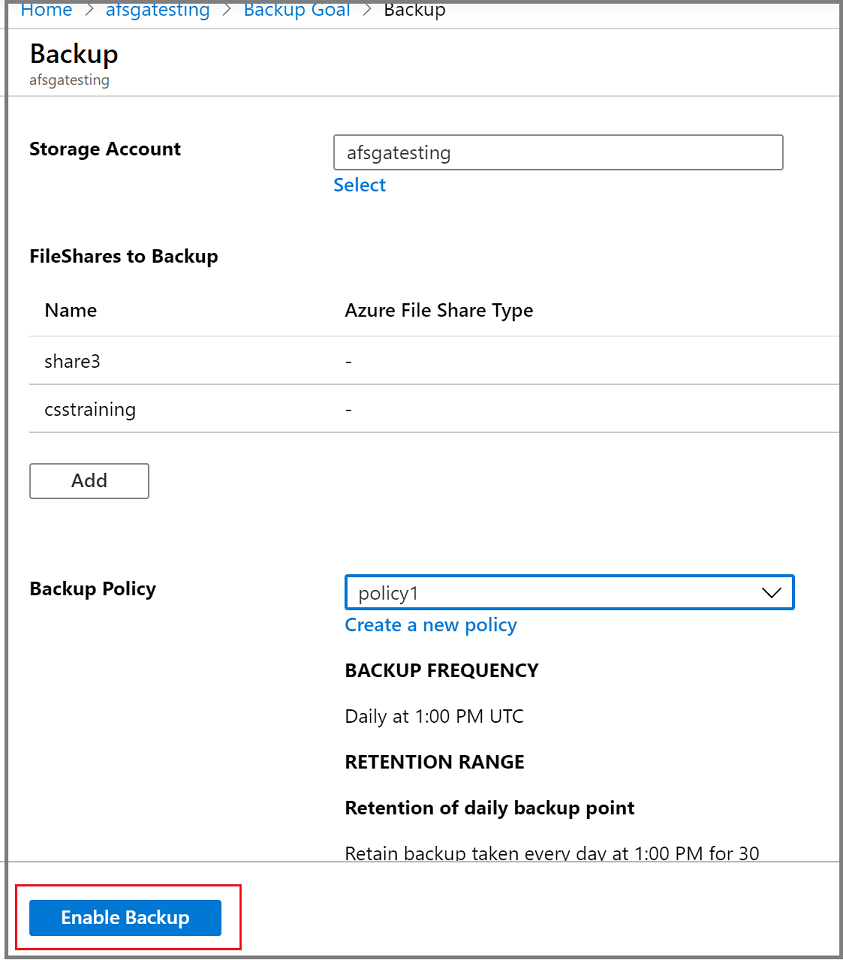
    Screenshot shows how to enable backup.

Run an on-demand backup job

Occasionally, you might want to generate a backup snapshot, or recovery point, outside of the times scheduled in the backup policy. A common reason to generate an on-demand backup is right after you've configured the backup policy. Based on the schedule in the backup policy, it might be hours or days until a snapshot is taken. To protect your data until the backup policy engages, initiate an on-demand backup. Creating an on-demand backup is often required before you make planned changes to your file shares.

Choose an entry point

To run an on-demand backup, follow these steps:

  1. Go to the Recovery Services vault and select Backup items from the menu.

  2. On the Backup items blade, select the Backup Management Type as Azure Storage (Azure Files).

  3. Select the item for which you want to run an on-demand backup job.

  4. In the Backup Item menu, select Backup now. Because this backup job is on demand, there's no retention policy associated with the recovery point.

    Screenshot showing to select Backup now.

  5. The Backup Now blade opens. Specify the last day you want to retain the recovery point. You can have a maximum retention of 10 years for an on-demand backup.

    Screenshot showing to choose retention date.

  6. Select OK to confirm the on-demand backup job that runs.

  7. Monitor the portal notifications to keep track of backup job run completion.

    To monitor the job progress in the Recovery Services vault dashboard, go to Recovery Services vault > Backup Jobs > In progress.

Best practices

  • Don't delete snapshots created by Azure Backup. Deleting snapshots can result in loss of recovery points and/or restore failures.

  • Don't remove the lock taken on the storage account by Azure Backup. Deletion of the lock can make your storage account prone to accidental deletion. Learn more about protect your resources with lock.

Next steps

Learn how to: