Quickstart: Create Bicep files with Visual Studio Code
This quickstart guides you how to use Visual Studio Code to create a Bicep file. You create a storage account and a virtual network. You also learn how the Bicep extension provides type safety, syntax validation, and autocompletion to simplify development.
Visual Studio supports a similar authoring experience. See Quickstart: Create Bicep files with Visual Studio for more information.
Prerequisites
If you don't have an Azure subscription, create a free account before you start.
To set up your environment for Bicep development, see Install Bicep tools. After completing those steps, you have Visual Studio Code and the Bicep extension installed. You also have either the latest Azure CLI version or Azure PowerShell module.
Add resource snippet
Visual Studio Code with the Bicep extension provides predefined snippets to simplify development. In this quickstart, you add a snippet that creates a virtual network.
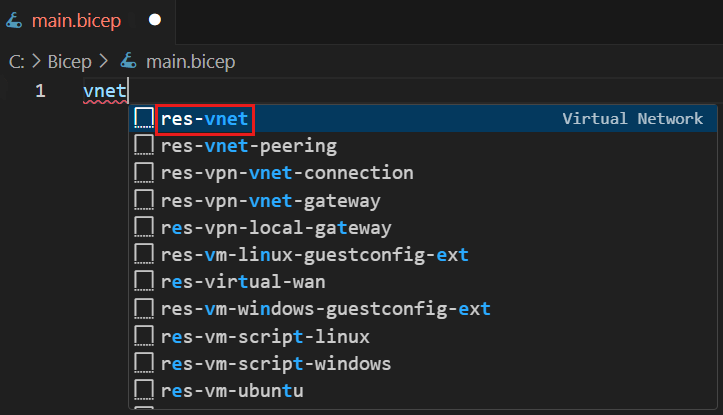
Launch Visual Studio Code, and create a new file named main.bicep. In main.bicep, type vnet, select res-vnet from the list, and then press TAB or ENTER.
Tip
If you don't see those IntelliSense options in Visual Studio Code, make sure you've installed the Bicep extension as specified in Prerequisites. If you have installed the extension, give the Bicep language service some time to start after opening your Bicep file. It usually starts quickly, and you won't have IntelliSense options until it starts. A notification in the lower right corner indicates that the service is starting. When that notification disappears, the service is running.
Your Bicep file now contains the following code:
resource virtualNetwork 'Microsoft.Network/virtualNetworks@2019-11-01' = {
  name: 'name'
  location: location
  properties: {
    addressSpace: {
      addressPrefixes: [
        '10.0.0.0/16'
      ]
    }
    subnets: [
      {
        name: 'Subnet-1'
        properties: {
          addressPrefix: '10.0.0.0/24'
        }
      }
      {
        name: 'Subnet-2'
        properties: {
          addressPrefix: '10.0.1.0/24'
        }
      }
    ]
  }
}
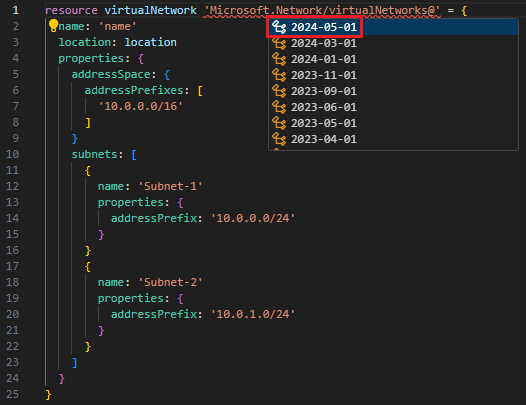
Within this snippet, you find all the necessary values for defining a virtual network. You might notice two curly underlines. A yellow one denotes a warning related to an outdated API version, while a red curly underline signals an error caused by a missing parameter definition. The Bicep linter checks Bicep files for syntax errors and best practice violations. Hover your cursor over @2019-11-01, a popup pane shows Use more recent API version for 'Microsoft.Network/virtualNetworks'. Select Quick fix from the popup pane, and then select Replace with 2024-05-01 to update the API version.
Alternatively, remove @2019-11-01, and replace it with @. Select the latest API version.
You'll fix the missing parameter definition error in the next section.
You can also modify this code to meet your requirements. For example, since name isn't a clear name for the virtual network, you can change the name property to exampleVnet:
name: 'exampleVNet'
Add parameter
The code snippet you added in the last section misses a parameter definition, location, as indicated by the red curly underline. At the top of the file, add:
param location
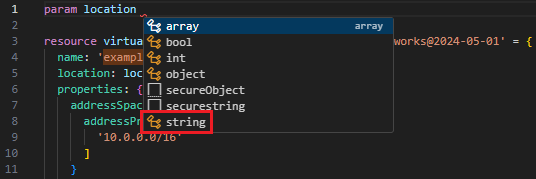
When you add a space after location, notice that IntelliSense offers the data types that are available for the parameter. Select string.
Give the parameter a default value:
param location string = resourceGroup().location
The preceding line assigns the location of the resource group to the virtual network resource. For more information about the function used in the default value, see resourceGroup().
At the top of the file, add another parameter for the storage account name (which you create later in the quickstart) with a default value:
param storageAccountName string = 'store${uniqueString(resourceGroup().id)}'
For more information, see Interpolation and uniqueString().
This parameter works fine, but storage accounts have limits on the length of the name. The name must have at least 3 and no more than 24 characters. You can specify these requirements by adding decorators to the parameter.
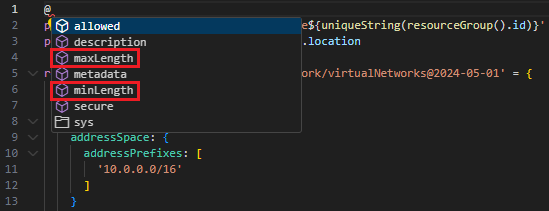
Add a line above the parameter, and type @. You see the available decorators. Notice that there are decorators for both minLength and maxLength.
Add both decorators, and specify the character limits (e.g., 3 and 24 below):
@minLength(3)
@maxLength(24)
param storageAccountName string = 'store${uniqueString(resourceGroup().id)}'
You can also add a description for the parameter. Include information that helps people deploying the Bicep file to understand which value to provide:
@minLength(3)
@maxLength(24)
@description('Provide a name for the storage account. Use only lowercase letters and numbers. The name must be unique across Azure.')
param storageAccountName string = 'store${uniqueString(resourceGroup().id)}'
Your parameters are ready to use.
Add resource
Instead of using a snippet to define the storage account, you use IntelliSense to set the values. IntelliSense makes this step easier than having to manually type the values.
To define a resource, use the resource keyword. Below your virtual network, type resource storageAccount:
resource storageAccount
storageAccount is a symbolic name for the resource you're deploying. You can use this name to reference the resource in other parts of your Bicep file.
When you add a space after the symbolic name, a list of resource types is displayed. Continue typing storageacc until you can select it from the available options.
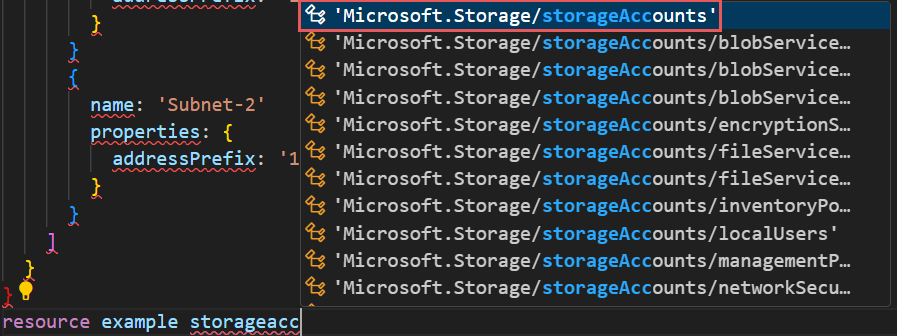
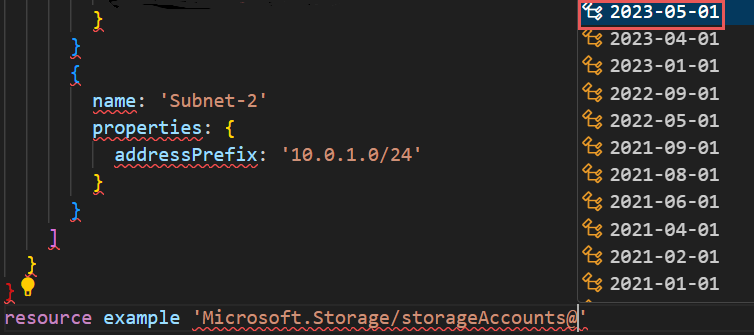
After selecting Microsoft.Storage/storageAccounts, you're presented with the available API versions. Select the latest version. For the following screenshot, it is 2023-05-01.
After the single quote for the resource type, add = and a space. You're presented with options for adding properties to the resource. Select required-properties.

This option adds all of the properties for the resource type that are required for deployment. After selecting this option, your storage account has the following properties:
resource storageAccount 'Microsoft.Storage/storageAccounts@2023-05-01' = {
  name:
  location:
  sku: {
    name:
  }
  kind:
}
You're almost done, and the next step is to provide values for those properties.
Again, IntelliSense helps you. Set name to storageAccountName, which is the parameter that contains a name for the storage account. For location, set it to location, which is a parameter that you created earlier. When adding sku.name and kind, IntelliSense presents the valid options.
To add optional properties alongside the required properties, place the cursor at the desired location, and press Ctrl+Space. The following screenshot shows how IntelliSense suggests available properties:
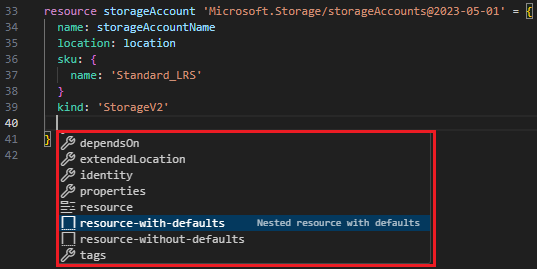
When finished, you have:
@minLength(3)
@maxLength(24)
@description('Provide a name for the storage account. Use only lowercase letters and numbers. The name must be unique across Azure.')
param storageAccountName string = 'store${uniqueString(resourceGroup().id)}'
param location string = resourceGroup().location

resource virtualNetwork 'Microsoft.Network/virtualNetworks@2024-05-01' = {
  name: 'exampleVNet'
  location: location
  properties: {
    addressSpace: {
      addressPrefixes: [
        '10.0.0.0/16'
      ]
    }
    subnets: [
      {
        name: 'Subnet-1'
        properties: {
          addressPrefix: '10.0.0.0/24'
        }
      }
      {
        name: 'Subnet-2'
        properties: {
          addressPrefix: '10.0.1.0/24'
        }
      }
    ]
  }
}

resource storageAccount 'Microsoft.Storage/storageAccounts@2023-05-01' = {
  name: storageAccountName
  location: location
  sku: {
    name: 'Standard_LRS'
  }
  kind: 'StorageV2'
}
For more information about the Bicep syntax, see Bicep file structure and syntax.
Visualize resources
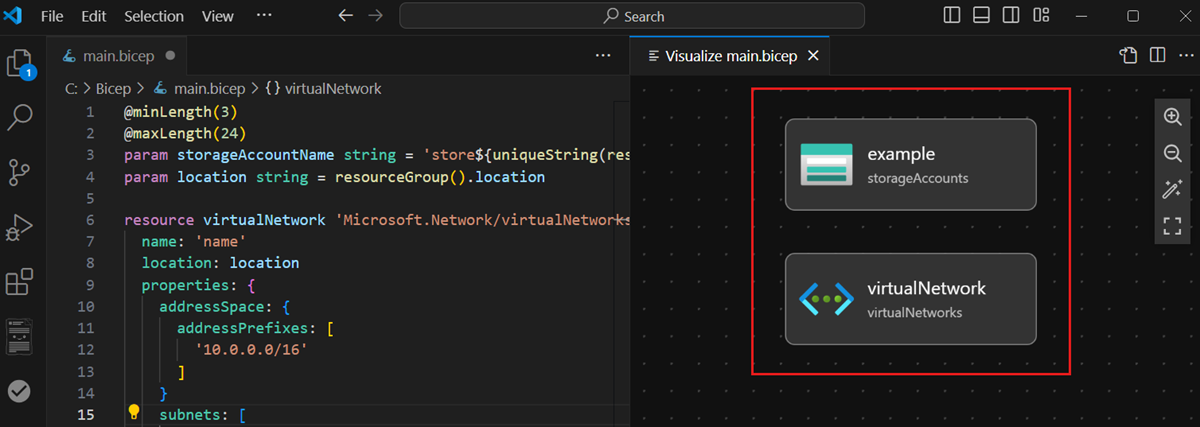
Bicep Visualizer shows you a graphic representation of the resources in your file.
Select the Bicep Visualizer button in the upper-right corner to open the tool:
![]()
This visualizer shows the resources defined in the Bicep file and the connectors between their dependencies. The two resources defined in this quickstart don't have a dependent relationship, so there isn't a connector between them:
Deploy the Bicep file
Right-click the Bicep file inside the Visual Studio Code, and then select Deploy Bicep file.
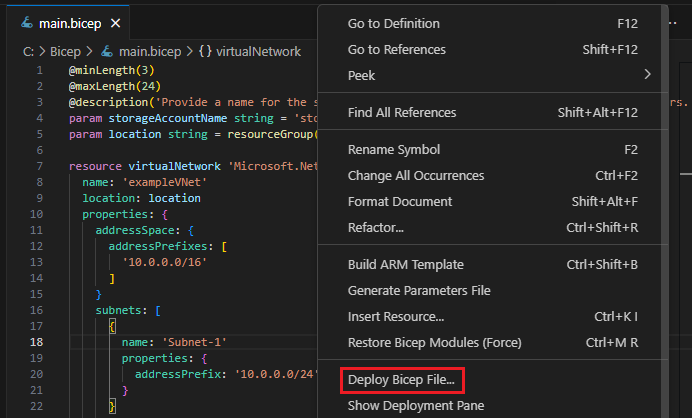
In the Please enter name for deployment text box, type deployStorageAndVNet, and then press ENTER.

From the Select Resource Group listbox on the top, select Create new Resource Group.
Enter exampleRG as the resource group name, and then press ENTER.
Select a location for the resource group, select Central US or a location of your choice, and then press ENTER.
From Select a parameters file, select None.
It takes a few moments to create the resources. For more information, see Deploy Bicep files with Visual Studio Code.
You can also use the Azure CLI or Azure PowerShell to deploy the Bicep file:
az group create --name exampleRG --location eastus

az deployment group create --resource-group exampleRG --template-file main.bicep --parameters storageAccountName=uniquename
When the deployment finishes, you should see a message describing that the deployment succeeded.
Clean up resources
When the Azure resources are no longer needed, use the Azure CLI or Azure PowerShell module to delete the quickstart resource group.
az group delete --name exampleRG
Next steps
Explore Learn modules for Bicep.