Managing capabilities
In Windows Server 2019, System Insights exposes a variety of settings that can be configured for each capability, and these settings can be tuned to address the specific needs of your deployment. This topic describes how to manage the various settings for each capability through Windows Admin Center or PowerShell, providing basic PowerShell examples and Windows Admin Center screenshots to demonstrate how to adjust these settings.
Tip
You can also use these short videos to help you get started and confidently manage System Insights: Getting started with System Insights in 10 minutes
Though this section provides PowerShell examples, you can use the System Insights PowerShell documentation to see all of the cmdlets, parameters, and parameter sets within System Insights.
Viewing capabilities
To get started, you can list all of the available capabilities using the Get-InsightsCapability cmdlet:
Get-InsightsCapability
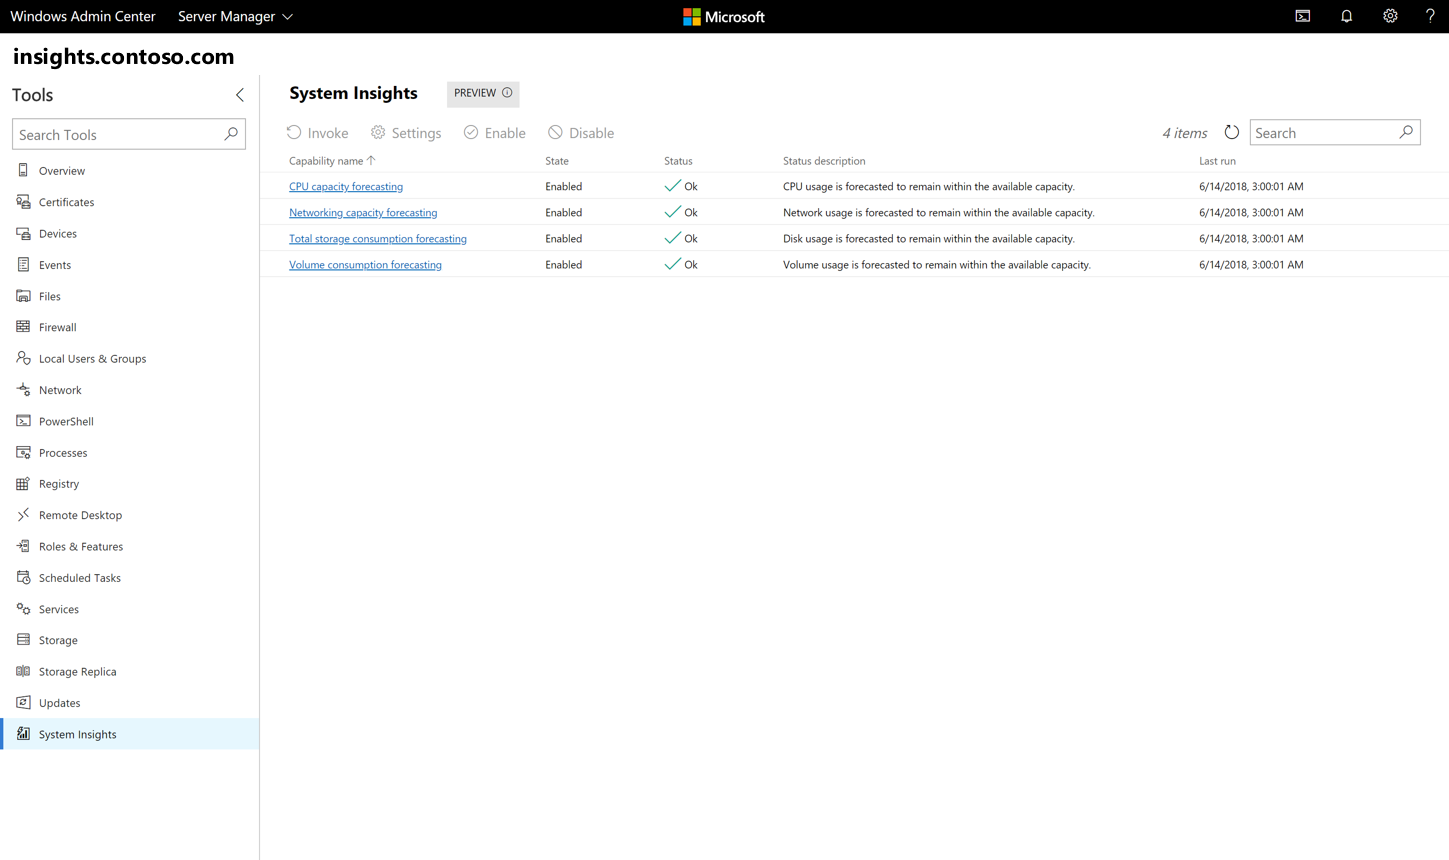
These capabilities are also visible in System Insights extension:

Enabling and disabling a capability
Each capability can be enabled or disabled. Disabling a capability prevents that capability from being invoked, and for non-default capabilities, disabling a capability stops all data collection for that capability. By default, all capabilities are enabled, and you can check the state of a capability using the Get-InsightsCapability cmdlet.
To enable or disable a capability, use the Enable-InsightsCapability and the Disable-InsightsCapability cmdlets:
Enable-InsightsCapability -Name "CPU capacity forecasting"
Disable-InsightsCapability -Name "Networking capacity forecasting"
These settings can also be toggled by selected a capability in Windows Admin Center clicking the Enable or Disable buttons.
Invoking a capability
Invoking a capability immediately runs the capability to retrieve a prediction, and administrators can invoke a capability any time by clicking the Invoke button in Windows Admin Center or by using the Invoke-InsightsCapability cmdlet:
Invoke-InsightsCapability -Name "CPU capacity forecasting"
Tip
To make sure invoking a capability doesn't conflict with critical operations on your machine, consider scheduling predictions during off-business hours.
Retrieving capability results
Once a capability has been invoked, the most recent results are visible using Get-InsightsCapability or Get-InsightsCapabilityResult. These cmdlets output the most recent Status and Status Description of each capability, which describe the result of each prediction. The Status and Status Description fields are further described in the understanding capabilities document.
Additionally, you can use the Get-InsightsCapabilityResult cmdlet to view the last 30 prediction results and to retrieve the data associated with the prediction:
# Specify the History parameter to see the last 30 prediction results.
Get-InsightsCapabilityResult -Name "CPU capacity forecasting" -History

# Use the Output field to locate and then show the results of "CPU capacity forecasting."
# Specify the encoding as UTF8, so that Get-Content correctly parses non-English characters.
$Output = Get-Content (Get-InsightsCapabilityResult -Name "CPU capacity forecasting").Output -Encoding UTF8 | ConvertFrom-Json
$Output.ForecastingResults
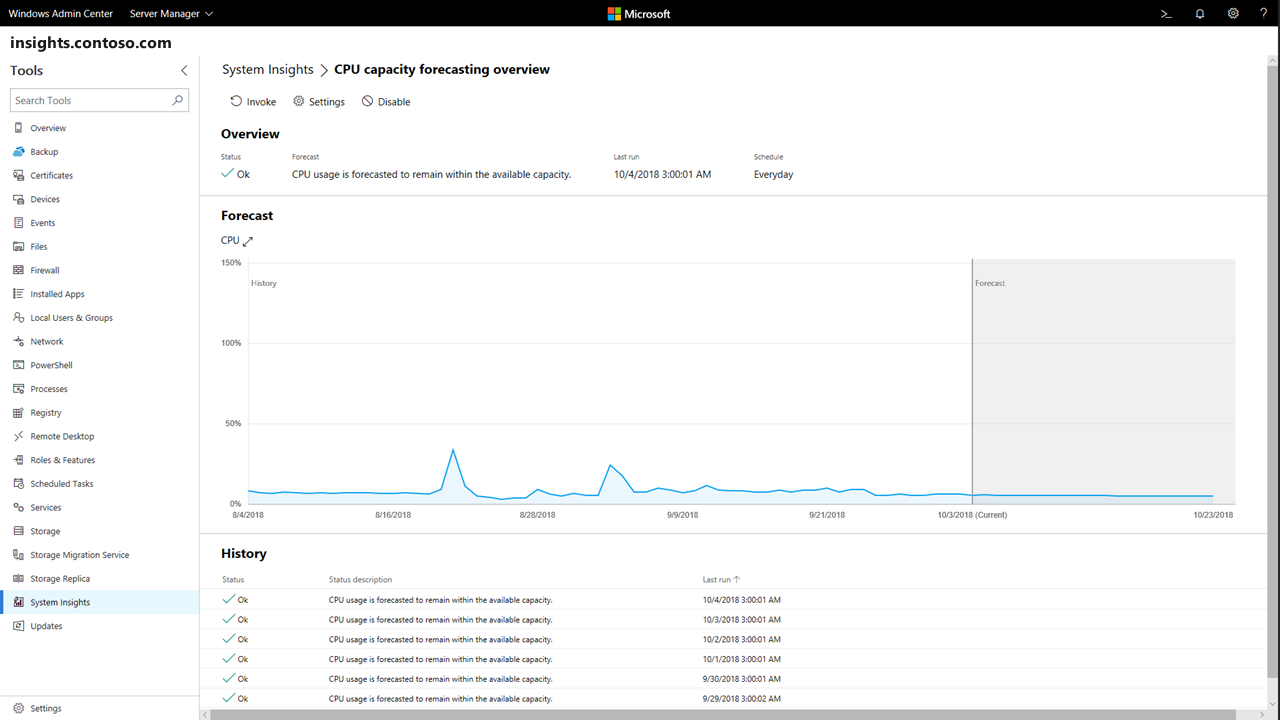
The System Insights extension automatically shows the prediction history and parses the results of the JSON result, giving you an intuitive, high-fidelity graph of each forecast:

Using the event log to retrieve capability results
System Insights logs an event each time a capability finishes a prediction. These events are visible in the Microsoft-Windows-System-Insights/Admin channel, and System Insights publishes a different event ID for each status:
| Prediction status | Event ID |
|---|---|
| Ok | 151 |
| Warning | 148 |
| Critical | 150 |
| Error | 149 |
| None | 132 |
Tip
Use Azure Monitor or System Center Operations Manager to aggregate these events and see prediction results across a group of machines.
Setting a capability schedule
In addition to on-demand predictions, you can configure periodic predictions for each capability so that the specified capability is automatically invoked on a predefined schedule. Use the Get-InsightsCapabilitySchedule cmdlet to see capability schedules:
Tip
Use the pipeline operator in PowerShell to see information for all capabilities returned by the Get-InsightsCapability cmdlet.
Get-InsightsCapability | Get-InsightsCapabilitySchedule
Periodic predictions are enabled by default though they can be disabled at any time using the Enable-InsightsCapabilitySchedule and Disable-InsightsCapabilitySchedule cmdlets:
Enable-InsightsCapabilitySchedule -Name "Total storage consumption forecasting"
Disable-InsightsCapabilitySchedule -Name "Volume consumption forecasting"
Each default capability is scheduled to run every day at 3am. You can, however, create custom schedules for each capability, and System Insights supports a variety of schedule types, which can be configured using the Set-InsightsCapabilitySchedule cmdlet:
Set-InsightsCapabilitySchedule -Name "CPU capacity forecasting" -Daily -DaysInterval 2 -At 4:00PM
Set-InsightsCapabilitySchedule -Name "Networking capacity forecasting" -Daily -DaysOfWeek Saturday, Sunday -At 2:30AM
Set-InsightsCapabilitySchedule -Name "Total storage consumption forecasting" -Hourly -HoursInterval 2 -DaysOfWeek Monday, Wednesday, Friday
Set-InsightsCapabilitySchedule -Name "Volume consumption forecasting" -Minute -MinutesInterval 30
Note
Because the default capabilities analyze daily data, it's recommended to use daily schedules for these capabilities. Learn more about the default capabilities here.
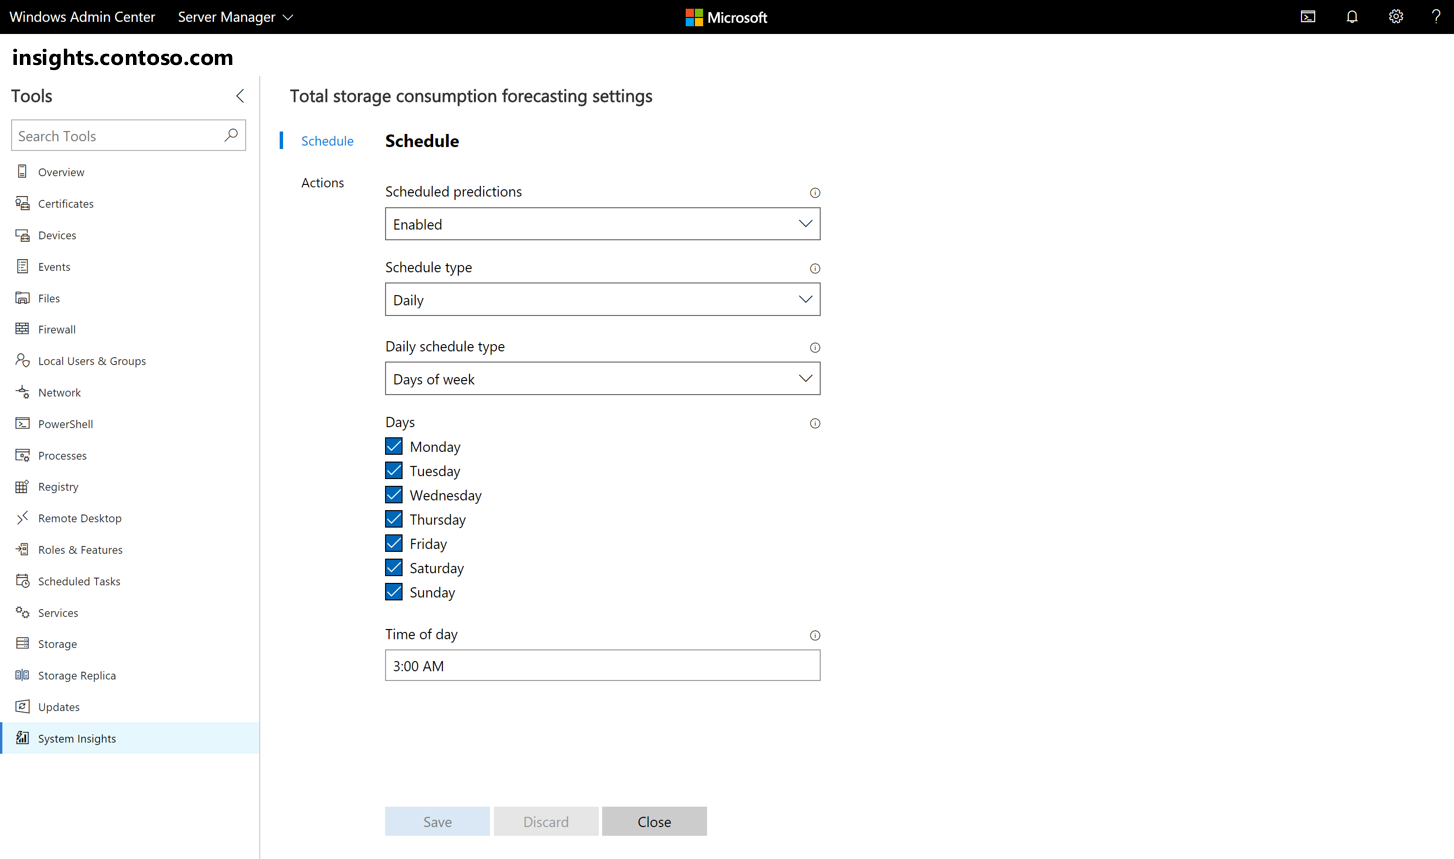
You can also use Windows Admin Center to view and set schedules for each capability by clicking Settings. The current schedule is shown on the Schedule tab, and you can use the GUI tools to create a new schedule:

Creating remediation actions
System Insights enables you to kick off custom remediation scripts based on the result of a capability. For each capability, you can configure a custom PowerShell script for each prediction status, allowing administrators to take corrective action automatically, rather than requiring manual intervention.
Sample remediation actions include running disk cleanup, extending a volume, running deduplication, live migrating VMs, and setting up Azure File Sync.
You can see the actions for each capability using the Get-InsightsCapabilityAction cmdlet:
Get-InsightsCapability | Get-InsightsCapabilityAction
You can create new actions or delete existing actions using the Set-InsightsCapabilityAction and Remove-InsightsCapabilityAction cmdlets. Each action is run using credentials that are specified in the ActionCredential parameter.
Note
In the initial System Insights release, you must specify remediation scripts outside of user directories. This will be fixed in an upcoming release.
$Cred = Get-Credential
Set-InsightsCapabilityAction -Name "CPU capacity forecasting" -Type Warning -Action "C:\Users\Public\WarningScript.ps1" -ActionCredential $Cred
Set-InsightsCapabilityAction -Name "CPU capacity forecasting" -Type Critical -Action "C:\Users\Public\CriticalScript.ps1" -ActionCredential $Cred

Remove-InsightsCapabilityAction -Name "CPU capacity forecasting" -Type Warning
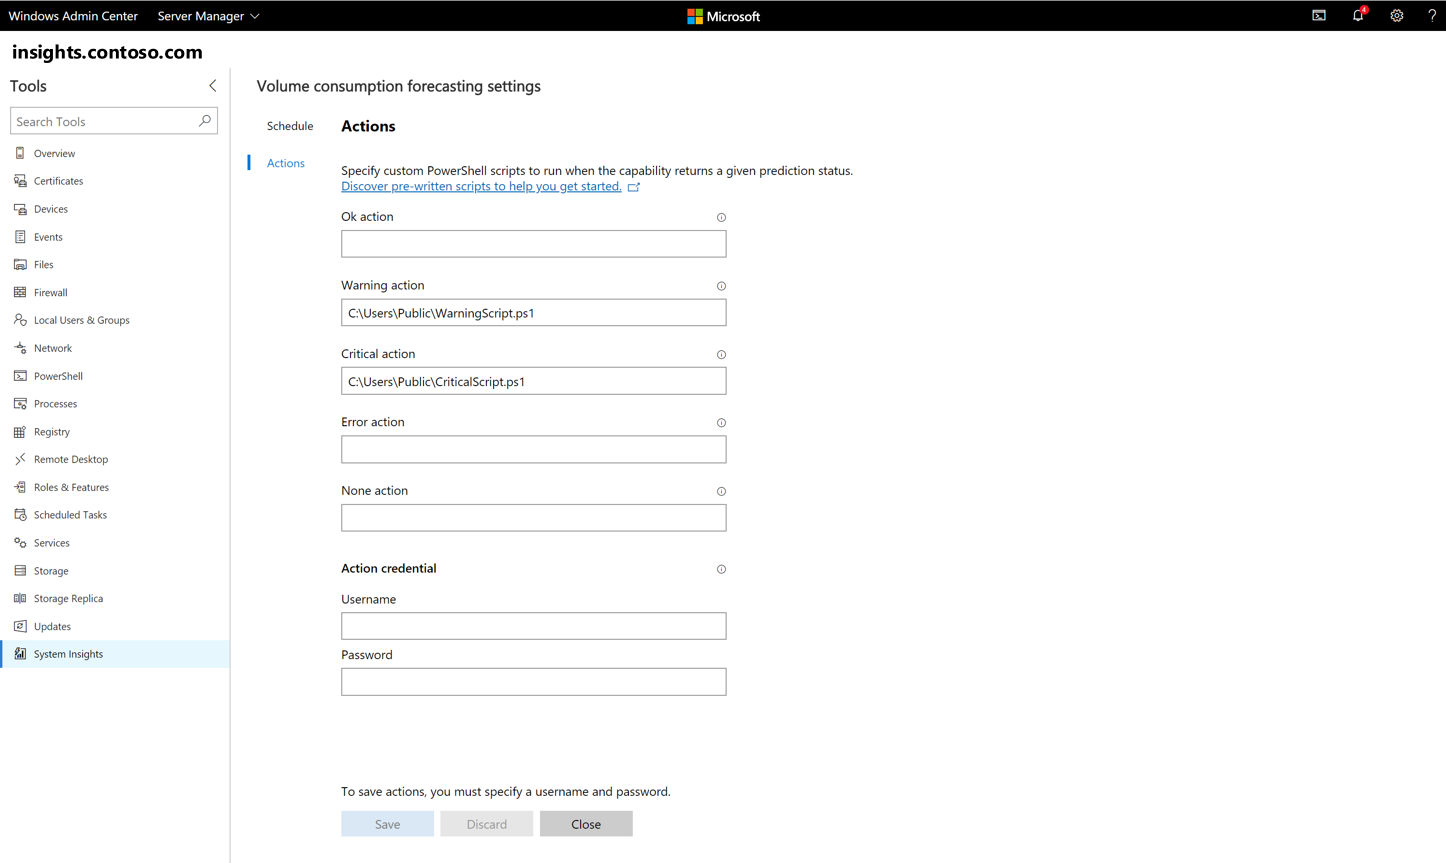
You can also use Windows Admin Center to set remediation actions by using the Actions tab within the Settings page:

Additional References
To learn more about System Insights, use the following resources: