Azure region access request process
Certain Azure regions require customers to go through a request process in order to gain access. To request access to these regions, you may open a support request and work with our Support team to discuss or enable access.
Original product version: Azure
Original KB number: 4339658
Step 1: Create a new support request
The process to request access is relatively straight forward. You can initiate the process directly within the Azure portal, follow these steps:
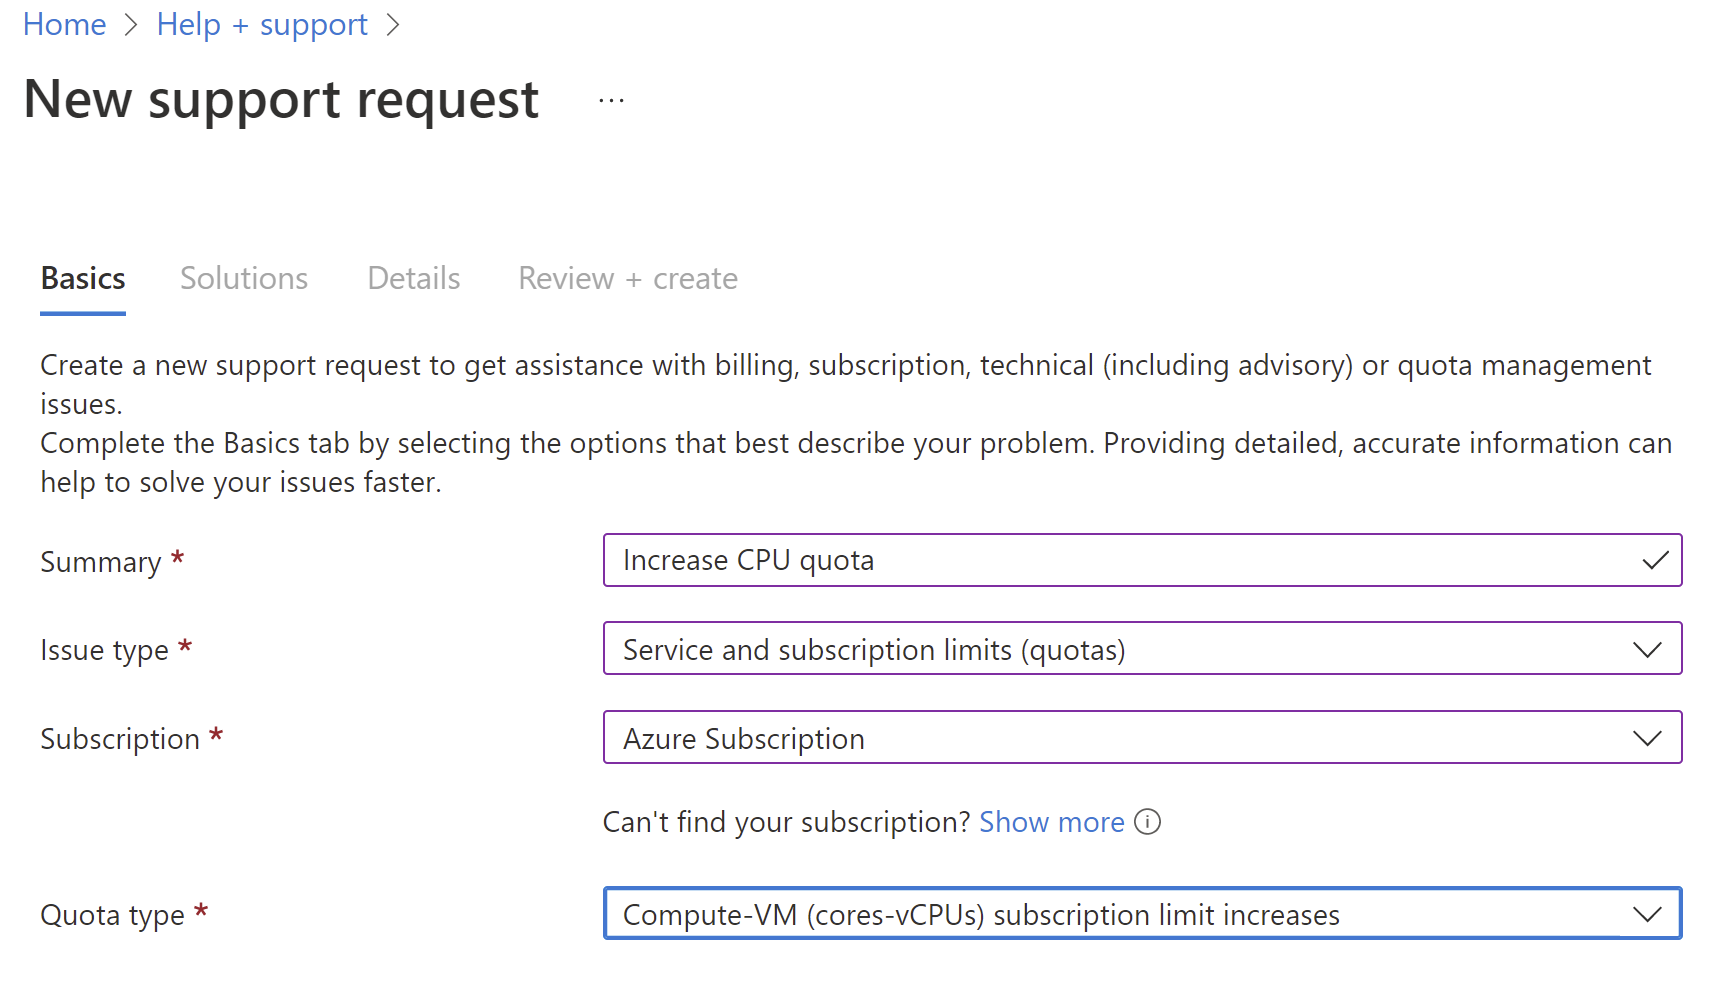
Log into the Azure Portal and navigate to Help + support, then select Create a new support request.
In the New support request page, complete the following:
- In Issue Type, select Service and subscription Limit (quotas).
- In Subscription, select the relevant subscription for which you would like to request access.
- In Quota type, select Compute-VM (core-vCPUs) subscription limit increases.
- Select Next.

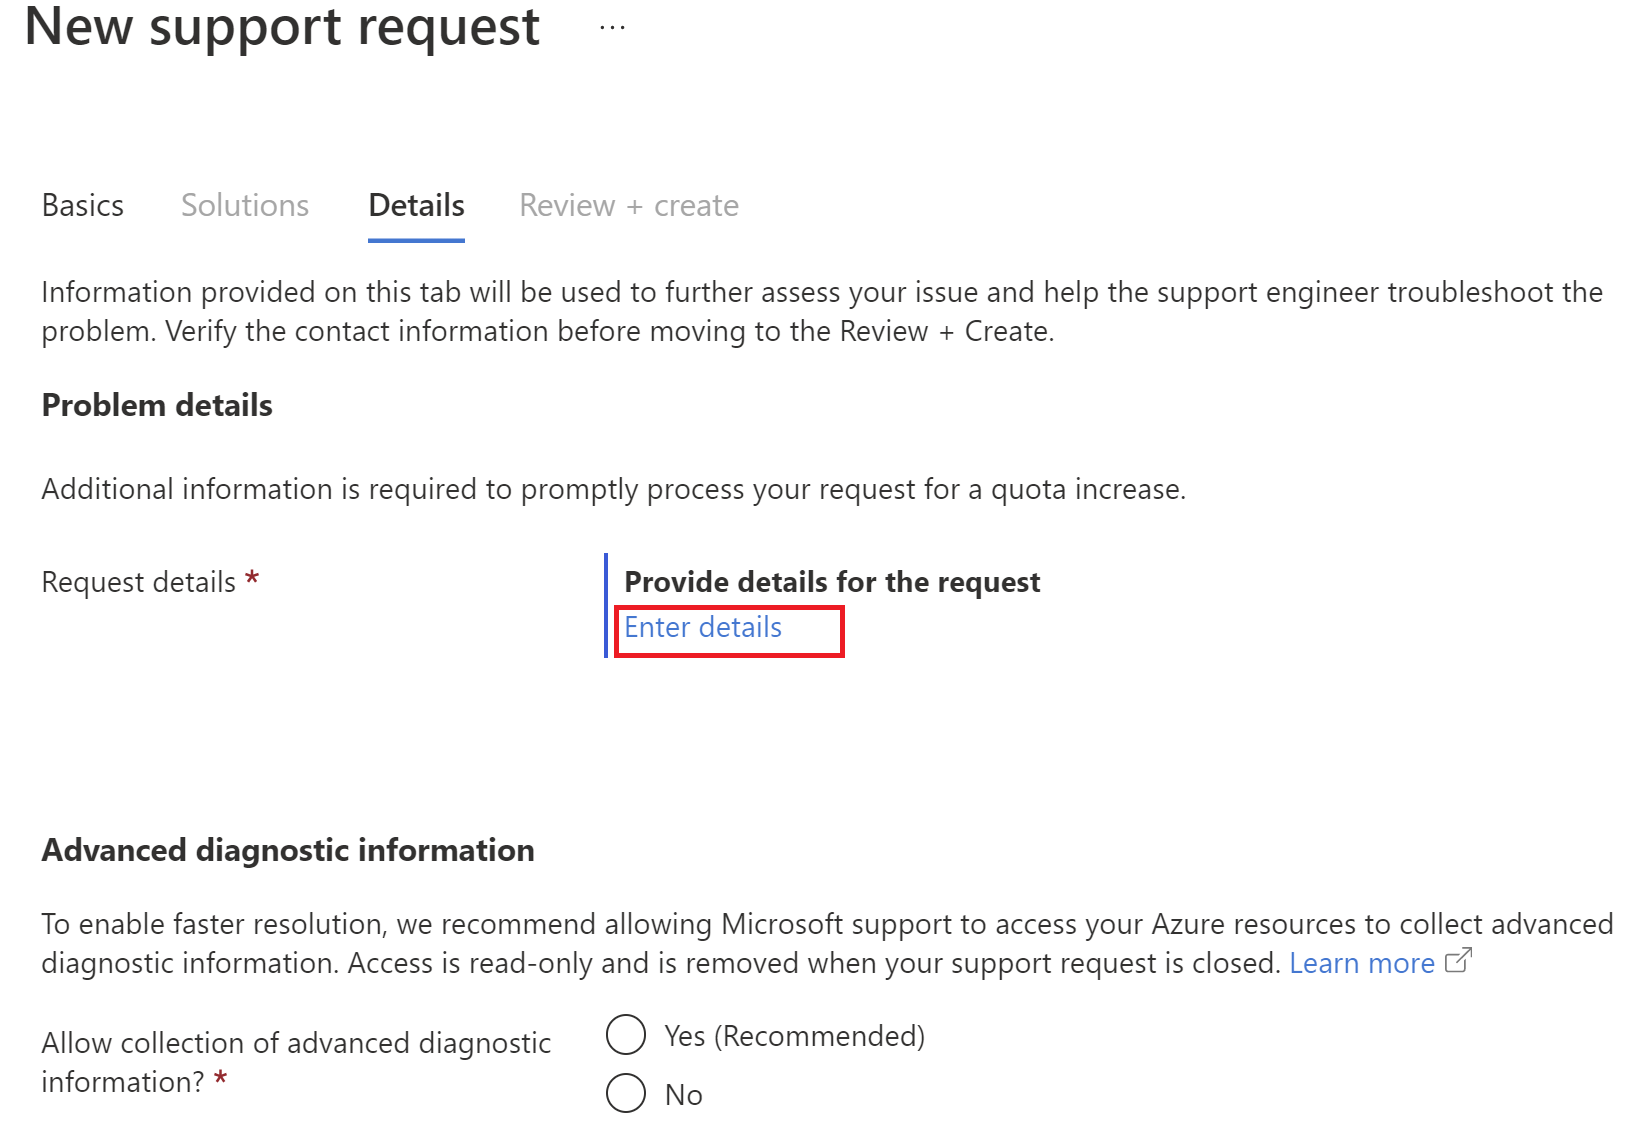
Step 2: Provide problem details
In the Problem details section, select Enter details.

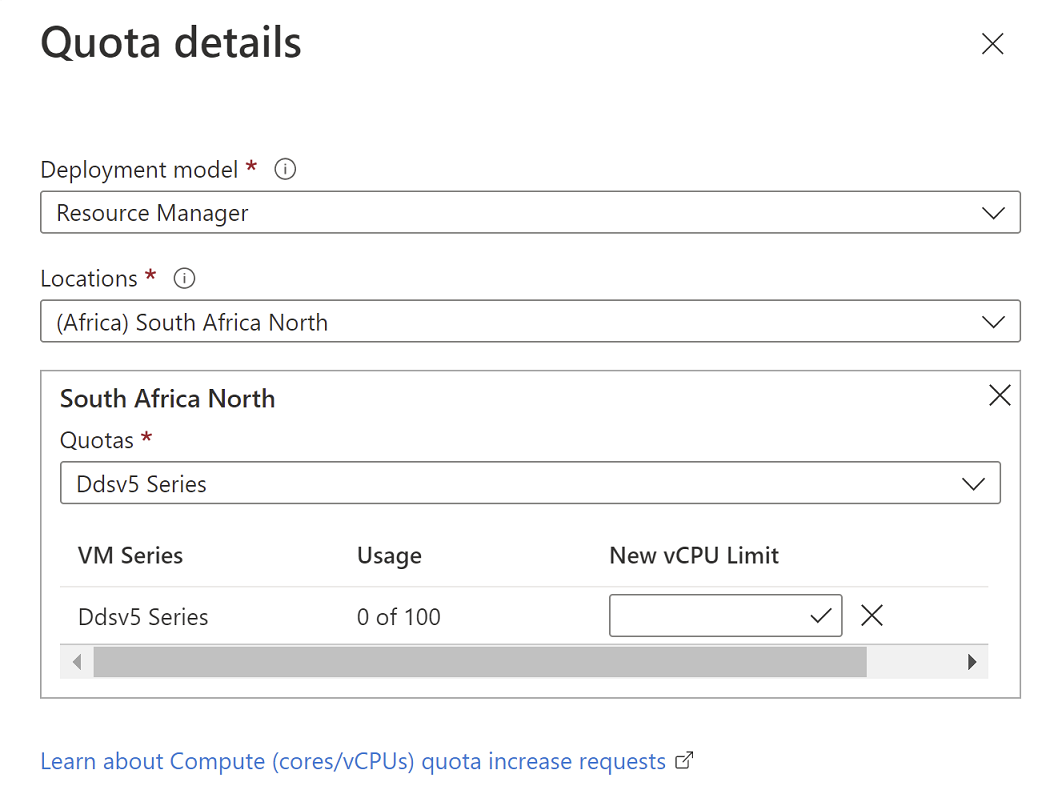
Select the deployment mode.
Select one or more regions that you want to request access. If the regions are not listed, go to the Reserved access regions section.
Select the VM series, and then specify new vCPU limit.

Select Save and continue.
Step 3: Enter your support method
- Select the severity based on your urgency of request.
- Fill in the details for the best way to contact you. We use this information to follow up with you if we need extra information, or need to learn more about your intended use of the Azure Region to which you are requesting access.
- Select Create to complete the process.
Request processing
Once you create the support request, the ticket follows our standard process, including a stop with the Azure Engineering team, where we validate the claims made in the request. This may include reaching out to the requestor for further details, so ensure that you add up-to-date contact details.
The support request will be routed back to you once complete, letting you know of the result. If successful, you will then see the Azure Region you have requested access to in your portal and can begin to consume resources just like any other Azure region.
Contact us for help
If you have questions or need help, create a support request, or ask Azure community support. You can also submit product feedback to Azure feedback community.
Reserved access regions
To view which regions are access restricted, see Azure paired regions.
To request the access for the reserved access regions, follow these steps:
In the New support request page, complete the following:
- In Issue Type, select Service and subscription Limit (quotas).
- In Subscription, select the relevant subscription for which you would like to request access. If you want to enable the region access for multiple subscriptions, you can include the additional subscription IDs in the Description section in the next page, thereby avoiding the need to fill out multiple support requests.
- In Quota type, select Other Requests.
- Select Next.
In the description section, input "Request access for the Azure <the region name> Regions for <your organization name>". Then specify your initial deployment model, your compute, storage, and SQL resource quota.
If you're unsure about what you'll need, we recommend that you add the following basic quota to the description section of the request, and include all the VM Types you are likely to need over time. This won't lock you into a specific quota. The quota can be adjusted as necessary over time.
Field Value Region to Enable <insert the region you are requesting access to> Deployment Model ARM Planned VM types For example, Dv3 Series Planned Compute usage in Cores 25 Planned Storage usage in TB 10 Planned SQL Database SKU For example, S0 Planned No. of Databases per DB SKU (20 DB limit per SKU) You can also include the following additional resource needs in your support request, or submit via a separate support request at another time:
Azure VM Reserved Instances
List the specific VM Types for which you plan to apply Reserved Instances, and your estimated usage in Cores.
Field Value Issue Type Reserved Instance Region enablement Subscription ID that needs to be enabled Region: Name of the region <insert the Azure region you are requesting access to> VM Series: (Example Dv2) Planned usage in Cores Note
Once access is confirmed for Reserved Instances, you can make the Reserved Instance purchase.
SQL Data warehouse
In the details section of the request, add the SQL Data warehouse requirements with the following:
Field Value Subscription GUID Only needed if submitting as a standalone request Region <insert the Azure region you are requesting access to> In your submission form, list all Virtual Machine SKUs, which you would like to request access for, along with your requested quota, thereby avoiding the need to fill out multiple support requests.
Likewise, if you want to request access for Storage, SQL, SQL-Managed Instance, HDI, and/or Batch, we recommend including these in your submission as well, along with your requested quota for these, thereby avoiding the need to fill out multiple support requests. For example: Once your Compute request has been approved, when logging in to your account, you will see that you have been granted access to associated products as well (like App Services, Functions, etc.).
If you have multiple Subscription IDs, which you would like to request for, we recommend including any additional Subscription IDs in the description section.
If you prefer to submit multiple requests, Microsoft Support will combine these requests on your behalf, for more streamlined communications.
Enter your contact details and create the support ticket.