Set retention for Log Analytics Workspace
This article helps you learn how to configure data retention for your Log Analytics workspace in the Log Analytics workspace.
You can set the default retention for a Log Analytics workspace in the Azure portal to any of the following number of days:
- 30
- 31
- 60
- 90
- 120
- 180
- 270
- 365
- 550
- 730
You can apply a different setting to specific tables by configuring the retention and archive settings at the table level. If the Log Analytics workspace is on the free tier, you must upgrade to the paid tier to be able to change the data retention period.
Configure retention for a Log Analytics workspace
Sign in to the Azure portal.
Enter log analytics in the search bar.
Under Services, select Log Analytics.
Select your Log Analytics workspace.
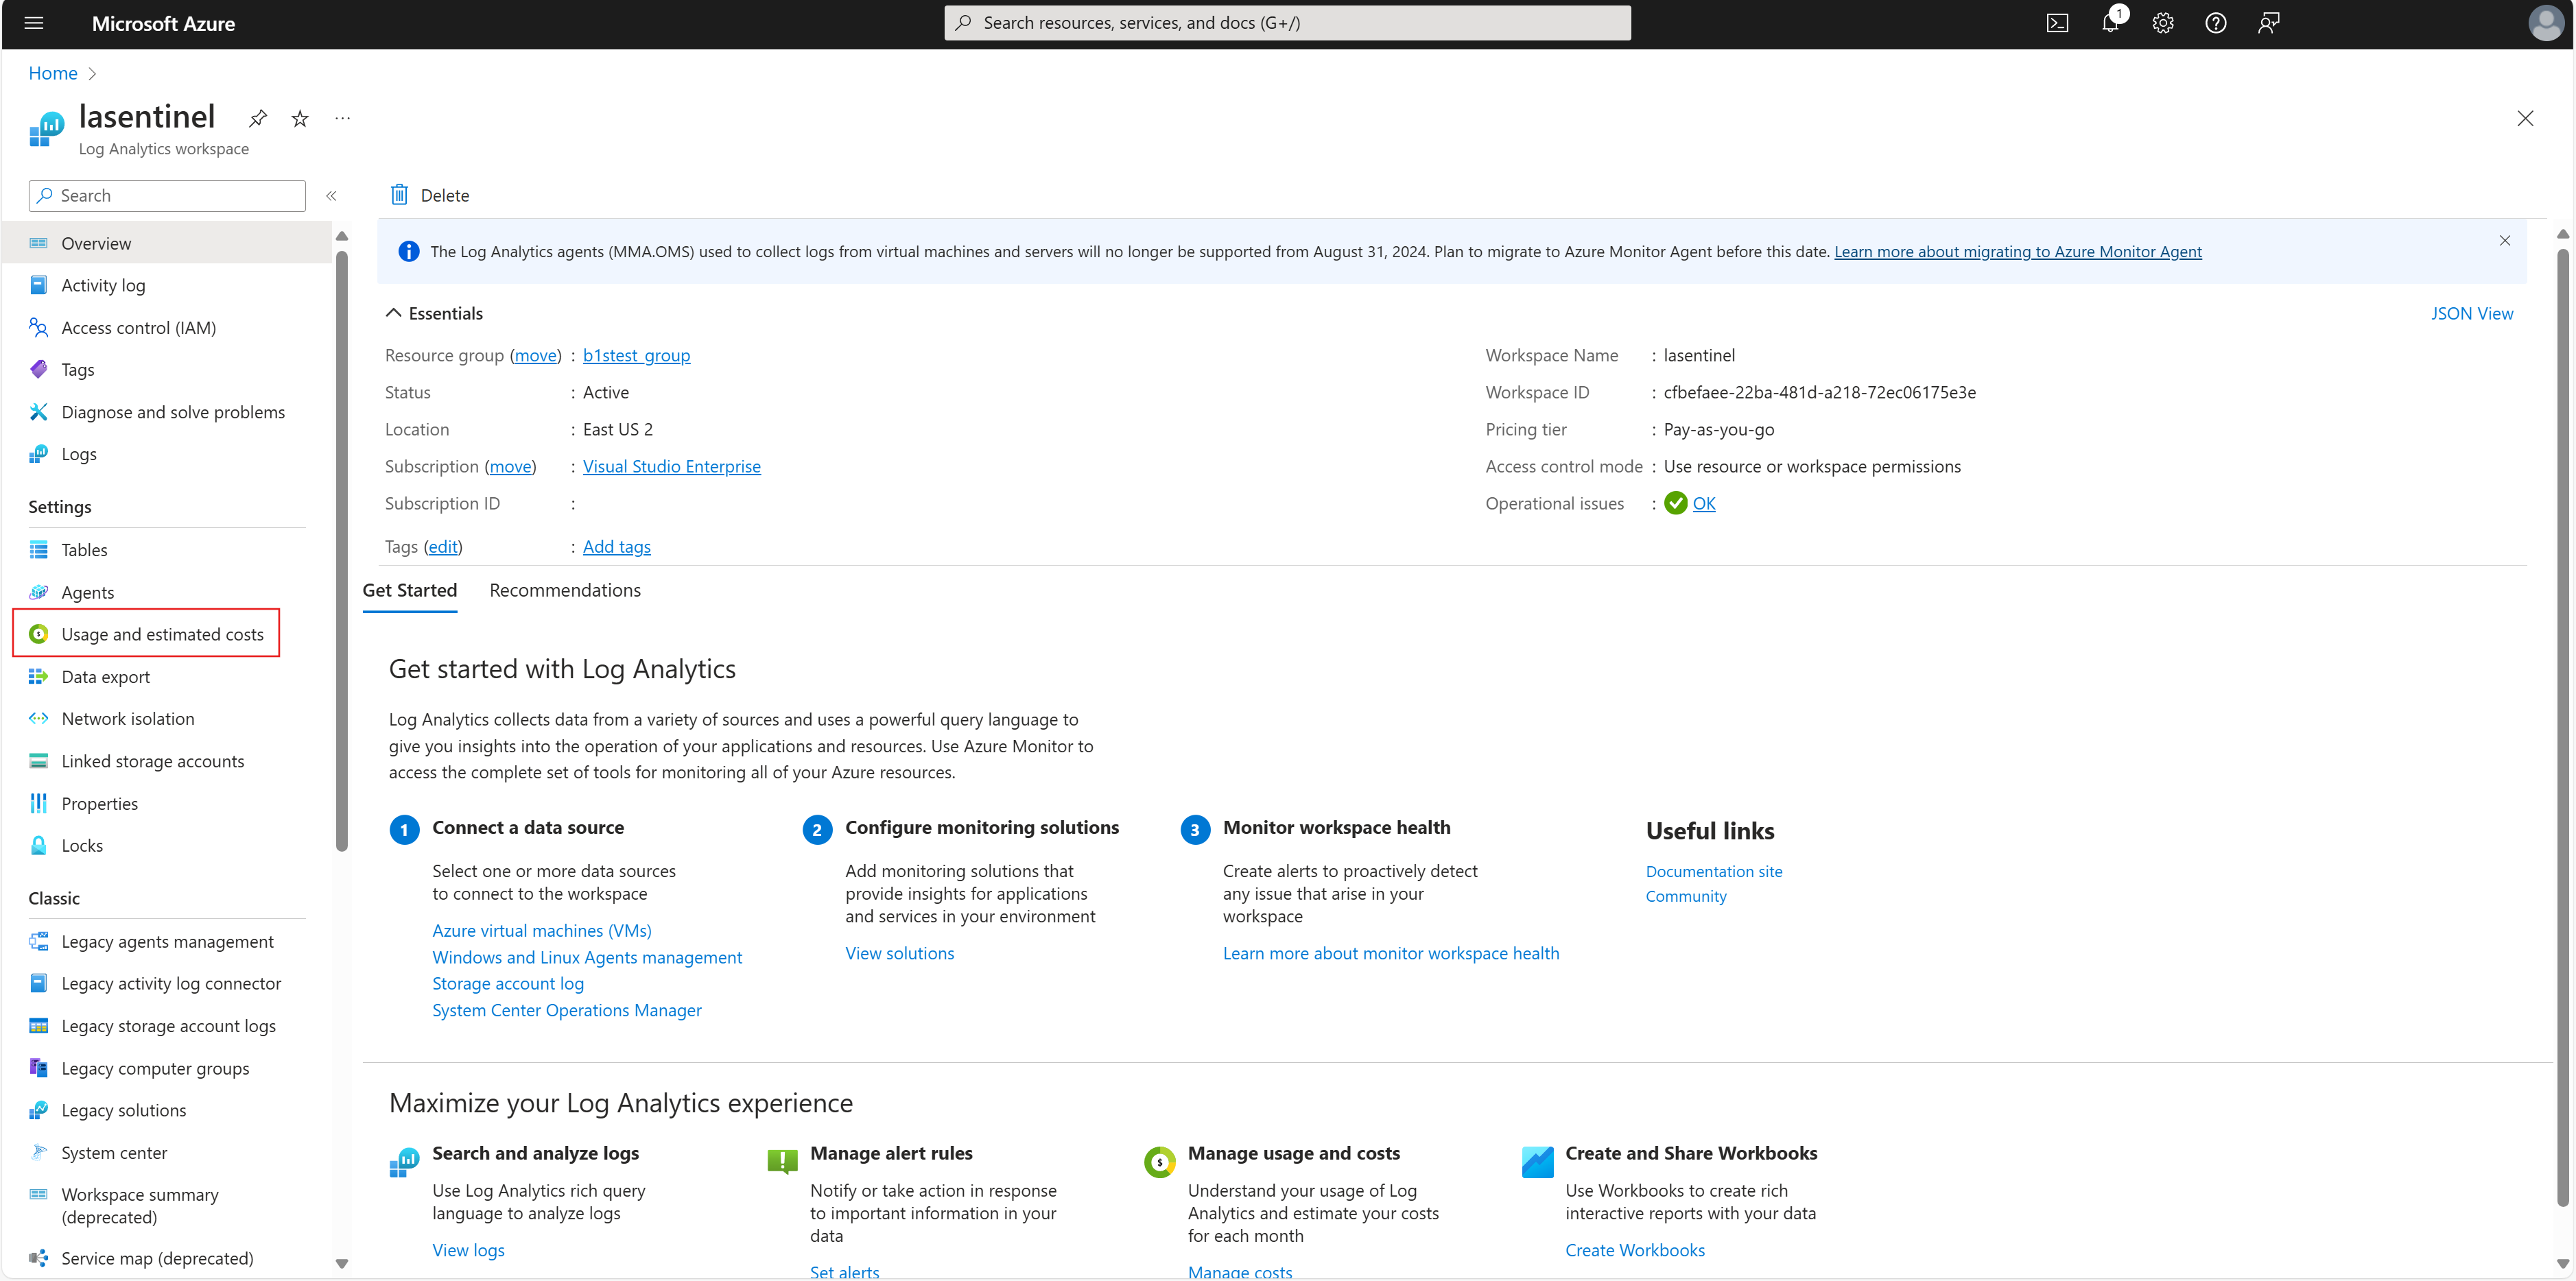
In the Settings section, select Usage and estimated costs.
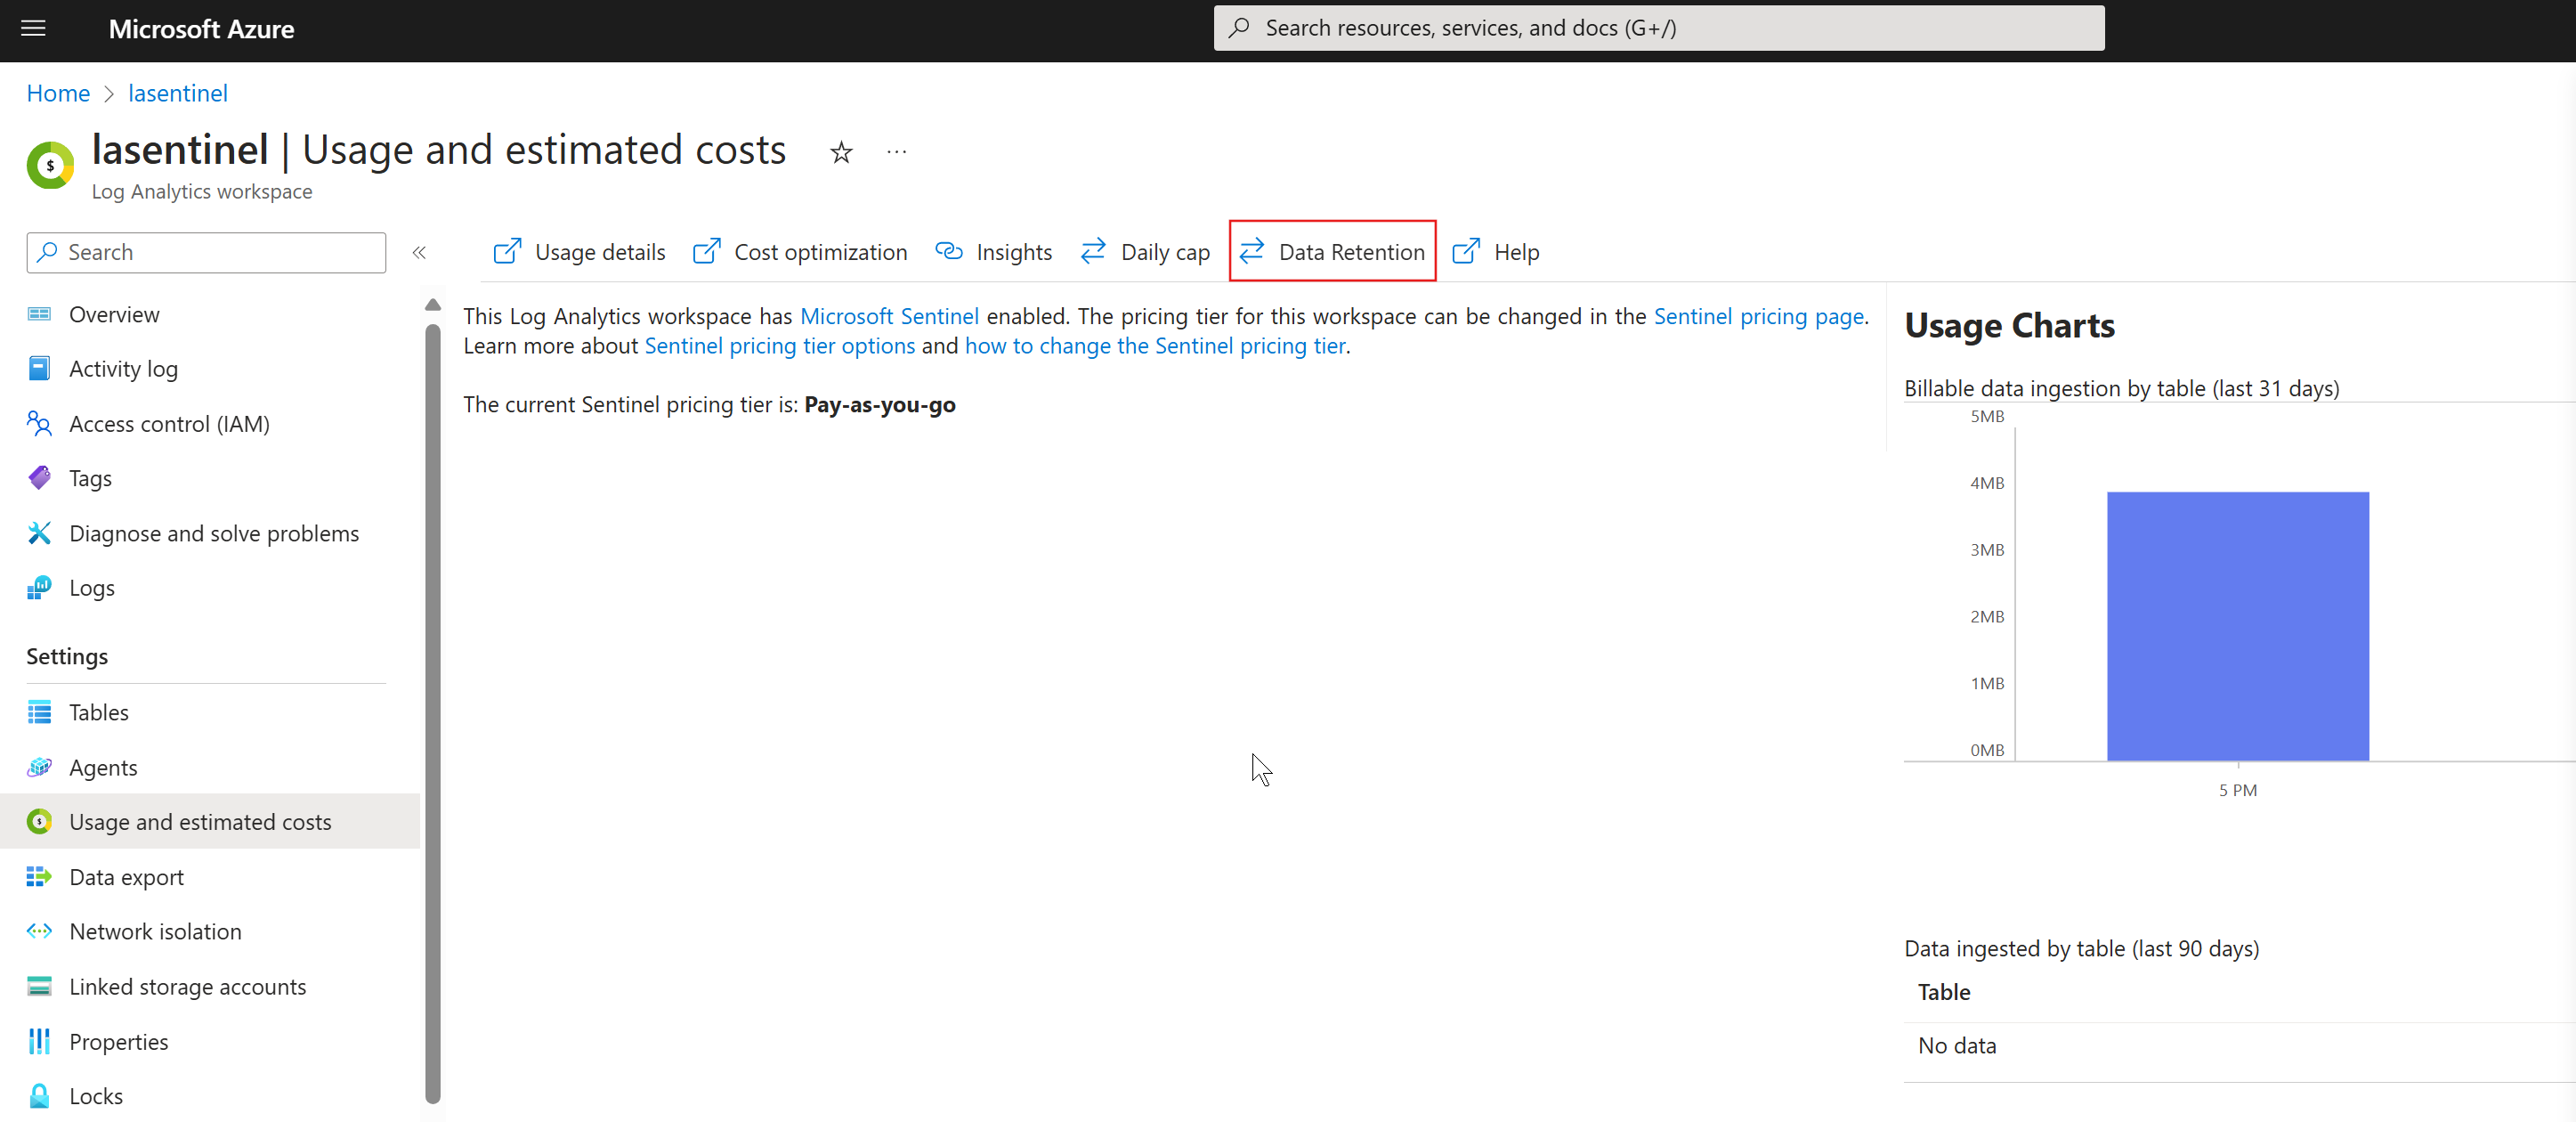
At the top of the Usage and estimated costs page, select Data Retention.
On the Data Retention pane, move the slider to increase or decrease the number of days, and then select OK.
Configure retention for a Log Analytics table
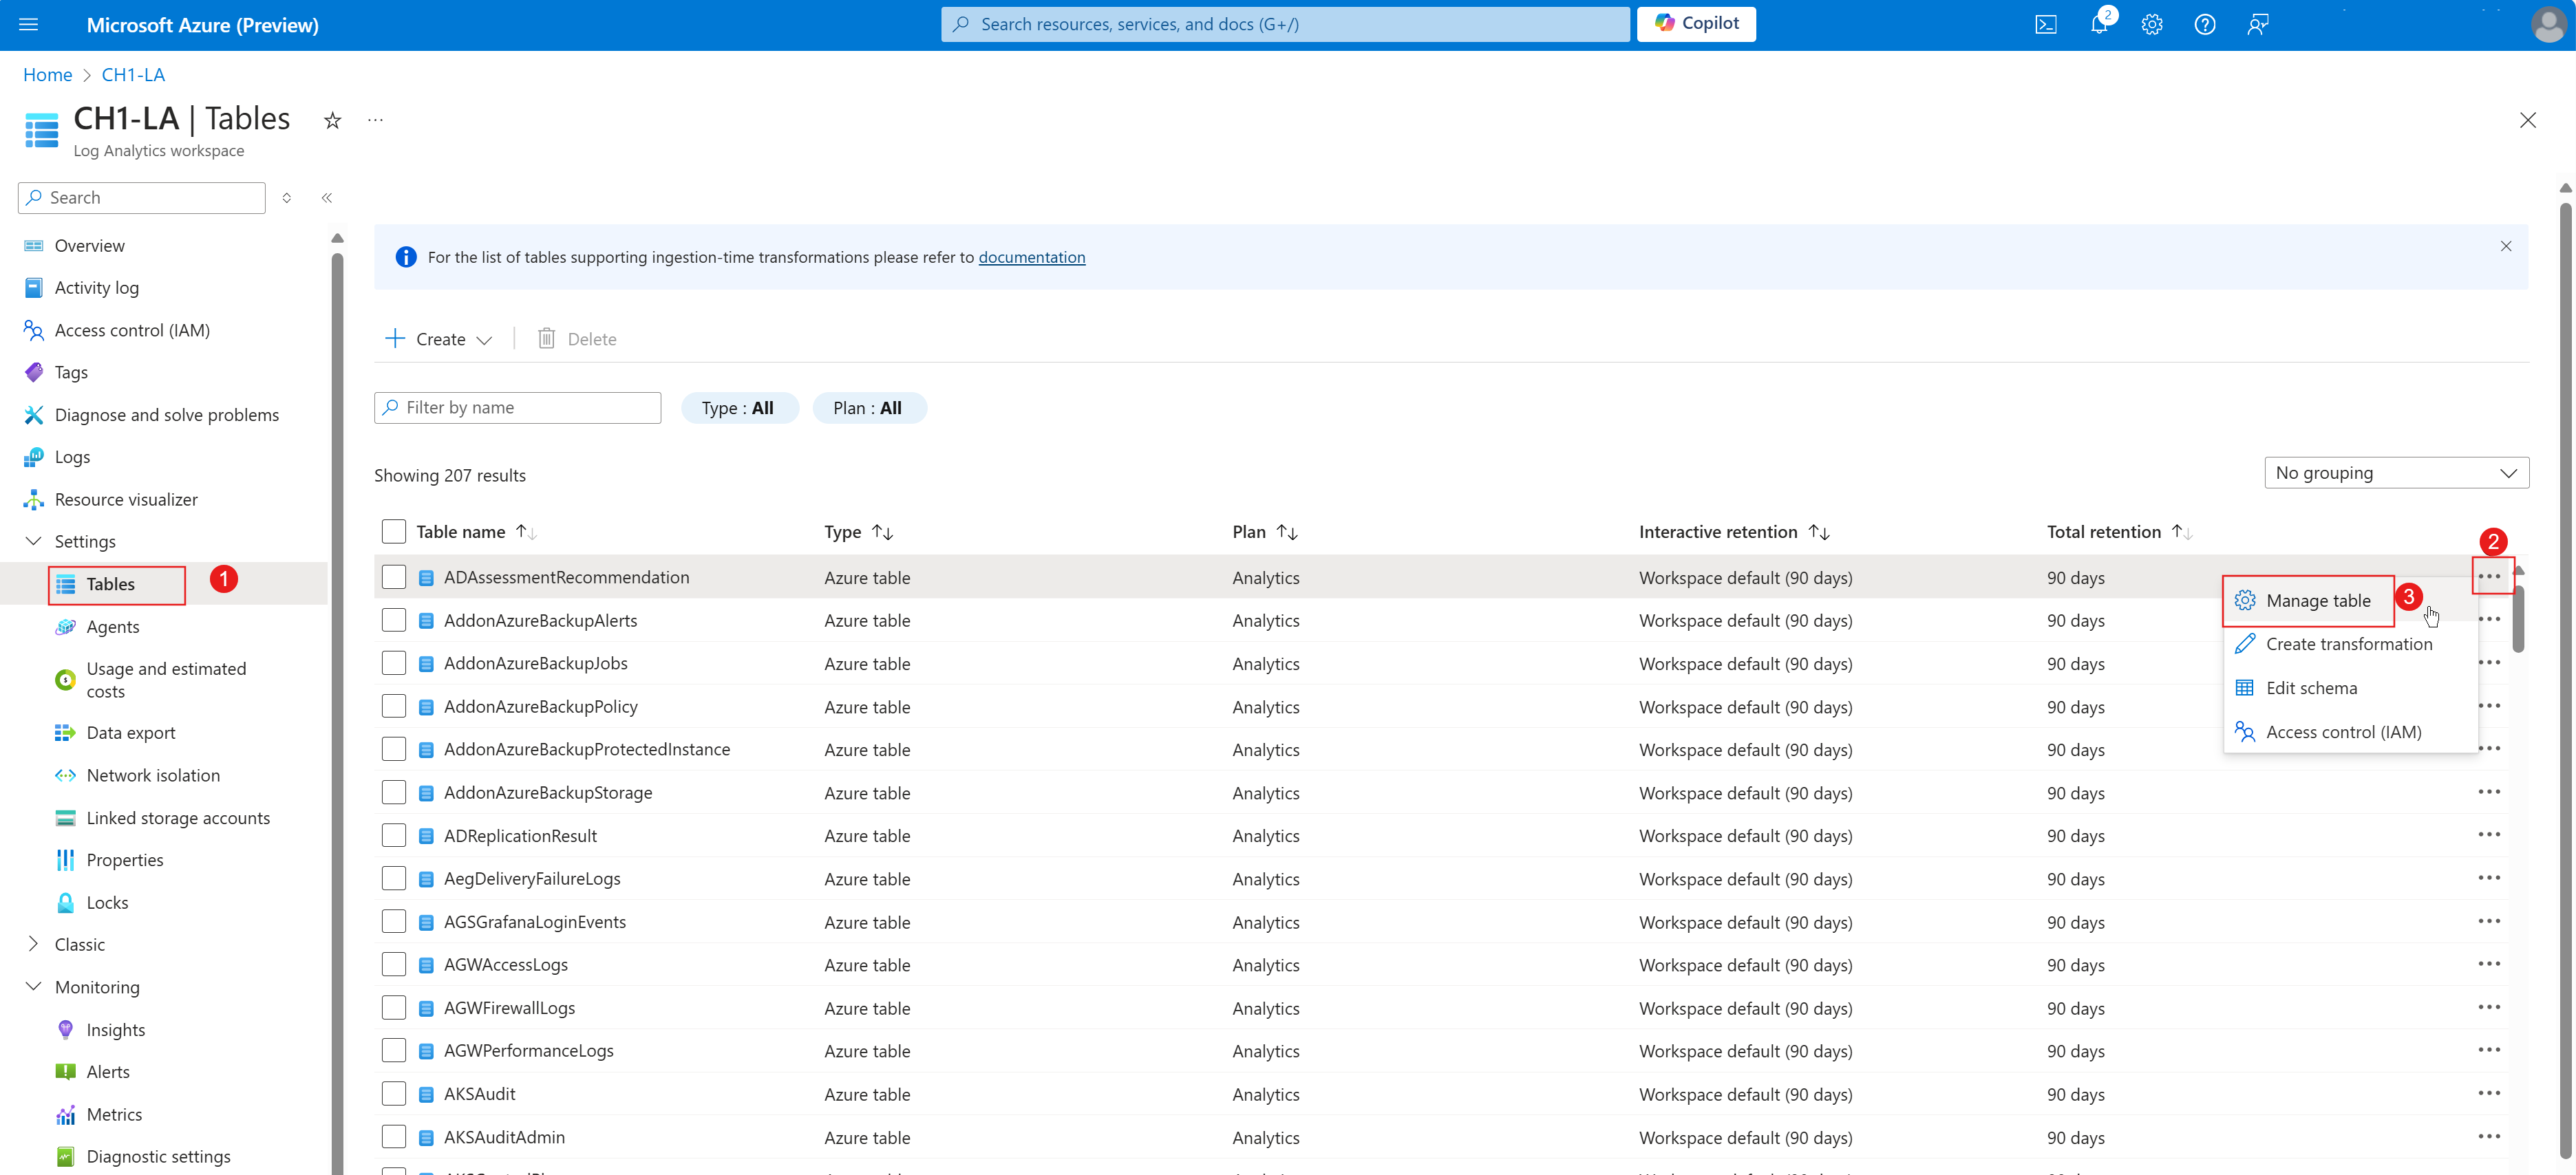
On the Log Analytics workspaces page, select Tables. The Tables page displays a list of all tables available in the workspace.
Choose the table you want to configure, and then select the ellipsis button (...).
Select Manage table.
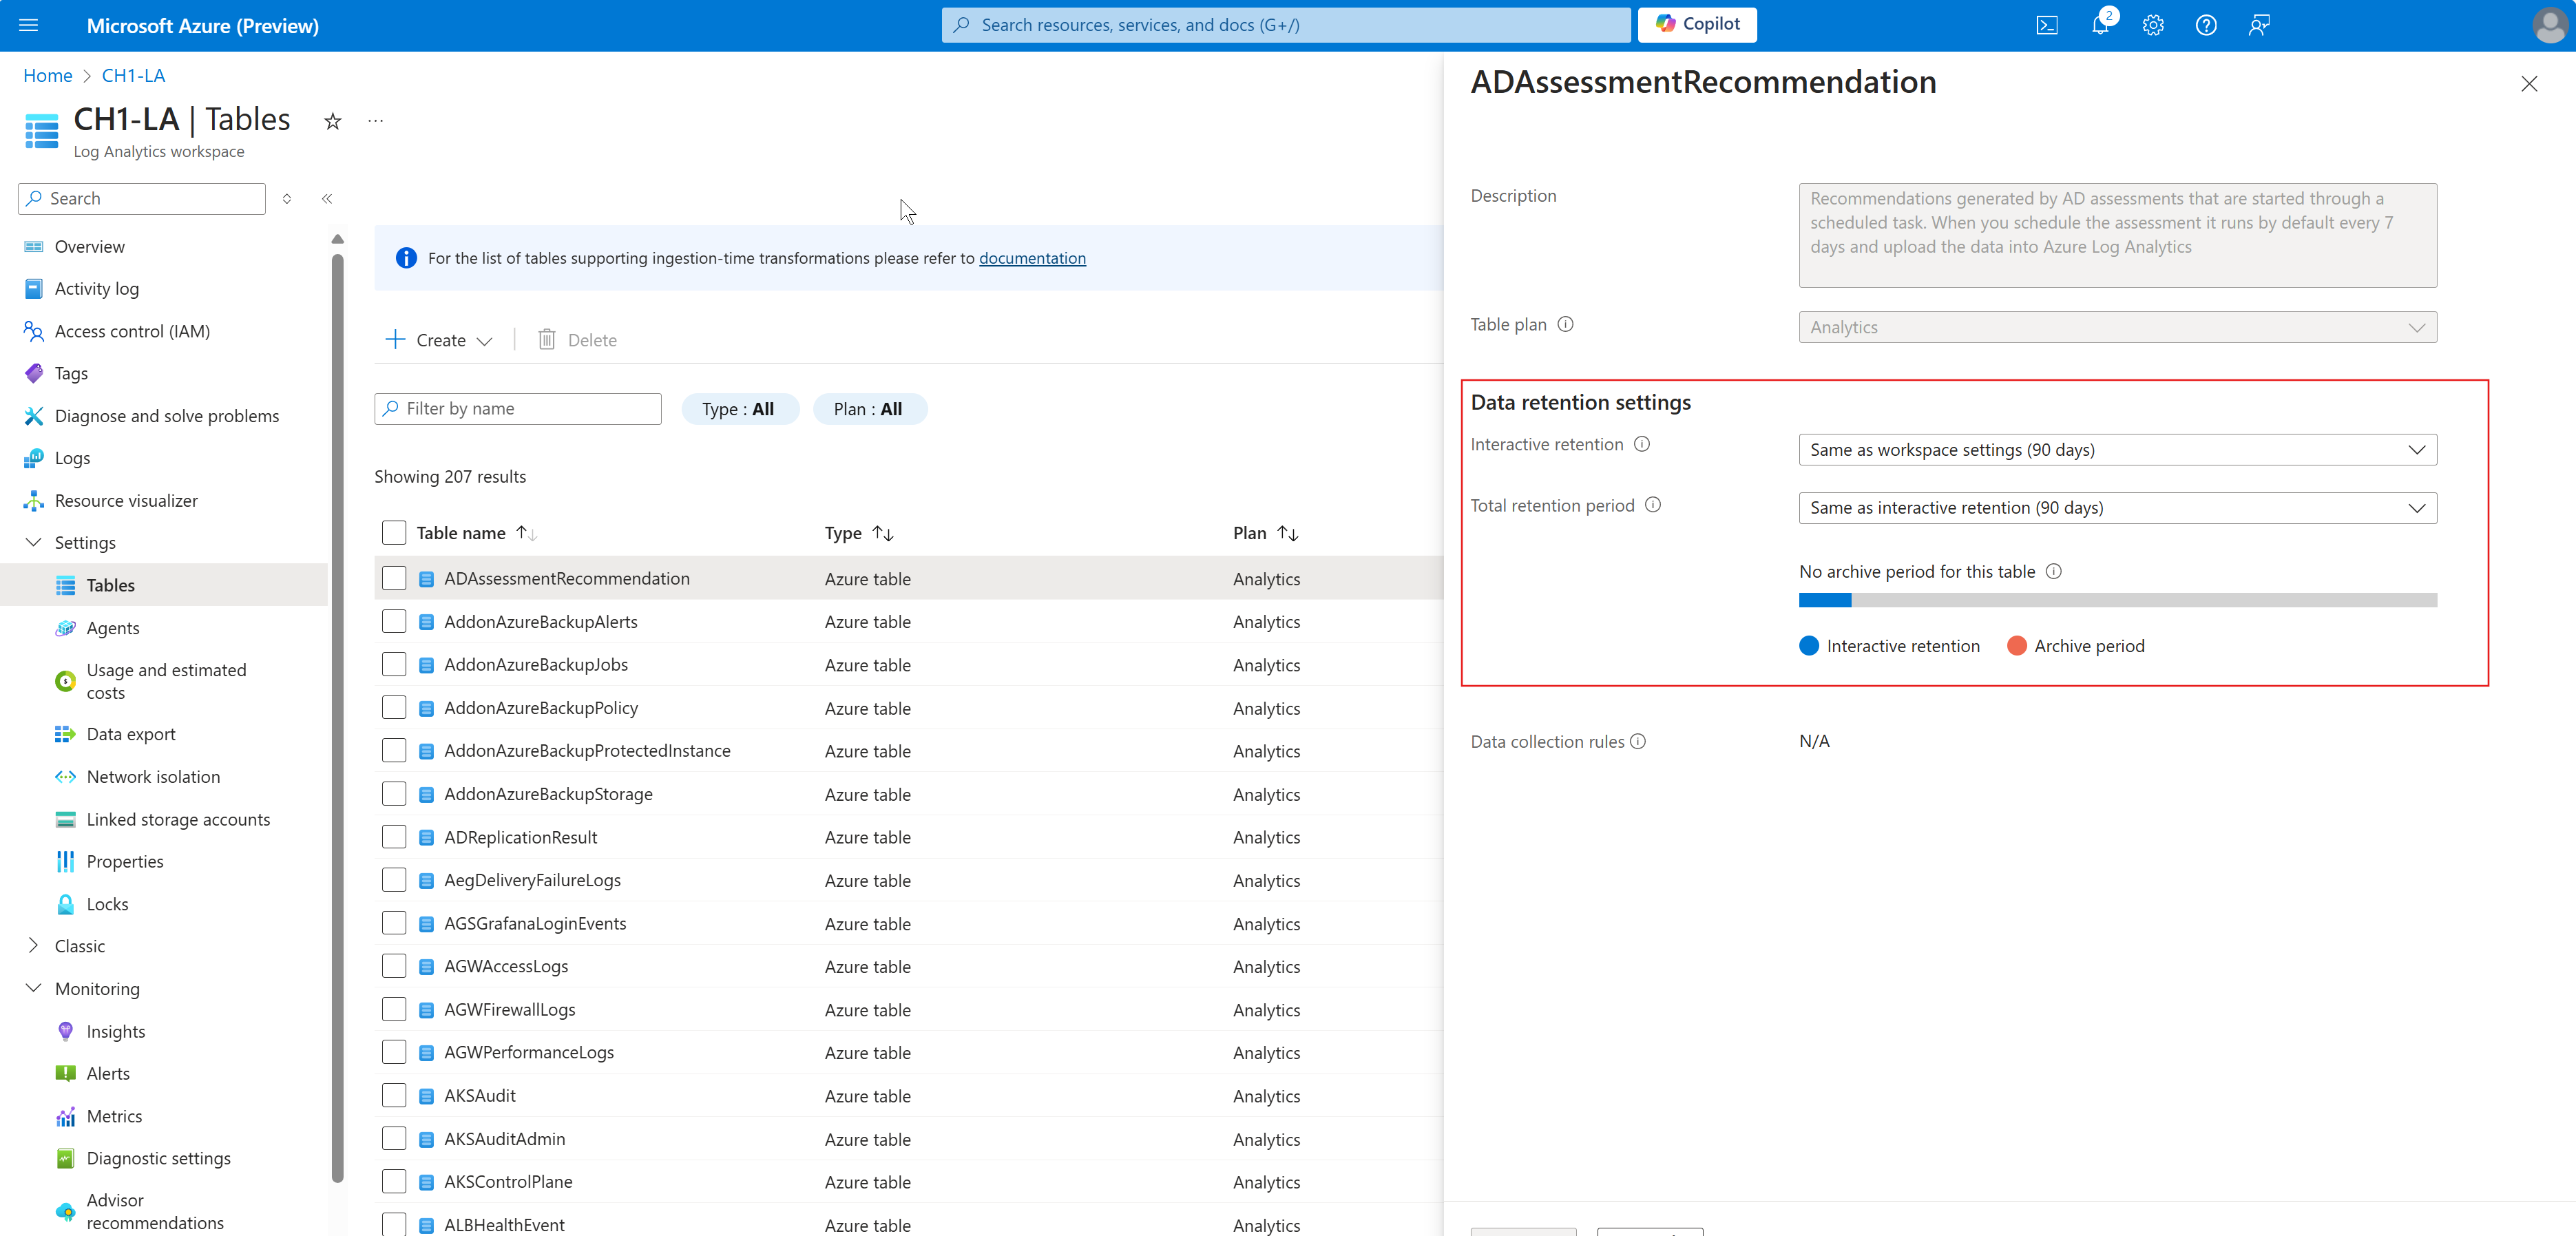
Configure the retention and archive duration in the Data retention settings section.
Contact us for help
If you have questions or need help, create a support request, or ask Azure community support. You can also submit product feedback to Azure feedback community.


