Step 4: Test data collections in Azure Monitor Agent
In this article, you can find several methods for linking recently formed data collection rules (DCRs) with existing virtual machines (VMs). By following these techniques, you can begin gathering data for analysis in a testing or production environment.
Deploy newly generated DCRs to a test workspace
Deploy Log Analytics testing workspace
To set up a short-term Log Analytics workspace for testing purposes, follow these steps:
- Sign in to the Azure portal with your Azure account credentials.
- In the search bar at the top of the portal, type Log Analytics and press Enter to open the Log Analytics blade.
- Select the + Add or Add button to create a new Log Analytics workspace.
- Fill in the required details for your new workspace, such as the name and the subscription where you want to create it.
- Select a resource group for your new workspace. You can create a new one or use an existing one.
- Select the location for your Log Analytics workspace. This should be the same region as your virtual machines.
- Select Create to start the deployment process. The creation of the Log Analytics workspace may take several minutes.
- Once the deployment is complete, navigate to the newly created Log Analytics workspace in the Azure portal.
Swap the production workspace with the test workspace
- In the search bar at the top of the portal, type Data Collection Rules and press Enter to open the Data Collection Rules blade.
- Select the data collection rule that you newly created with the DCR tool.
- Select Configuration > Data Sources, and then select a data source.
- Validate the data source setting and select the Destination tab.
- Select Destination Details to remove the production workspace and replace with testing workspace.
- Begin your testing activities within this temporary Log Analytics workspace, ensuring that you have all required permissions and access levels in place.
Associate VMs to the DCR
In the list of DCRs, select the DCR that you want to associate with VMs.
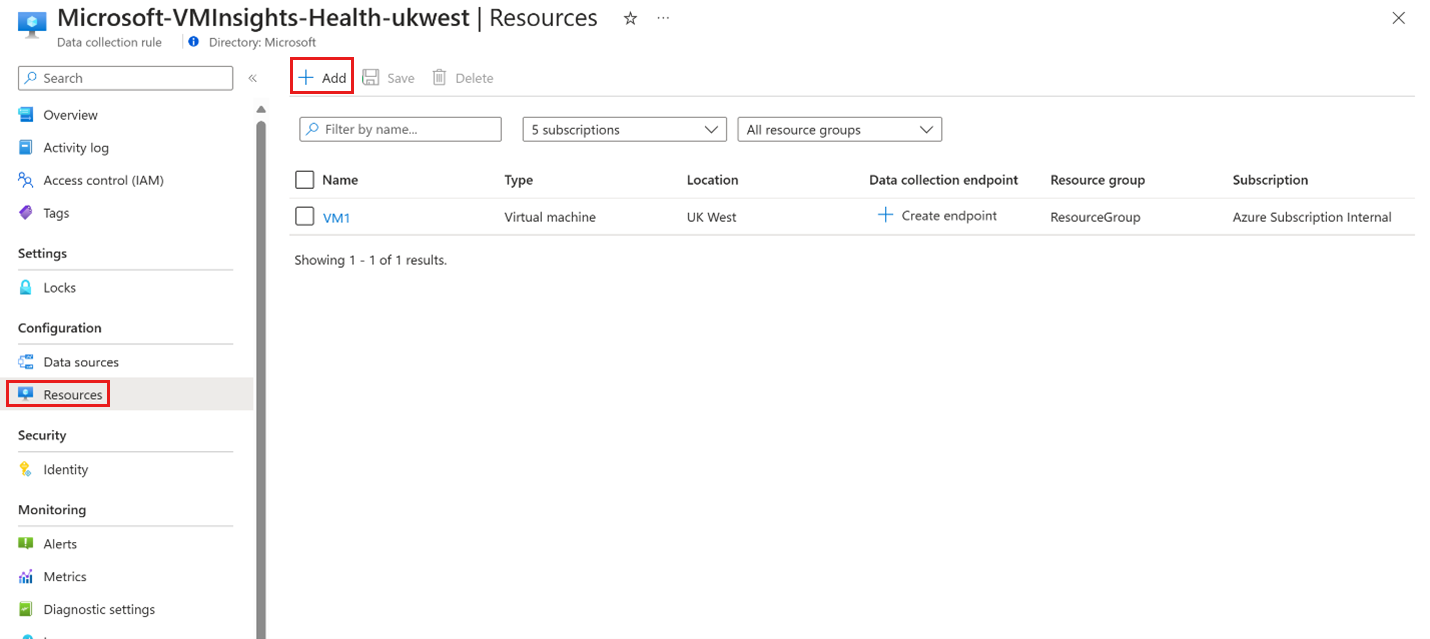
In the menu pane of the DCR, locate the Configuration, and then select Resources.
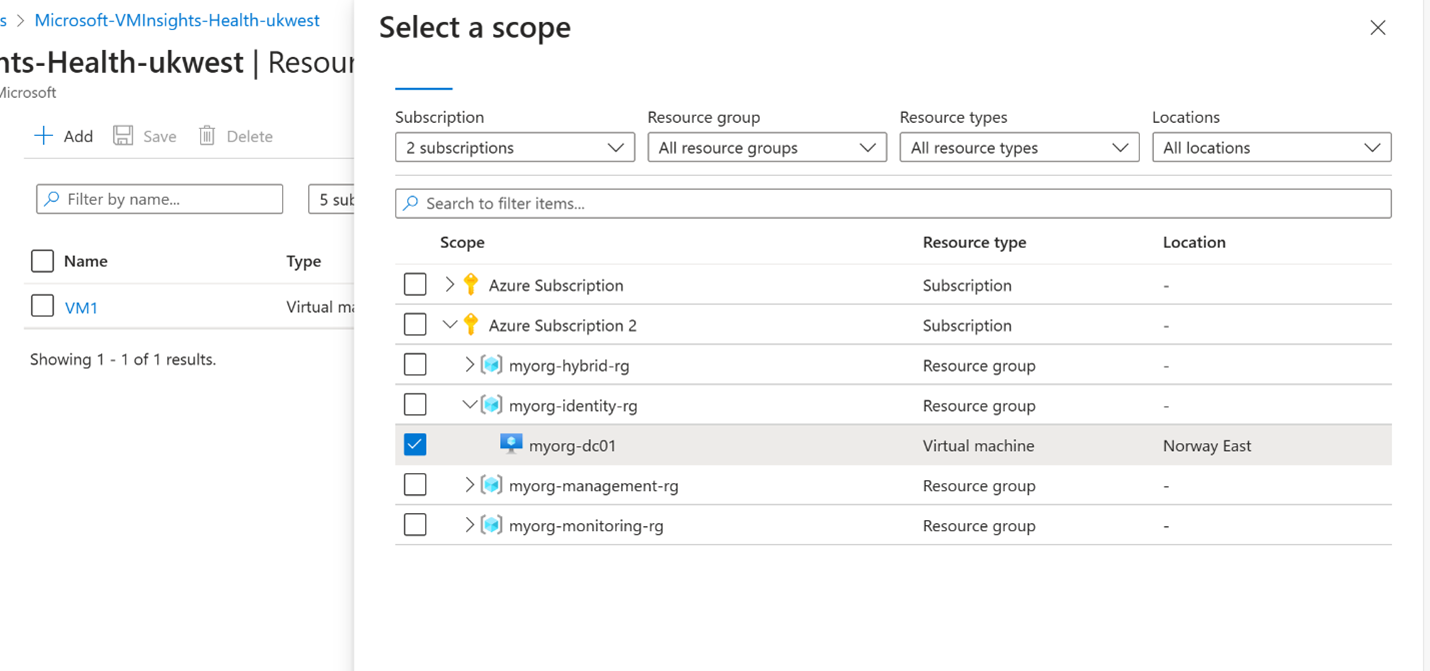
Select the + Add button to search VMs to associate with the DCR. The Select a scope pane appears:
Locate the VMs that you want to associate with the DCR, and then select the Apply button. If Azure Monitor Agent isn't deployed to the VM, it's deployed at this time.
You're now ready to validate your configuration.
Post validation steps
Once the data validation is complete, perform these steps:
- Switch the destination workspace in the DCR from the temporary workspace to the production workspace.
- Remove the legacy agent extension from the VM in the portal.
Migration is now complete. To migrate more workspaces, repeat the steps.
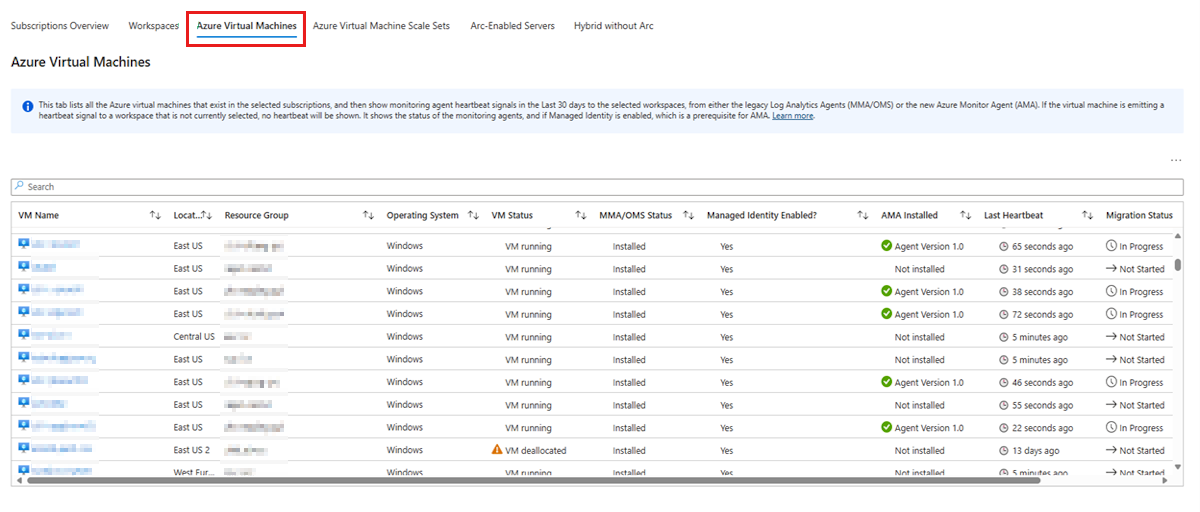
To check the latest status of your migration, see the AMA Migration Helper workbook:
Troubleshoot Azure Monitor Agent
To troubleshoot Azure Monitor Agent, you can use one of the following tools:
- Windows operating system (OS) Azure Monitor Agent Troubleshooter
- Linux operating system (OS) Azure Monitor Agent Troubleshooter
Contact us for help
If you have questions or need help, create a support request, or ask Azure community support. You can also submit product feedback to Azure feedback community.


