Work with shared datasets - web portal
Applies to:
SQL Server 2016 (13.x) Reporting Services and later
Power BI Report Server
With a shared dataset, you can manage the settings for a dataset separately from reports and other catalog items that use it. Shared datasets can be used with paginated and mobile reports, along with KPIs.
You can view and manage the properties of a shared dataset within the web portal. The web portal can launch you into Report Builder to create or edit shared datasets.
Create a shared dataset
To create a new shared dataset, do the following steps.
Select new from the menu bar.
Select Dataset.
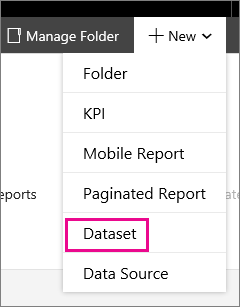
This action either launches Report Builder, or prompts you to download it.
On the New Report or Dataset dialog, select a data source connection to use for this dataset. You might need to browse to the location of the shared data source.
Select Create.
Build your dataset and then select the save icon in the upper left to save the dataset back to the report server.
Manage an existing shared dataset
To manage an existing shared dataset, do the following steps.
Note
If you don't see the shared dataset in the folder, make sure you are viewing datasets. You can select View from the menu bar in the upper right of the web portal. Make sure Datasets is checked.
Select the ellipsis (...) for the dataset you want to manage.
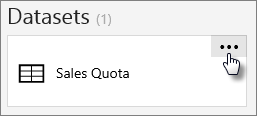
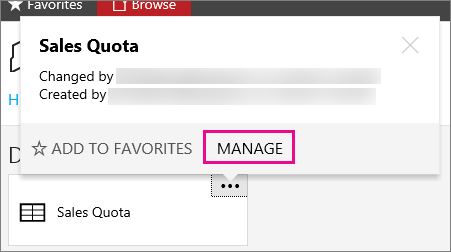
Select Manage which takes you to the edit screen.
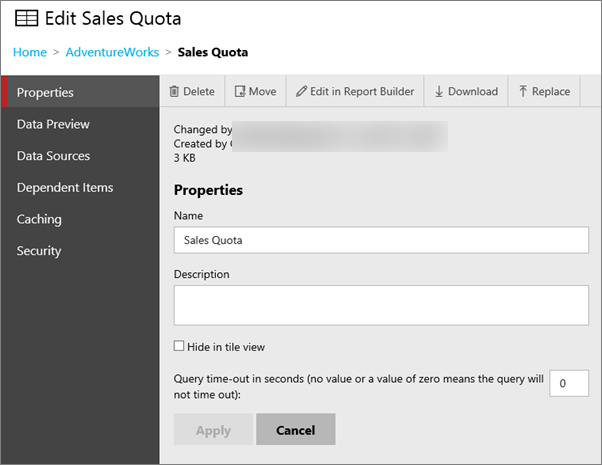
Properties
On the properties screen, you can change the name and description for the dataset. You can also Delete, Move, Edit in Report Builder, Download or Replace.
Cache
You have options when it comes to caching data for a dataset. You start off with a simple selection.
Always run this report with the most recent data issues queries to the data source when requested.
Cache copies of this report and use them when available places a temporary copy of the data in a cache for use with items that use this dataset. Caching usually improves performance because the data is returned from the cache instead of running the dataset query again.
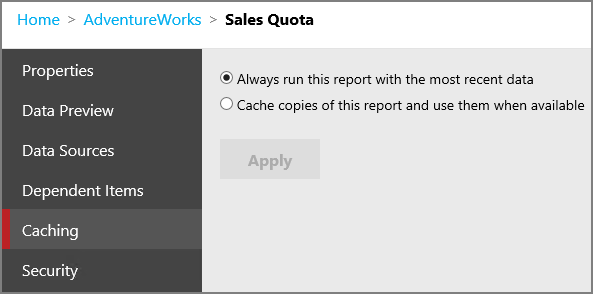
Selecting Cache Copies of this report and use them when available presents you with some more options.
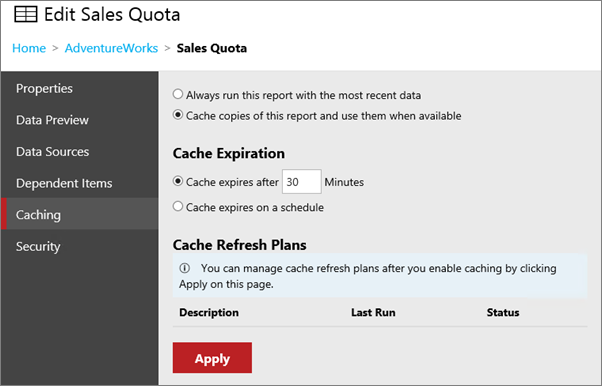
Cache expiration
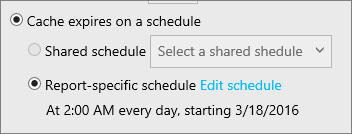
You can control whether you want to expire the cache for the shared dataset after a certain amount of time. Or if you'd prefer, you can make it expire on a schedule. You can use a shared schedule.
Note
Setting an expiration does not refresh the cache. Without a cache refresh plan, the data will be refreshed on the next execution of the dataset.
Cache refresh plans
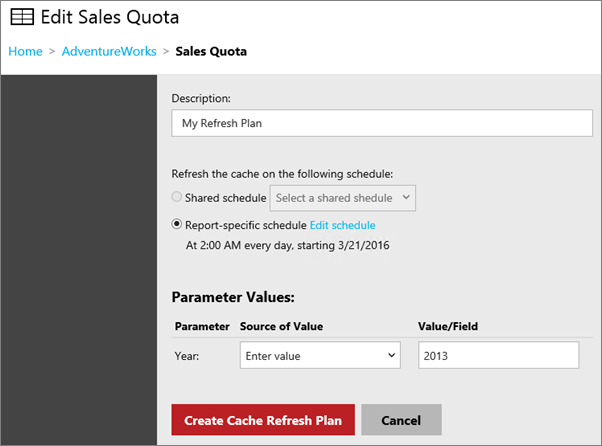
You can use Cache refresh plans to create schedules for preloading the cache with temporary copies of data for a shared dataset. A refresh plan includes a schedule and the option to specify or override values for parameters. You can't override values for parameters that are marked read-only. You can create and use more than one refresh plan.
Default role assignments that enable you to add, delete, and change shared datasets for cache refresh plans are Content Manager, My Reports, and Publisher.
After you apply the previously mentioned cache option, you can define a cache refresh plan. Select the Manage Refresh Plans link that appears after you apply the cache settings. The cache refresh plan page opens.
To create a new cache refresh plan, select New Cache Refresh Plan. You can then enter a name for the plan and specify a schedule. If the dataset has parameters defined, you see them listed and can provide values, unless they're marked as read-only.
Once you're done, you can select Create Cache Refresh Plan.
Note
- SQL Server Agent needs to be running to create a cache refresh plan.
- If you create a KPI based on a shared dataset, the dataset has to have a cache refresh plan. Otherwise, it won't update.
You can then Edit or Delete plans that are listed. The New From Existing option is enabled when one, and only one, cache refresh plan is selected. This option creates a new refresh plan, which is copied from the original plan. The cache refresh plan page opens prepopulated with details from the plan that was selected. You can then modify the refresh plan options and save the plan with a new description.
More questions? Try asking the Reporting Services forum.