Overview
Microsoft 365 Customer Key supports RSA keys that are stored in Managed HSM (Hardware Secure module) which is FIPS 140-2 Level 3 compliant solution. Azure Key Vault Managed HSM is a fully managed, highly available, single-tenant, standards-compliant cloud service that enables you to safeguards cryptographic keys for your cloud applications, using FIPS 140-2 Level 3-validated HSMs. For more information on Managed HSM, review the Overview.
Set Up Customer Key with Managed HSM
To set up Customer Key with Managed HSM, complete these tasks in the listed order. The rest of this article provides detailed instructions for each task, or links out to more information for each step in the process.
Important
Managed HSM uses a different set of cmdlets from classic Azure Key Vault.
Create a resource group provision, and activate a Managed HSM
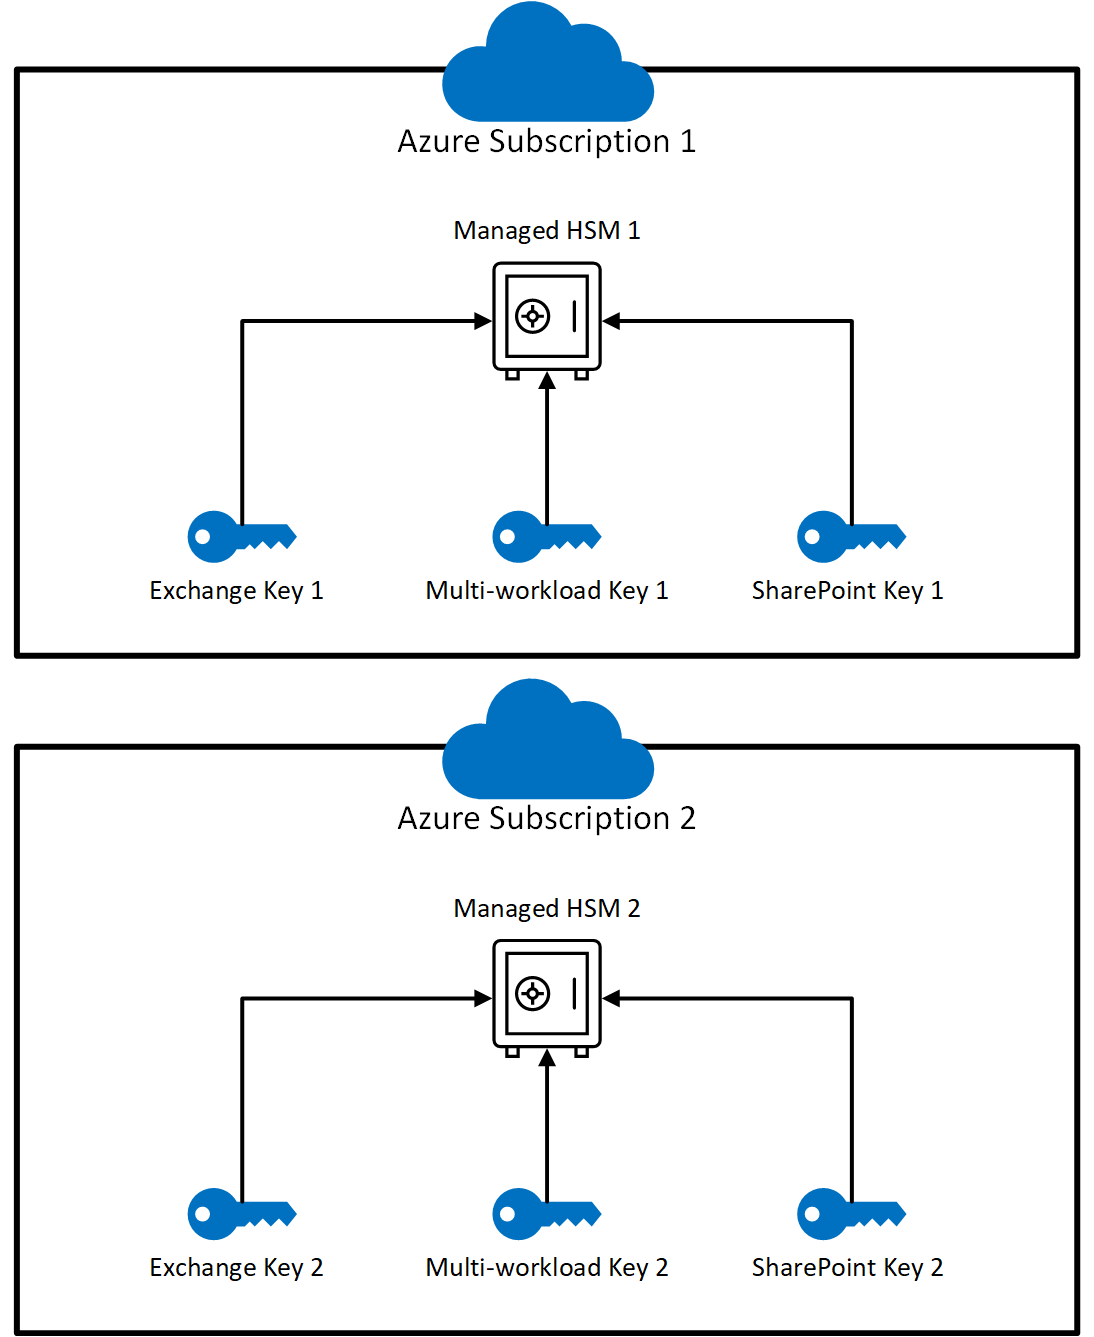
When using Azure Key Vault, Customer Key typically requires provisioning three pairs of Key Vaults (six in total)—one pair for each workload. In contrast, if you use Managed HSM, you only need to provision two instances (one per subscription), regardless of how many of the three workloads you use.
Follow the instructions found in the Managed HSM Quickstarts to provision and activate your managed HSM.

Assign Permissions to each Managed HSM
Managed HSM uses local RBAC (Role-Based Access Control) for access control. To assign wrapKey, unwrapkey, and get permissions on your managed HSM, you must assign the Managed HSM Crypto Service Encryption User role to the corresponding Microsoft 365 app. For more information, see Managed HSM role management.
Search for the following names for each Microsoft 365 app when adding the role to your Azure Key Vault:
Exchange:
Office 365 Exchange OnlineSharePoint and OneDrive:
Office 365 SharePoint OnlineMulti-workload policy (Exchange, Teams, Microsoft Purview Information Protection):
M365DataAtRestEncryption
If you don't see the corresponding Microsoft 365 app, verify that you registered the app in the tenant.
For more information on assigning roles and permissions, see Use role-based access control to manage access to your Azure subscription resources.
Assign User roles to your Managed HSM
Managed HSM Administrators do day-to-day management of your key vault for your organization. These tasks include backup, create, get, import, list, and restore. See Assigning User Roles for details.
Add a key to each Managed HSM
Managed HSMs only support HSM-protected keys. When you create a key for a Managed HSM, you must create an RSA-HSM key, not another type. For instructions to add a key to each vault or Managed HSM, see Add-AzKeyVaultKey.
For detailed steps to create a key on-premises and import it into your HSM, see How to generate and transfer HSM-protected keys for Azure Key Vault. Use the Azure instructions to create a key in each Managed HSM.
Verify the expiration data of your Managed HSM Keys
To verify that an expiration date isn't set for your keys, run the Get-AzKeyVaultKey cmdlet.
Get-AzKeyVaultKey -HsmName <HSM name>
Customer Key can't use an expired key. Operations attempted with an expired key fail, and possibly result in a service outage.
Caution
We strongly recommend that keys used with Customer Key don't have an expiration date.
An expiration date, once set, can't be removed, but can be changed to a different date. If a key that has an expiration date must be used, change the expiration value to 12/31/9999 and use the legacy onboarding process. Keys with an expiration date set to a date other than 12/31/9999 fail Microsoft 365 validation. The Customer Key Onboarding Service only accepts keys without an expiration date.
To change an expiration date that is set to any value other than 12/31/9999, run the Update-AzKeyVaultKey cmdlet.
Update-AzKeyVaultKey -HsmName <HSM name> -Name <key name> -Expires (Get-Date -Date "12/31/9999")
Back up your Managed HSM Key
To back up your Managed HSM Key, see Backup-AzKeyVaultKey.
Obtain the URI for each Managed HSM key
Once you set up your Managed HSMs and added your keys, run the following command to get the URI for the key in each Managed HSM. Use these URIs when you create and assign each DEP later, so save this information in a safe place. Run this command once for each Managed HSM.
In Azure PowerShell:
(Get-AzKeyVaultKey -HsmName <HSM name>).Id
Onboard to Customer Key using the legacy method
Once all steps to set up your subscriptions, Managed HSMs and keys are complete, see Onboard to Customer Key using the legacy method.
Next steps
Once you complete the steps in this article, you're ready to create and assign DEPs. For instructions, see Manage Customer Key.