Connect your app to the cloud
This step-by-step guide will allow you to familiarize yourself with Windows 10 IoT Core, set up your device and create your first application that connects to Azure IoT Hub.
Step 1: Prepare your device
You can find instructions on how to prepare your device on the Get Started Page Make sure you provision the TPM of your device
Step 2: Install Visual Studio 2017 and tools
Install Visual Studio 2017. You can install any edition of Visual Studio, including the free Community edition.
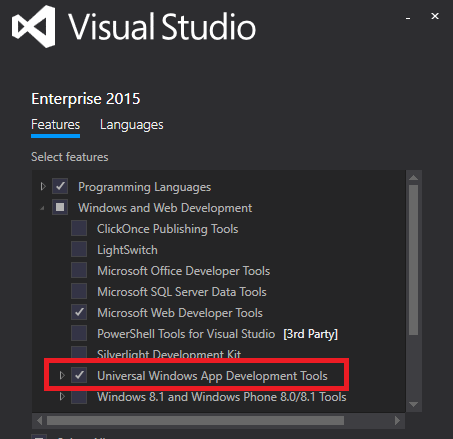
Make sure to select the Universal Windows App Development Tools, the component required for writing apps Windows 10:

Step 3: Install the Connected Services for Azure IoT Hub
The Connected Services for Azure IoT Hub Visual Studio extension allows you to connect and start interacting with Azure IoT Hub in less than a minute.
You can install the extension from the VS Gallery.
Step 4: Create a Visual Studio UWP solution
To create a UWP solution in Visual Studio, on the File menu, click New then Project:

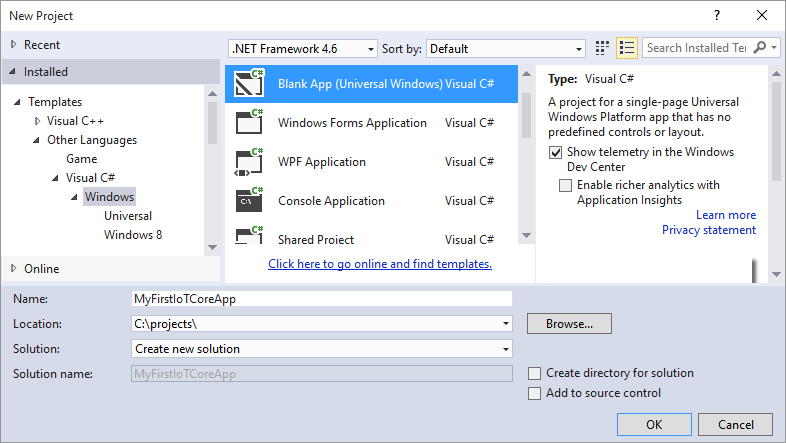
In the New Project dialog that comes up, select Blank App (Universal Windows) Visual C#. Give your project a name (e.x. MyFirstIoTCoreApp):

Use the Connected Services for Azure IoT Hub to connect to Azure IoT Hub
Follow the instructions from the Connected Services tool to connect your project to Azure IoT Hub. The tool will generate two functions, SendDeviceToCloudMessageAsync and ReceiveCloudToDeviceMessageAsync that you can invoke anywhere in your app. You can modify these functions as you see fit.