Build Teams connectors
Important
Microsoft 365 Connectors (previously called Office 365 Connectors) are nearing deprecation, and the creation of new Microsoft 365 Connectors will soon be blocked. For more information on the schedule and how the Workflows app provides a more flexible and secure experience, see retirement of Microsoft 365 connectors within Microsoft Teams.
How can you create a webhook in Teams?
To automatically post to a chat or channel when a webhook request is received, use the predefined workflow templates or create a workflow from scratch using the When a Teams webhook request is received trigger. For more information, see post a workflow when a webhook request is received in Microsoft Teams.
For more information about the When a Teams webhook request is received trigger, see Microsoft Teams - Webhook.
If you've already built Office 365 Connectors:
Create a Power Automate connector: Power Automate enhances the widely used Workflows apps in Teams. It's the scalable and secure approach to transmit data programmatically into and out of Teams. If you adopt this method, you can create workflow templates for posting alerts from your product to Teams channels. This approach simplifies user adoption of the new method. For more information, see Power Automate for enterprise developers, ISVs, and partners.
Update your Teams app: You can enhance your current Teams app. For example, you can enable users to set up proactive messages based on trigger events within your system. For more information, see how bots can post to channels through proactive messages.
Known issues
- Workflows app can't post in private channels as a flow bot. However, it can post on behalf of a user.
- Workflows support Adaptive Cards only. It doesn't support the older message card format that Office 365 Connectors use. Workflows don't support using the message card format. For more information, see how to convert connector message card format to Adaptive Card.
- Workflows don't offer third-party connectors such as DataDog and Jenkins.
- Workflows can only be created in your default environment.
Limitations
Workflows are linked only to specific users (referred to as owners of the workflow) and not to a Teams team or channel. Workflows can become orphan flows in the absence of an owner if no co-owners assigned. To maintain continuity in the business process automated by the flow, admins can add one or more co-owners and grant them full control over the workflow. They can also add authentication for connections, if any, and enable the flow if it has been disabled. For more information, see manage orphan flows.
Microsoft Teams connector is Model-View-Controller (MVC) sample task management application and generated using the ASP.NET web application template. Most of the code is related to either basic MVC configuration or task management system. You can add your existing connector for Microsoft 365 Groups or build a new one within Teams.
Types of connector codes
- ConnectorController.cs: Set up and save actions.
- TaskController.cs: Create and update actions.
Key features of Microsoft Teams connector
- Simulates real task management system.
- Allows users to create and view tasks.
- Generates content randomly.
- Simulates notification to be sent to Microsoft Teams channel.
This step-by-step guide helps you to create and test a connector in Microsoft Teams. You'll see the following output:

Prerequisites
Ensure that you install the following tools and set up your development environment:
| Install | For using... | |
|---|---|---|
| Microsoft Teams | Microsoft Teams to collaborate with everyone you work with through apps for chat, meetings, and calls all in one place. | |
| Visual Studio 2022 | You can install the enterprise version in Visual Studio 2022, and install the ASP.NET and web development workloads. Use the latest version. | |
| .NET Core SDK | Customized bindings for local debugging and Azure Functions app deployments. Use the latest version or install the portable version. | |
| Dev tunnel | Teams app features (conversational bots, message extensions, and incoming webhooks) need inbound connections. A tunnel connects your development system to Teams. Dev tunnel is a powerful tool to securely open your localhost to the internet and control who has access. Dev tunnel is available in Visual Studio 2022 version 17.7.0 or later. or You can also use ngrok as a tunnel to connect your development system to Teams. It isn't required for apps that only include tabs. This package is installed within the project directory (using npm devDependencies). |
Note
After downloading ngrok, sign up and install authtoken.
Set up local environment
Open Microsoft-Teams-Samples.
Select Code.
From the dropdown menu, select Open with GitHub Desktop.
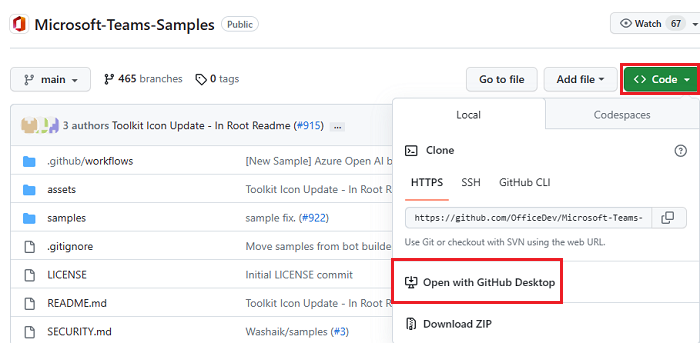
Select Clone.
Enable developer preview
Enable uploading of apps in the admin console of your tenant.
Sign in to Microsoft 365 admin center with your admin credentials.
In the left pane, select Show All.
Select Teams.
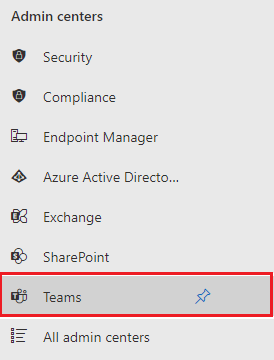
In the left pane, select Teams apps.
Select Setup policies.
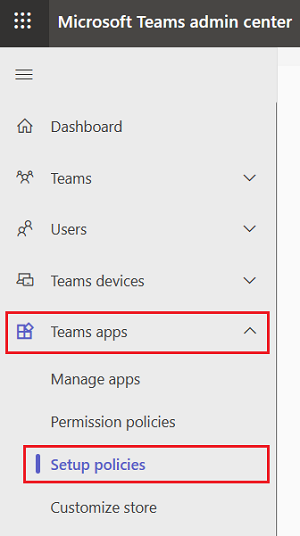
Select Global (Org-wide default).
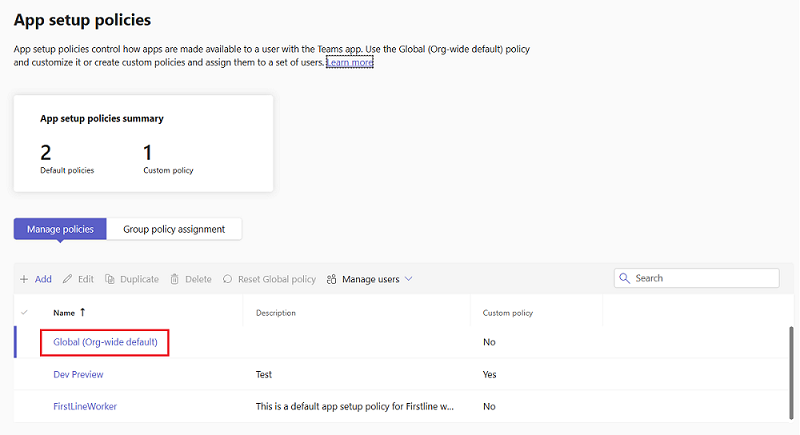
Turn on the Upload custom apps toggle.
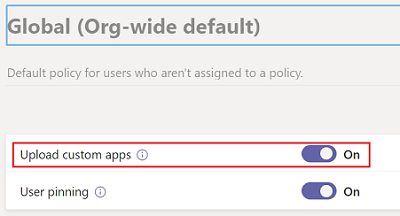
Select Save.
Your test tenant can now permit custom app upload.
Tip
Custom app upload takes some time to become active.
Go to Microsoft Teams.
From the upper-right corner of your Teams, select ....
Select About > Developer preview.
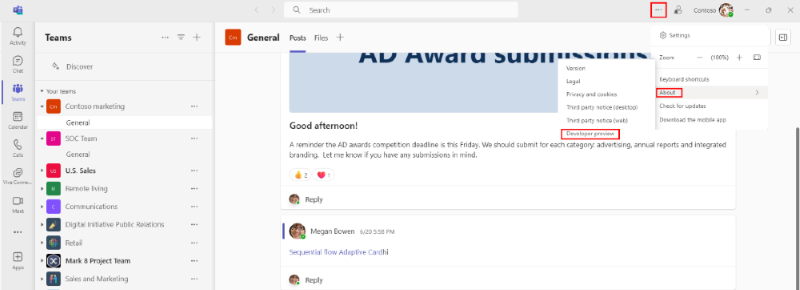
Select Switch to developer preview.
Configure your connector
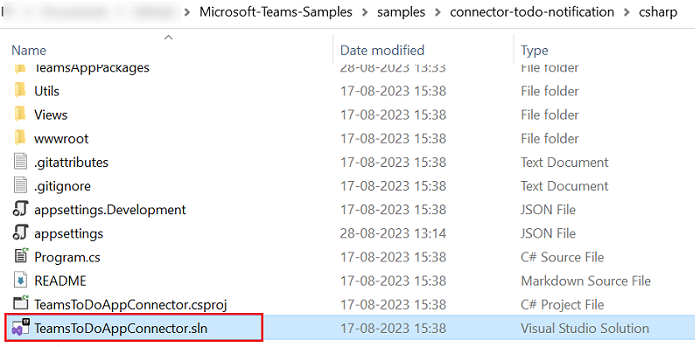
Open TeamsToDoAppconnector.sln in Visual Studio from the cloned repository.
Create a tunnel
Open Visual Studio.
Select Create a new project.

In the search box, enter ASP.NET. From the search results, select ASP.NET Core Web App.
Select Next.
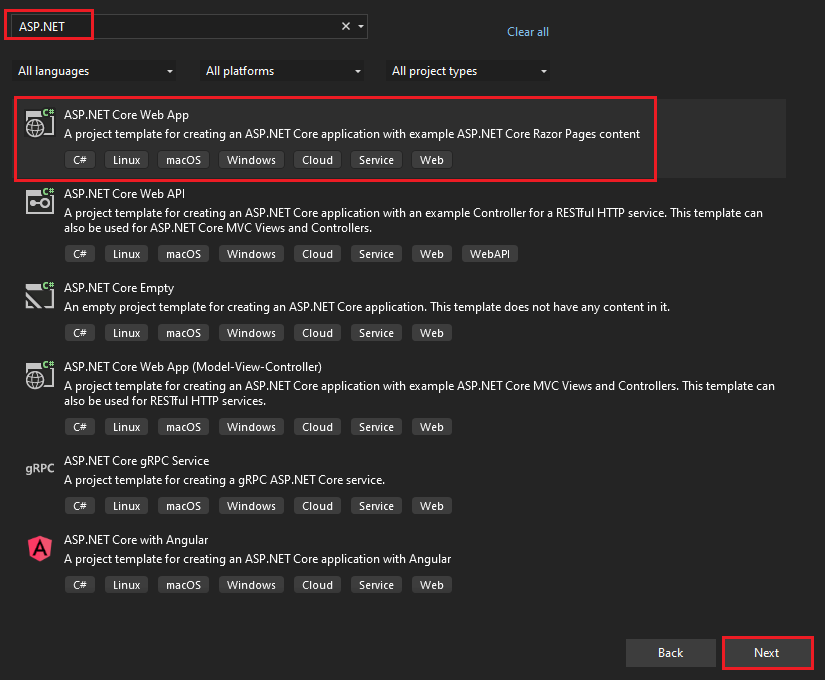
Enter Project name and select Next.
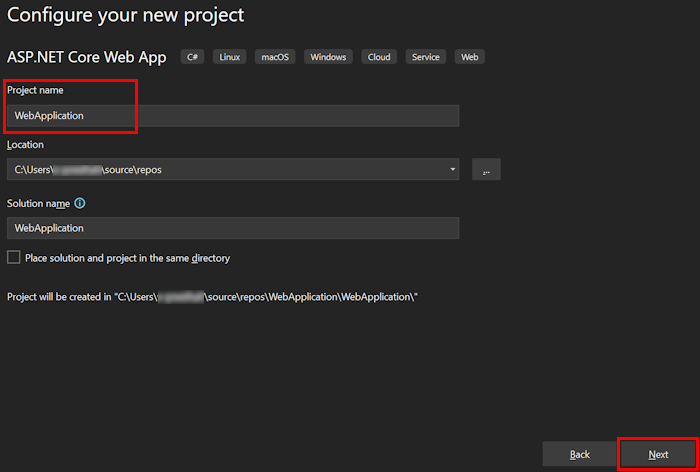
Select Create.

An overview window appears.
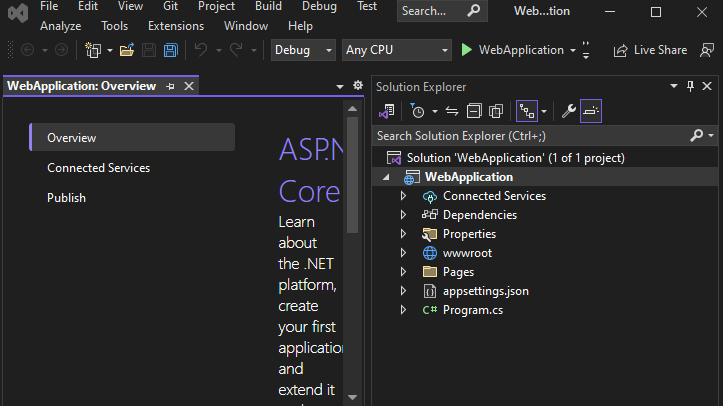
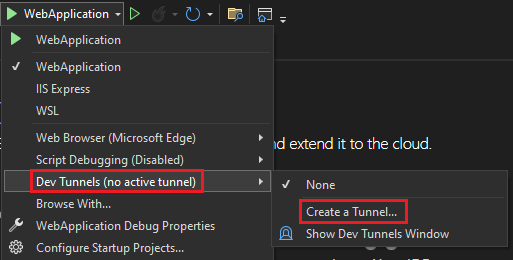
In the debug dropdown list, select Dev Tunnels (no active tunnel) > Create a Tunnel....
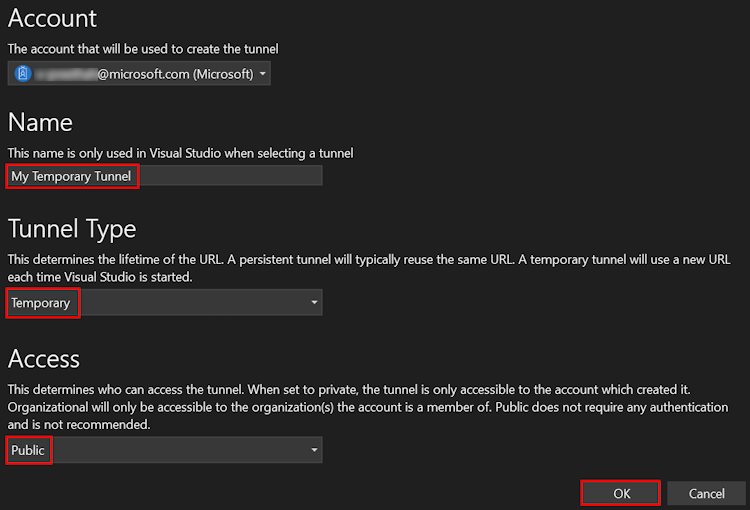
A pop-up window appears.
Update the following details in the pop-up window:
- Account: Enter a Microsoft or GitHub account.
- Name: Enter a name for your tunnel.
- Tunnel Type: From the dropdown list, select Temporary.
- Access: From the dropdown list, select Public.
Select OK.
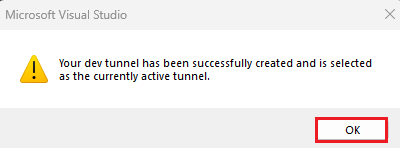
A pop-up window appears showing that dev tunnel is successfully created.
Select OK.
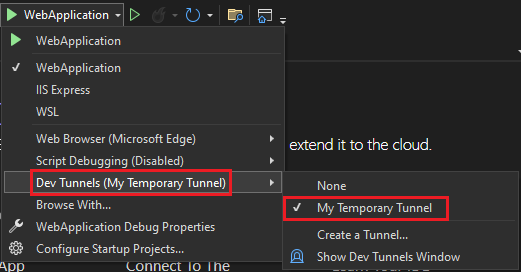
You can find the tunnel you've created in the debug dropdown list as follows:
Select F5 to run the application in the debug mode.
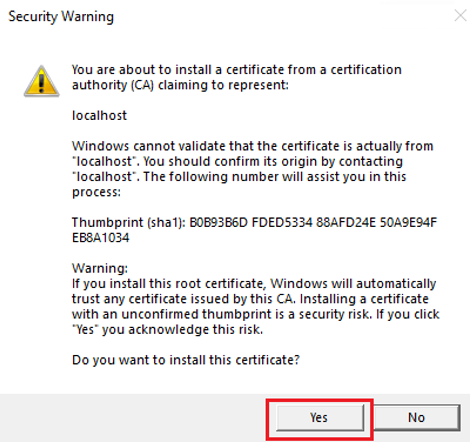
If a Security Warning dialog appears, select Yes.
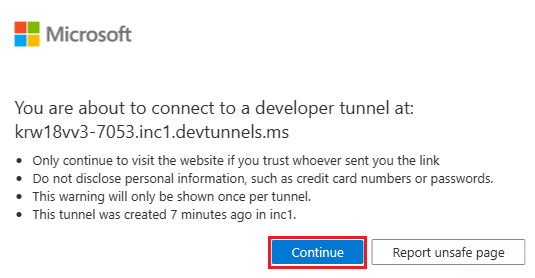
A pop-up window appears.
Select Continue.
The dev tunnel home page opens in a new browser window and the dev tunnel is now active.

Go to Visual Studio, select View > Output.
From the Output console dropdown menu, select Dev Tunnels.
The Output console shows the dev tunnel URL.

Go to Connector Developer Portal.
Select New Connector.

Enter the following details to register a new connector:
- Connector name.
- Logo
- Short description of your app (10 words or less).
- Detailed description of what your Connector does (3-5 sentences).
- Company website.
- Configuration page for your Connector as
https://[BASE_URI]/connector/setup. - Set Valid domains as
https>//[Base URI]. - Select Yes to enable the action on Connector cards.
- Set Actions URL as
https://[BASE_URI]/Task/Update. - Select I accept the terms and conditions of the App Developer Agreement.
- Select Save.
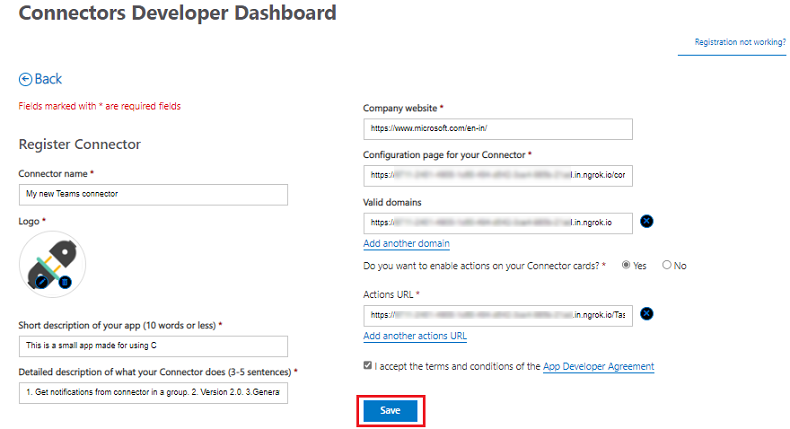
You've successfully registered a new connector. The window appears with the registered connector ID.

Tip
Save the Connector ID for future reference.
Open the TeamsToDoAppConnector.csproj file from the cloned repository.
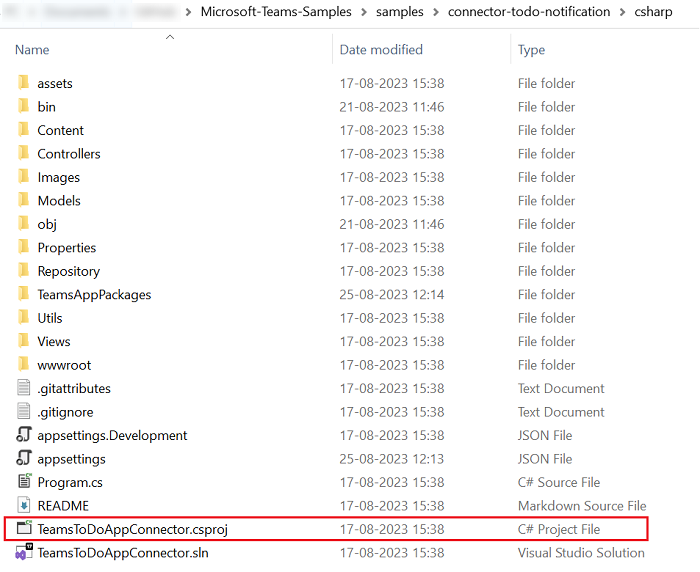
In your cloned repository, go to Microsoft-Teams-Samples > samples > connector-todo-notification > csharp.
Open the appsettings.json file in Visual Studio and do the following updates.
- Replace the
BASE_URLwithngork URLordev tunnel URL. - Replace
CONNECTOR_IDwith the connector ID created.

- Replace the
In your cloned repository, go to Microsoft-Teams-Samples > samples > connector-todo-notification > csharp > TeamsAppPackages.
Open the manifest.json file in Visual Studio and make the following changes:
Replace
CONNECTOR_IDwith the connector ID created.Replace
VALID-DOMAINto your ngrok OR dev tunnel domain excluding https://.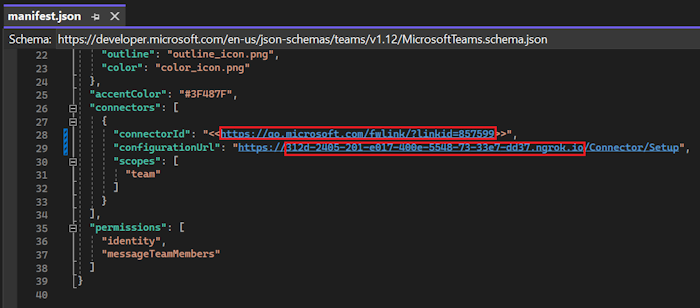
Press F5 to run the project. A web page opens.
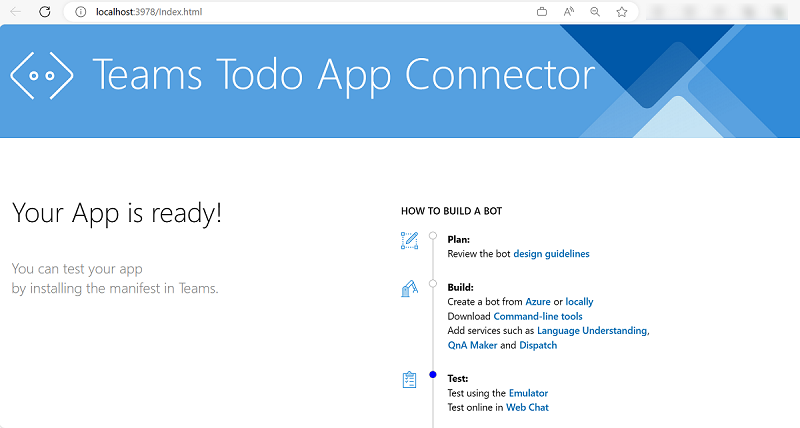
Test connector in Microsoft Teams
Create a .zip file with the following files that are present in the Manifest folder:
manifest.json
outline-icon.png
color-icon.png

Go to Microsoft Teams.
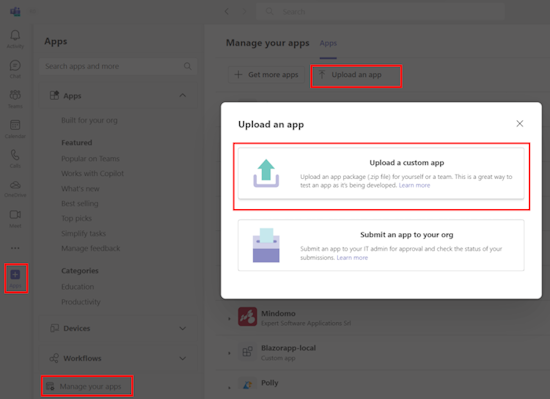
In the left pane, select the Apps icon.
Select Manage your apps.
Select Upload an app.
Look for the option to Upload a custom app.
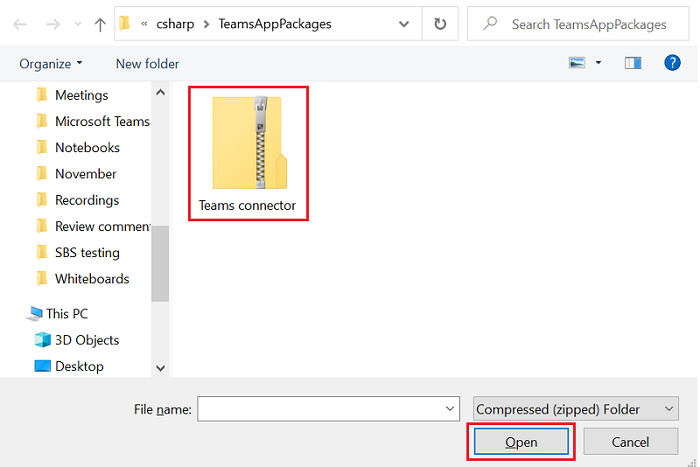
Select the .zip file that you created in the Manifest folder and select Open.
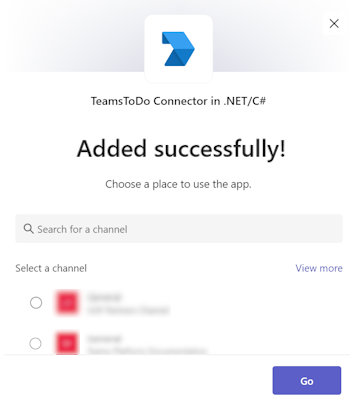
Select Add.

Search and select the required channel or select a channel from the list, and move through the dialog to select Go.
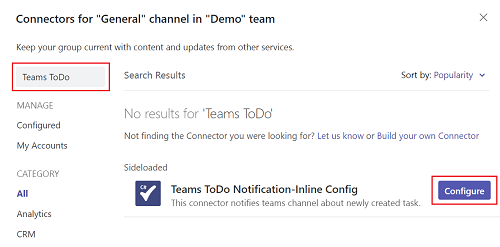
In the left pane, search Teams ToDo connector in the search bar and select Configure.
Select either Created or Updated on the registration page and select Save.
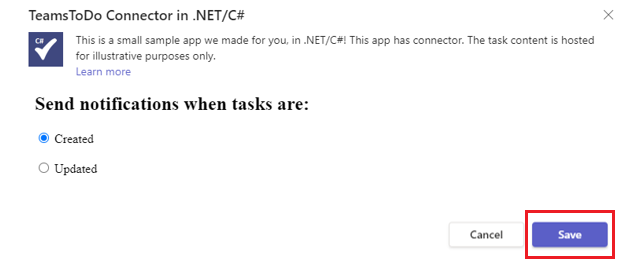
After configuration, you can see notification in channel with link to Task Manager Portal.

Go to Task Manager Portal.

Select Create New.

Enter the new task details:
- Title
- Description
- Assign To
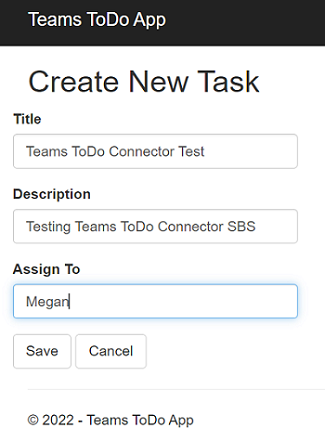
Select Save.
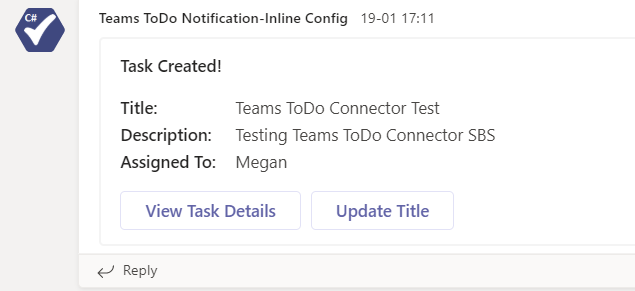
The message card appears in the registered Teams channel.
Tip
You can try the actionable buttons available on the message card.
Complete challenge
Did you come up with something like this?

Congratulations!
You've completed the tutorial to get started with Microsoft Teams connectors!
Have an issue with this section? If so, please give us some feedback so we can improve this section.
