Quick start guide for using Assistants API with Teams AI library
Get started using OpenAI or Azure OpenAI Assistants API with Teams AI library in Math tutor assistant sample. This guide uses the OpenAI Code Interpreter tool to help you create an assistant that specializes in mathematics. The bot uses the gpt-3.5-turbo model to chat with Microsoft Teams users and respond in a polite and respectful manner, staying within the scope of the conversation.
Prerequisites
To get started, ensure that you have the following tools:
| Install | For using... |
|---|---|
| Visual Studio Code | JavaScript, TypeScript, or C Sharp build environments. Use the latest version. |
| Teams Toolkit | Microsoft Visual Studio Code extension that creates a project scaffolding for your app. Use the latest version. |
| Git | Git is a version control system that helps you manage different versions of code within a repository. |
| Node.js | Back-end JavaScript runtime environment. For more information, see Node.js version compatibility table for project type. |
| Microsoft Teams | To collaborate with everyone, you work with through apps for chat, meetings, and call-all in one place. |
| OpenAI or Azure OpenAI | First create your OpenAI API key to use OpenAI's GPT. If you want to host your app or access resources in Azure, you must create an Azure OpenAI service. |
| Microsoft Edge (recommended) or Google Chrome | A browser with developer tools. |
| Microsoft 365 developer account | Access to Teams account with the appropriate permissions to install an app and enable custom Teams apps and turn on custom app uploading. |
If you've already run the samples before or encountered a runtime error, follow these steps to start fresh:
- Check all the
.envandenv/.env.*.*files in the sample and delete any automatically populated values to ensure that Teams Toolkit generates new resources for you. - If you don’t want Teams Toolkit to generate the app ID and password, update the
MicrosoftAppIdandMicrosoftAppPasswordin the.envfile with your own values. - Remove values or leave the values blank for SECRET_BOT_PASSWORD and TEAMS_APP_UPDATE_TIME in the
.envfile to avoid conflicts.
Teams Toolkit automatically provisions MicrosoftAppId and MicrosoftAppPassword resources. If you want to use your own resources, you need to manually add them to the .env file. Teams Toolkit doesn't auto-generate the following resources:
- An Azure OpenAI or OpenAI key
- A database or similar storage options
Build and run the sample app
Get started with Teams AI library using the Math tutor assistant sample. It enables your computer’s localhost to quickly execute a Teams AI library-based sample.
Go to the sample.
Run the following command to clone the repository:
git clone https://github.com/microsoft/teams-ai.gitGo to Visual Studio Code.
Select File > Open Folder.
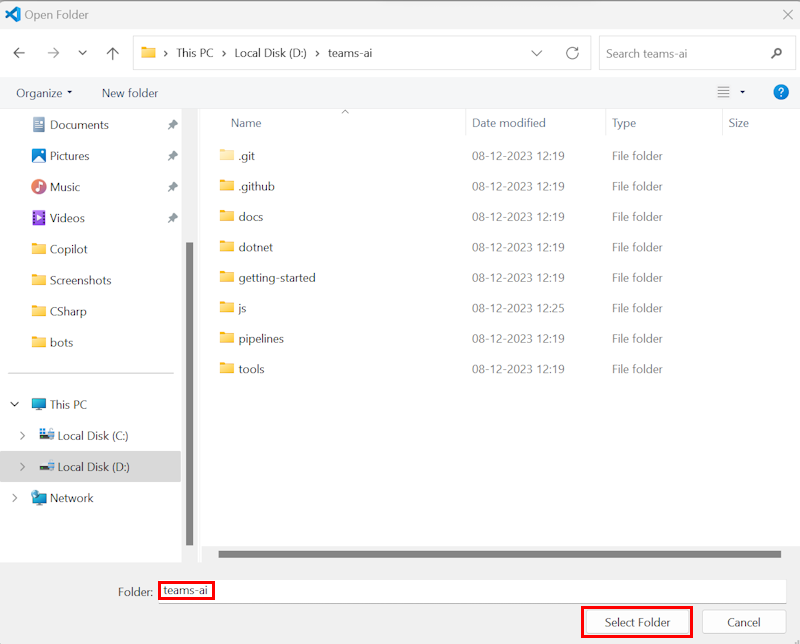
Go to the location where you cloned teams-ai repo and select the teams-ai folder.
Select Select Folder.

Select View > Terminal. A terminal window opens.
In the terminal window, run the following command to go to the js folder:
cd .\js\Run the following command to install dependencies:
yarn installRun the following command to build dependencies:
yarn buildAfter the dependencies are installed, select File > Open Folder.
Go to teams-ai > js > samples > 04.ai-apps > d.assistants-mathBot and select Select Folder. All the files for the Math tutor assistant sample are listed under the EXPLORER section in Visual Studio Code.
Under EXPLORER, duplicate the
sample.envfile and update the duplicate file to.env.Update the following steps based on the AI services you select.
Go to
envfolder and update the following code in./env/.env.local.userfile:SECRET_OPENAI_KEY=<your OpenAI key> ASSISTANT_ID=<your Assistant ID>Go to the
infrafolder and ensure that the following lines in theazure.bicepfile are commented out:// { // name: 'AZURE_OPENAI_KEY' // value: azureOpenAIKey // } // { // name: 'AZURE_OPENAI_ENDPOINT' // value: azureOpenAIEndpoint // }
Copy the sample to a new directory that isn't a subdirectory of
teams-ai.From the left pane, select Teams Toolkit.
Under ACCOUNTS, sign in to the following:
- Microsoft 365 account
- Azure account
To debug your app, select the F5 key.
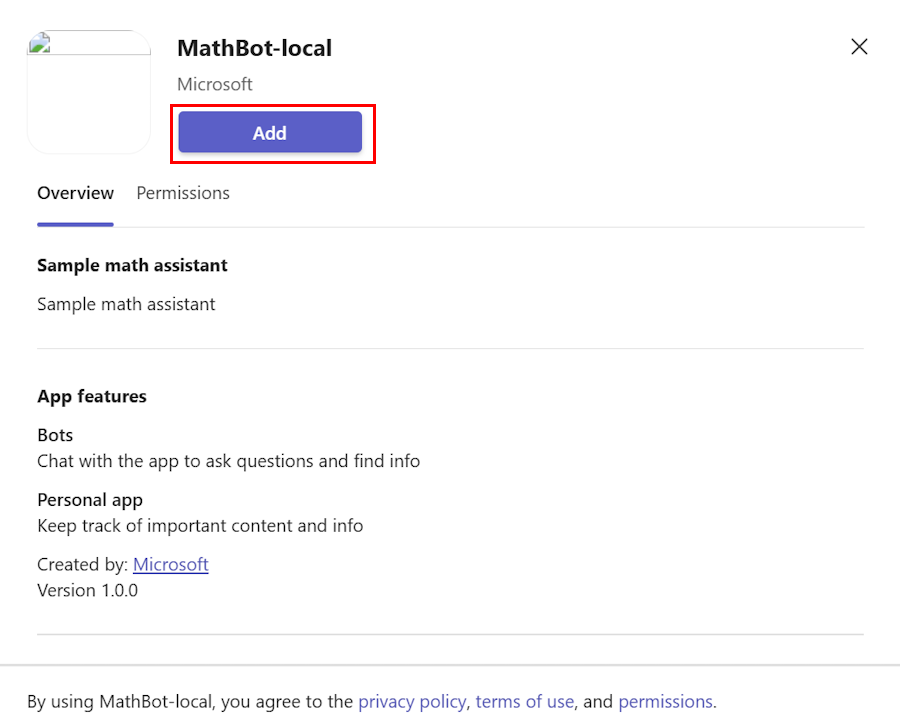
A browser tab opens a Teams web client requesting to add the bot to your tenant.
Select Add.

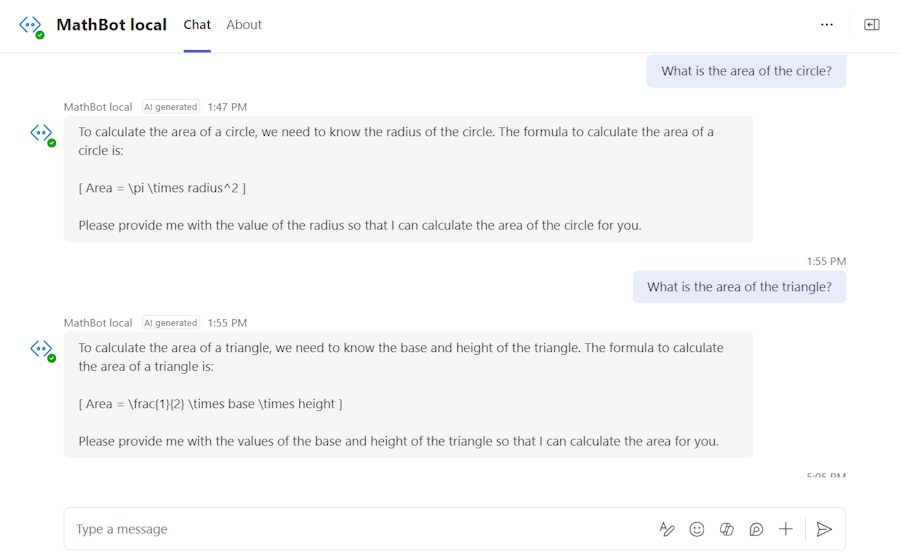
A chat window opens.
In the message compose area, send a message to invoke the bot.
Note
If you're building a bot for the first time, it's recommended to use Teams Toolkit extension for Visual Studio Code to build a bot, see build your first bot app using JavaScript.
Additional tools
You can also use the following tools to run and set up a sample:
Teams Toolkit CLI: You can use the Teams Toolkit CLI to create and manage Microsoft Teams apps from the command line. For more information, see Teams Toolkit CLI set up instructions.
Bot Framework Emulator: The Bot Framework Emulator is a desktop application that allows you to test and debug your bot locally. You can connect to your bot by entering the bot’s endpoint URL and Microsoft app ID and password. You can then send messages to your bot and see its responses in real-time. For more information, see Bot Framework Emulator set up instructions.
Manual setup: If you prefer to set up your resources manually, you can do so by following the instructions provided by the respective services. For more information, see manual set up instructions.
