Opening source files in Visual Studio Code
The Open source files in Visual Studio Code experiment allows you to use Microsoft Edge DevTools, but then edit your files in Visual Studio Code instead of in the code editor of the DevTools Sources tool.
When you use this experiment, if you use Visual Studio Code and you use DevTools to change your CSS rules, you no longer have to use the code editor in the Sources tool of DevTools. You can simply use the code editor in Visual Studio Code. When you turn on this experiment, local files will get a different treatment.
Setting up editing local files in Visual Studio Code
First, select DevTools > Settings > Experiments > Open source files in Visual Studio Code, and then re-start DevTools.
With this experiment enabled, suppose that in Microsoft Edge, you go to a local server (such as http://localhost or http://127.0.0.1), or open a local file.
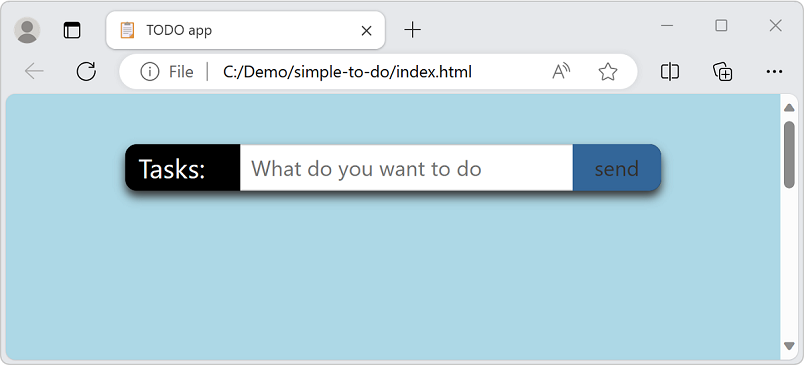
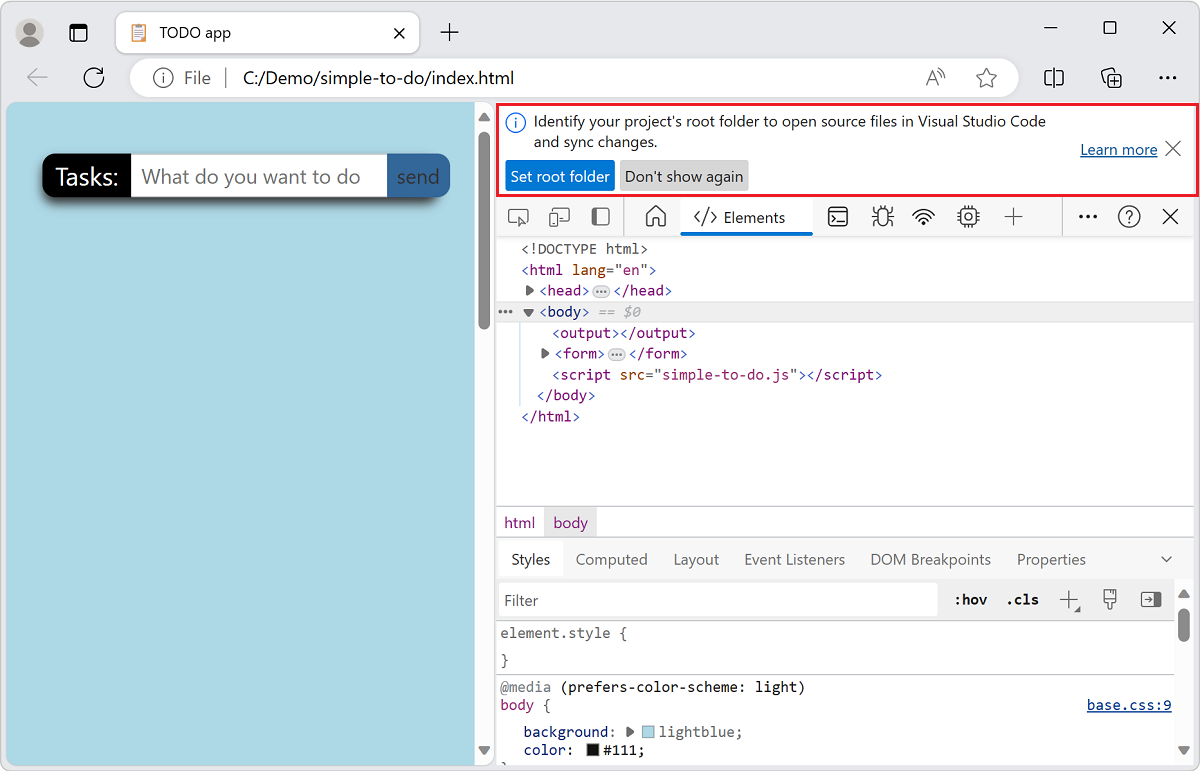
When you open DevTools, you are prompted to identify your root folder. You can opt out by selecting Close (x) or selecting the Don't show again button. You can get more information by selecting the Learn more link.
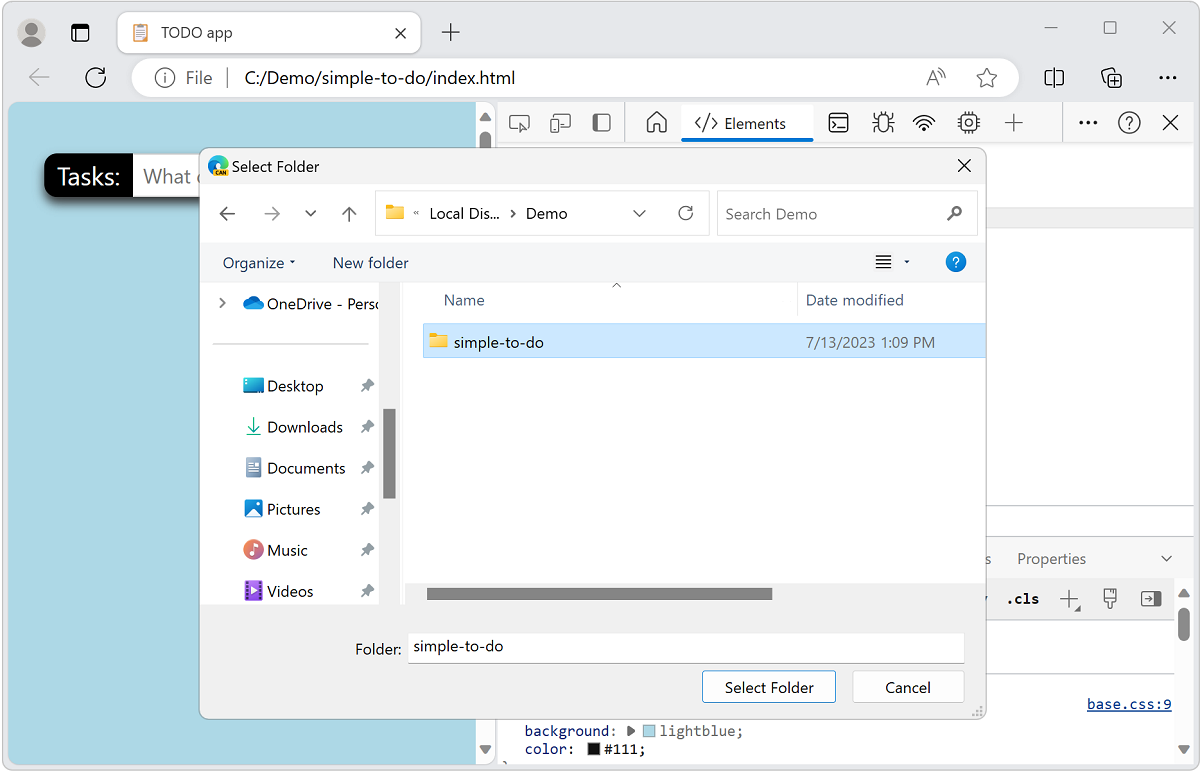
If you select the Set root folder button, the operating system prompts you to navigate to the folder and select it.
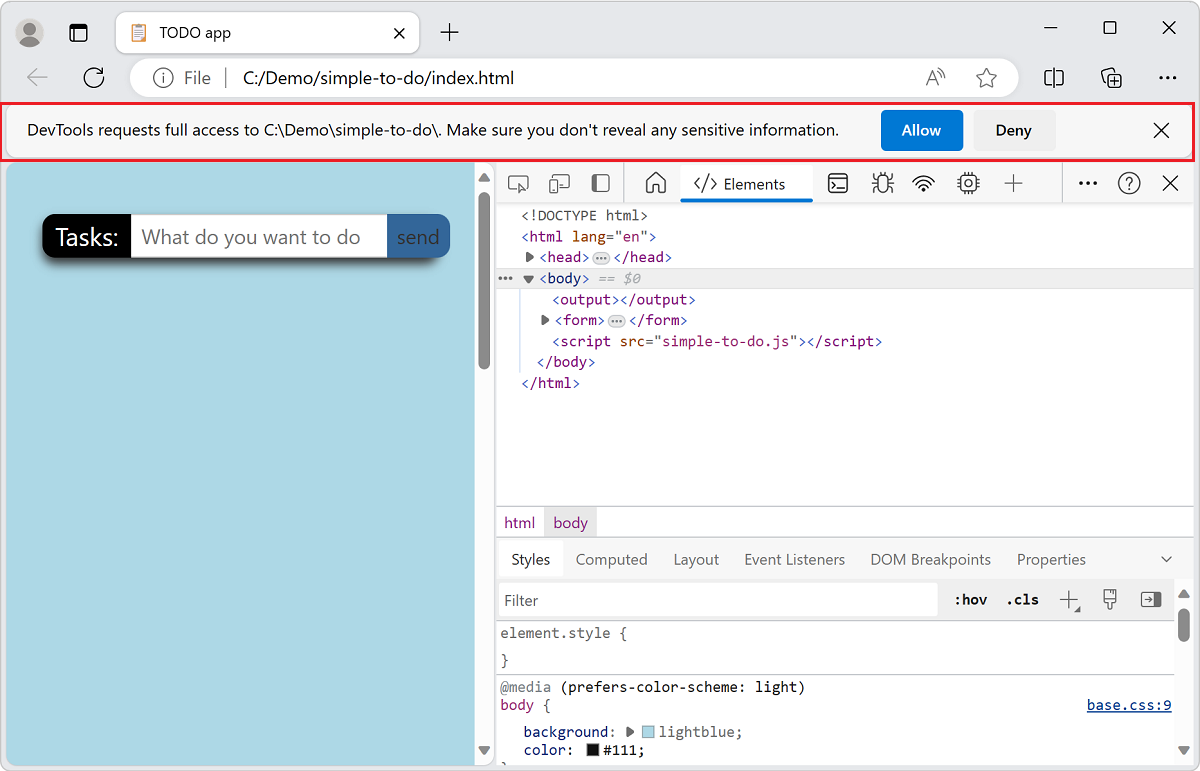
After you select a root folder, you need to grant DevTools full access to the folder. Above the toolbar, a prompt with Allow or Deny buttons asks you whether to grant permission to DevTools to access the folder.
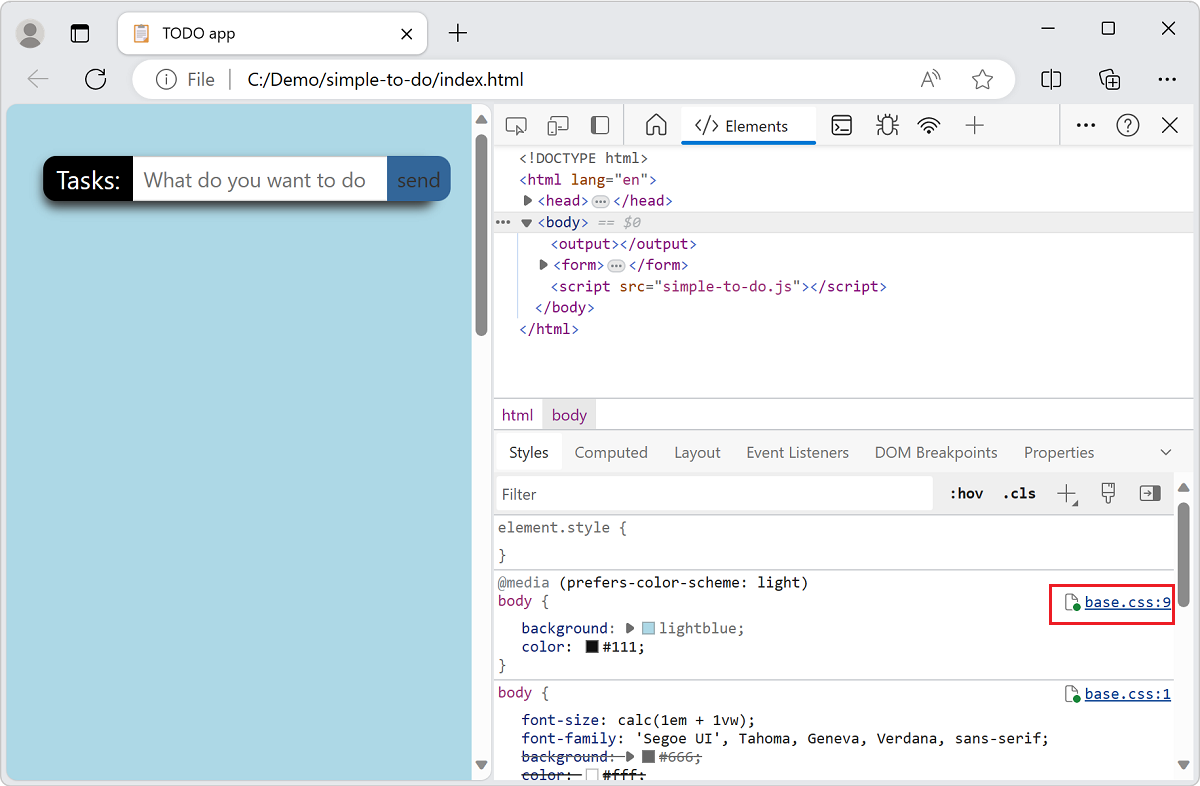
After you grant permission, the folder you select is added as a Workspace in DevTools, in the Filesystem tab of the Sources tool. This means that any file you edit in DevTools now opens in Microsoft Visual Studio Code instead of in the Sources tool. As an indicator, we show a linked icon next to the file name. In this example, we'll select the base.css link in the Styles tool.
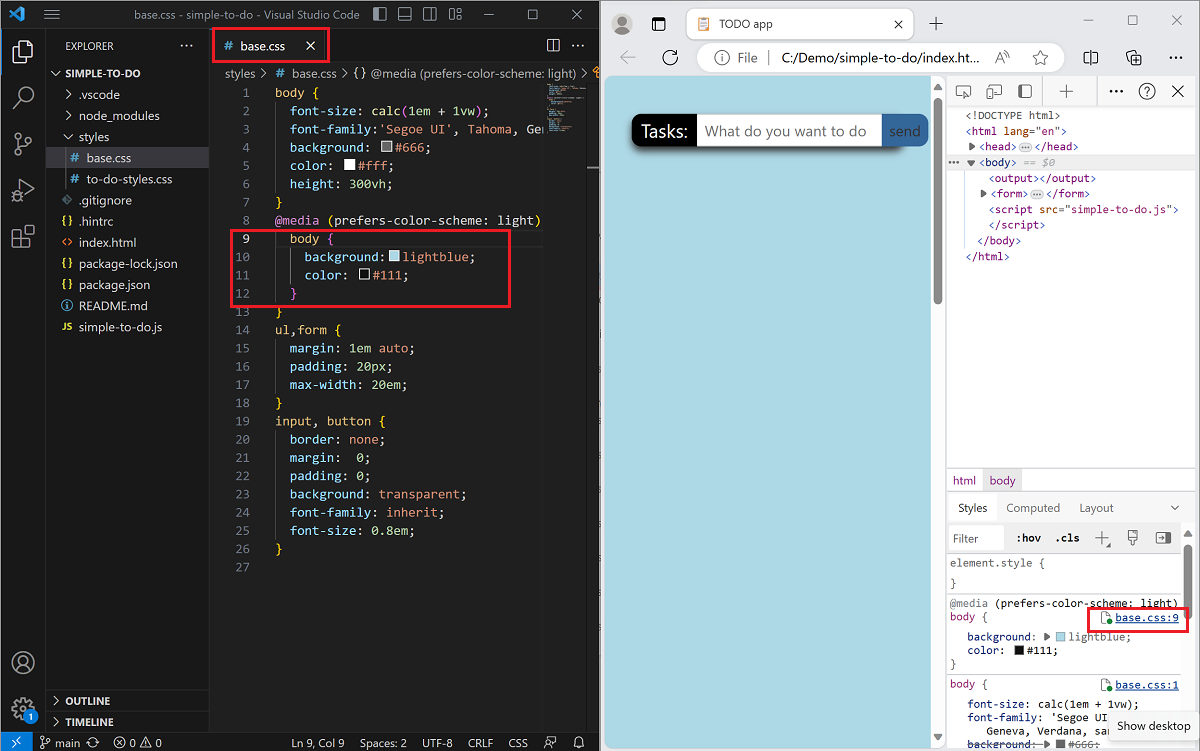
DevTools opens an instance of Visual Studio Code and shows all the files in the root folder. DevTools also opens the file you've selected, scrolled to the correct line of the CSS selector.
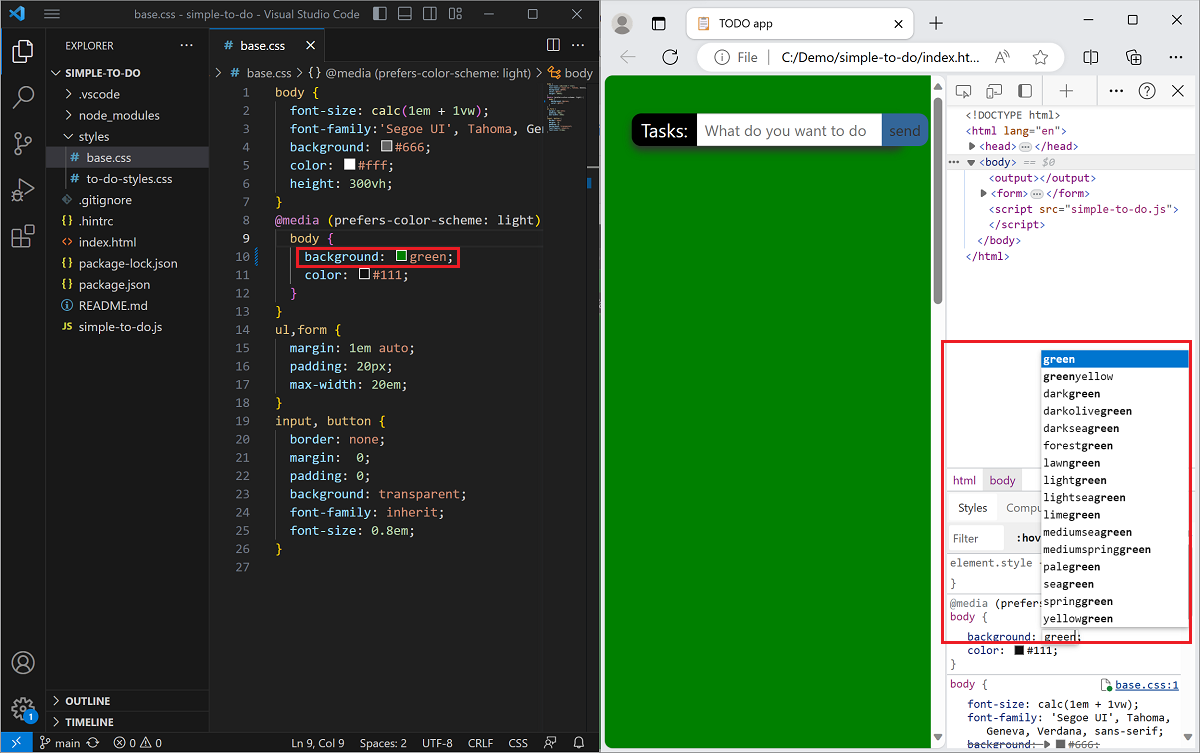
Any changes that you make to the file in DevTools will now be synced to Visual Studio Code. For example, if you change the background to be green for the styles of the body, the same CSS rule will automatically be added to the base.css file in the code editor of Visual Studio Code.
Changing the workspace settings
To change the behavior of the Open source files in Visual Studio Code experiment, go to the DevTools Settings page by clicking Settings (the gear icon) or pressing Shift+?, and then select the Workspace page:
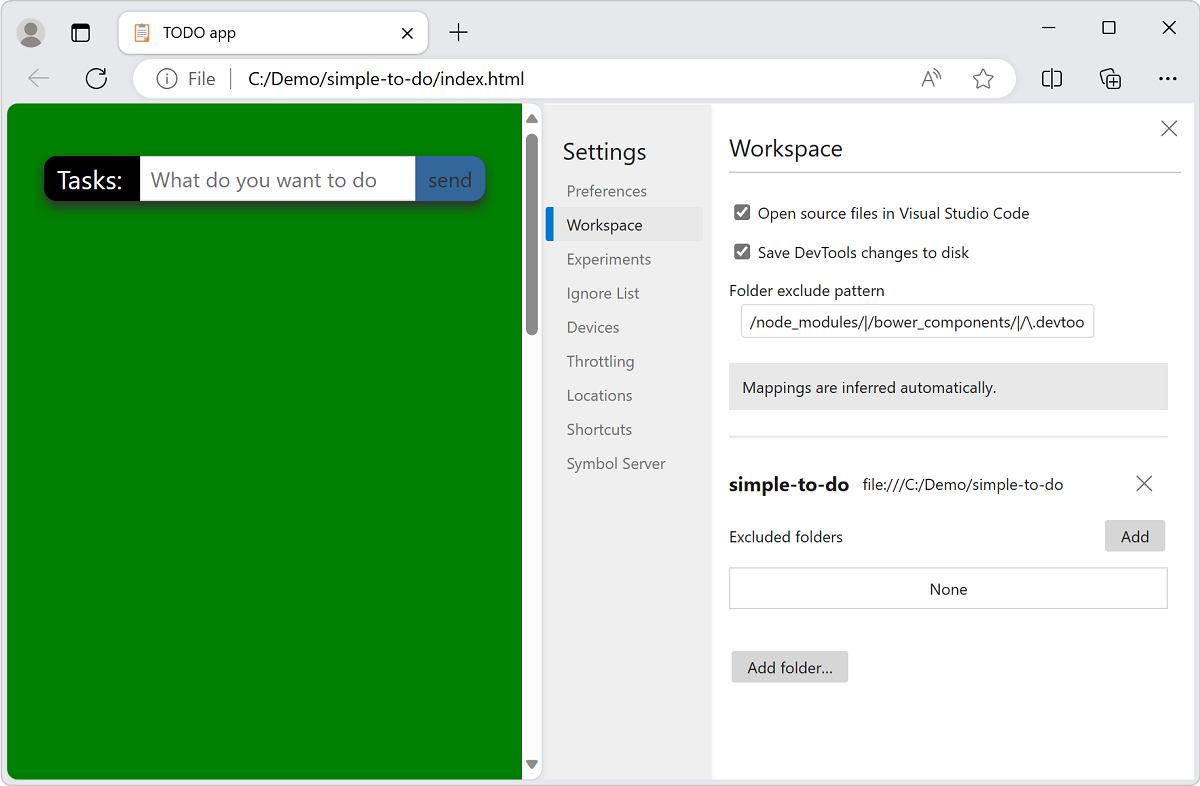
The Settings > Workspace page lists your workspaces, along with the following configuration options:
| UI control | Description |
|---|---|
| Open source files in Visual Studio Code checkbox | Sets whether to open source files in Visual Studio Code. |
| Save DevTools changes to disk checkbox | Automatically saves DevTools changes to disk. |
| Folder exclude pattern text box | Automatically excludes folders from a workspace folder. |
| Add button next to Excluded folders | Excludes a folder from a specific workspace. |
| Add folder button | Adds an additional workspace. |