Build Copilot user experience
In this article, you learn how to create the user interface (UI) for your AI solution that provides users with a Copilot experience that is consistent across Business Central.
Prompt dialog page introduction
The fundamental component of Copilot from the UI perspective is the PromptDialog type page. The PromptDialog page is designed for creating Copilot experiences that assist users in making informed decisions about the AI-generated output. Within a single page object, the PromptDialog page type creates a comprehensive flow in the UI, where users can provide input, view the subsequent output, and revise it as needed. The user can then choose to save their work or discard it.
| Start Copilot > | Provide input (prompt) > | AOAI generates results > | Show results (content) |
|---|---|---|---|
 |
Prompt dialog modes
PromptDialog page type has three different display modes to accommodate the flow for generating AI content:
| Mode | Description |
|---|---|
| prompt mode | This mode is used to input data to influence the results generated by AI. You can design this mode so that input is provided manually by the user, for example by entering data in one or more fields, or programmatically, for example by extracting existing data from a table. This mode is optional because AI logic might not require it. |
| generate mode | The mode appears while the platform connects to the Azure OpenAI Service and content is being generated, functioning as a kind of progress bar for the user. This mode doesn't require any added logic on your part, because the platform controls its behavior. Its UI is limited to a caption, a link to terms of use, and an action to stop generating. The caption is customizable. |
| content mode | This mode is used to display the AI-generated results and is initiated automatically after the generate mode allowing the user to review the content, regenerate, save, or discard the results. |
Fundamental Copilot flow
The following diagram illustrates PromptDialog page type and its different modes within the fundamental Copilot flow. Your flow might vary depending on your design choices, like whether to use a prompt mode and which mode displays when the PromptDialog page opens.
The following table gives an overview of the typical flow from the user's perspective and how it's achieved in AL code.
| Phase | In UI | In AL code | Learn more |
|---|---|---|---|
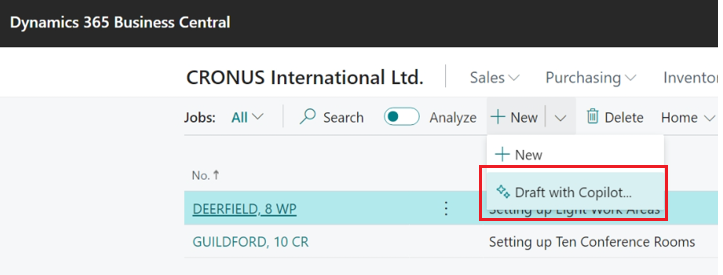
| 1 | User starts the Copilot experience by selecting an action on a page. | An action control on a page runs the PromptDialog type page |
Launch experience |
| 2 | The PromptDialog page opens in the prompt mode, where users can provide input. | The PromptDialog page is defined by setting the PageType property to PromptDialog. |
Create PromptDialog type page |
| 3 | User enters information that Copilot uses to generate results. | The prompt area of the PromptDialog page defines what the user can input, which typically consists of one or more fields. |
Design the prompt mode |
| 4 | User selects a button to start generating content with AI | The system action Generate calls the procedure that starts the AI generation process. |
Add the generate action |
| 5 | The generation mode appears while the results are being generated. | Handled automatically by the platform. However, you can customize its caption by calling Dialog.Open() or Dialog.Update(). | Customize the genarate mode caption |
| 6 | The content mode appears and displays the AI-generated proposal for review by the user. | The content area of the PromptDialog page defines the layout of AI-generated content on the page. |
Design the content mode |
| 7 | User chooses to save or discard the proposal by using actions at the bottom of the page | A system action for saving and one for discarding trigger the logic to handle the content with respect the user's choice, and the prompt dialog page closes. | Add save and discard actions |
Code example
page 50100 "Copilot Job Proposal"
{
    Caption = 'Draft new job with Copilot';
    PageType = PromptDialog;
    Extensible = false;
    IsPreview = true;
    DataCaptionExpression = UserInput;

    layout
    {
        area(Prompt)
        {
            field(ProjectDescription; UserInput)
            {
                ShowCaption = false;
                MultiLine = true;
            }
        }
        area(Content)
        {
            field("Job Short Description"; JobDescription)
            {
            }
            field("Job Full Details"; JobFullDescription)
            {
            }
            field(CustomerNameField; CustomerName)
            {
            }
            part(ProposalDetails; "Copilot Job Proposal Subpart")
            {
            }
        }

        area(PromptOptions)
            {
                field(Tone; Tone) {}
                field(TextFormat; TextFormat) {}
                field(Emphasis; Emphasis){}
            }
    }
    actions
    {
        area(SystemActions)
        {
            systemaction(Generate)
            {
                Caption = 'Generate';
                trigger OnAction()
                begin
                    // The code triggering the Copilot interaction. This is where you call the Copilot API, and get the results back. You must implement this yourself.
                    RunGeneration();
                end;
            }
            systemaction(Regenerate)
            {
                Caption = 'Regenerate';
                ToolTip = 'Regenerate the Job proposed by Dynamics 365 Copilot.';
                trigger OnAction()
                begin
                    // The code triggering the Copilot interaction. This is where you call the Copilot API, and get the results back. You must implement this yourself.
                    RunGeneration();
                end;
            }
            systemaction(OK)
            {
                Caption = 'Keep it';
                ToolTip = 'Save the proposed Job.';
            }
            systemaction(Cancel)
            {
                Caption = 'Throw it away';
                ToolTip = 'Throw away the proposed Job.';
            }
        }
    }

    trigger OnQueryClosePage(CloseAction: Action): Boolean
    var
        SaveCopilotJobProposal: Codeunit "Save Copilot Job Proposal";
    begin
        if CloseAction = CloseAction::OK then
            SaveCopilotJobProposal.Save(CustomerNo, CopilotJobProposal);
    end;
}