Add multilingual support
APPLIES TO: Composer v1.x and v2.x
Bot Framework Composer provides multilingual support for bot development in different languages, with English as the default. With a few changes to the settings in Composer, you can author .lg and .lu files in your preferred language, and give your bot the ability to talk to users in different languages.
This article shows how to build a basic bot in English (en-us) and walks through the process to author the bot in Chinese (zh-cn).
Note
If your bot has LUIS or QnA integrations, you'll also need to consider additional constraints of LUIS supported languages and QnA supported languages.
Note
Azure QnA Maker will be retired on 31 March 2025. Beginning 1 October 2022, you won't be able to create new QnA Maker resources or knowledge bases. A newer version of the question and answering capability is now available as part of Azure AI Language.
Custom question answering, a feature of Azure AI Language, is the updated version of the QnA Maker service. For more information about question-and-answer support in Composer, see Natural language processing.
Note
Language Understanding (LUIS) will be retired on 1 October 2025. Beginning 1 April 2023, you won't be able to create new LUIS resources. A newer version of language understanding is now available as part of Azure AI Language.
Conversational language understanding (CLU), a feature of Azure AI Language, is the updated version of LUIS. For more information about question-and-answer support in Composer, see Natural language processing.
Prerequisites
- Install Composer
- Access to LUIS resources
How does multilingual support work?
Composer creates copies of your source language files so that you can add manual translation. If you build a bot with just a single dialog, you can access your bot's source code (for example, in the directory: C:\Users\UserName\Documents\Composer\CoolBot) and see the following file structure:
/coolbot
   coolbot.dialog
   /language-generation
      /en-us
         common.en-us.lg
         coolbot.en-us.lg
   /language-understanding
      /en-us
         coolbot.en-us.lu
When adding languages, Composer creates copies of the language files. For examples, if you add Chinese (zh-cn), your bot's file structure will look like the following:
/coolbot
   coolbot.dialog
   /language-generation
      /en-us
         common.en-us.lg
         coolbot.en-us.lg
      /zh-cn
         common.zh-cn.lg
         coolbot.zh-cn.lg
   /language-understanding
      /en-us
         coolbot.en-us.lu
      /zh-cn
         coolbot.zh-cn.lu
Note
Both en-us and zh-cn are locales. A locale is a set of parameters that defines the user's language, region and any special variant preferences that the user wants to see in their user interface.
After adding the languages, you can add manual translations with your source language files as reference. When you're done with the translation process, you must set the locale in the Default language field. This tells your bot in which language it must talk to the users. However, this locale setting will be overwritten by the client's (for example, Bot Framework Emulator) locale setting.
In the next sections, you'll use a basic bot in English and walk through the steps to author bots in multiple languages.
Build a basic bot
To show how multilingual support works in Composer, we build a bot in English for demo purposes. If you already have a bot, you can skip to the update language settings section.
We suggest using the Core Bot with Language template when creating multilingual bots. In this example, you'll see how to create a multilingual joke bot.
- Open Composer and select Create new.
- Select the language you want to use, and then select Core Bot with Language. Now select Next.
- Name the bot
MultilangBotand select Create to make your bot.
Now you need to add an Intent recognized (LUIS) trigger.
Go to the authoring canvas. Select the More options button next to the MultilangBot dialog and then select Add new trigger.
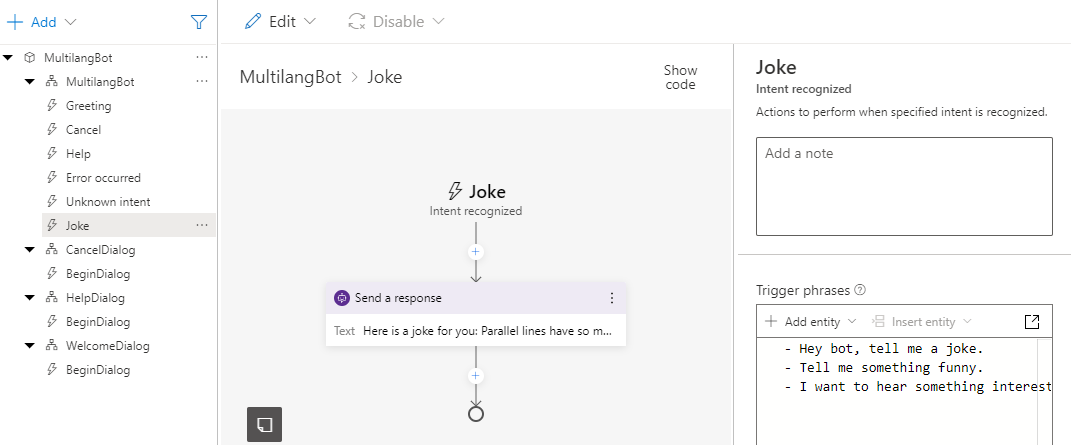
The Create a trigger window will appear. Name your trigger Joke, and add the following to Trigger phrases:
- Hey bot, tell me a joke.
- Tell me something funny.
- I want to hear something interesting.
Select Submit to create the trigger.
Now that your bot can recognize Joke intent, it should send a joke response to the user.
Select the Add button under the Joke (intent recognized) trigger in the authoring canvas. Then select Send a response.
Add the following joke response variation:
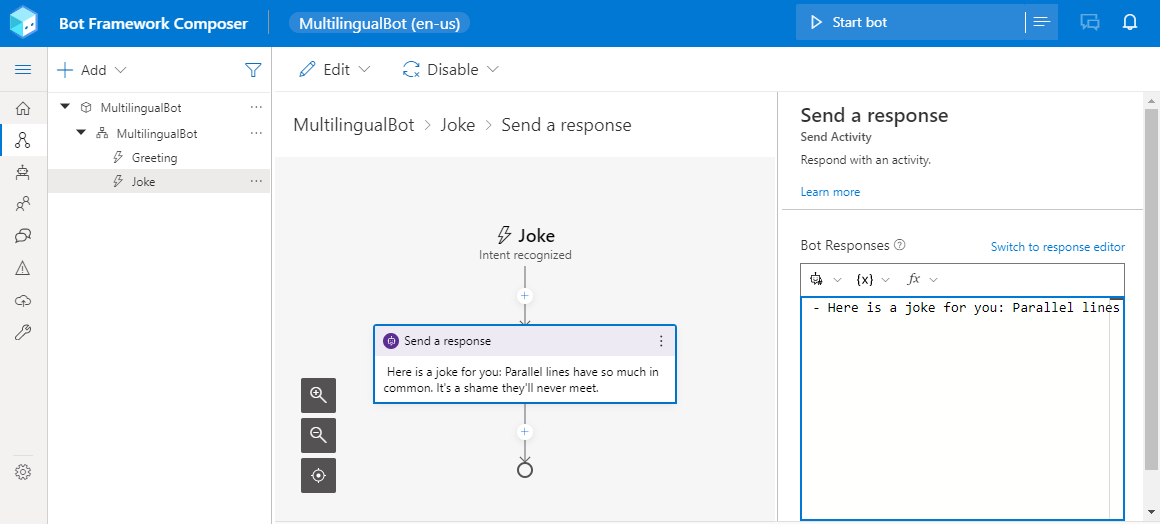
Here is a joke for you: Parallel lines have so much in common. It's a shame they'll never meet.The MultilangBot is shown below:
Finally you need to add LUIS related values to get your bot running. If you've already done this, you can skip to the next section.
Select the error icon in the top right on the left next to the MultilangBot bot project. Then select the Fix in bot settings link.
You'll be taken to the Azure Language Understanding tab on the Configure page.
If you know your Language Understanding authoring key and Language Understanding region, fill in the values now. If you don't select Set up Language Understanding, select the option that works best for you. For more information, see the article about adding LUIS to your bot.
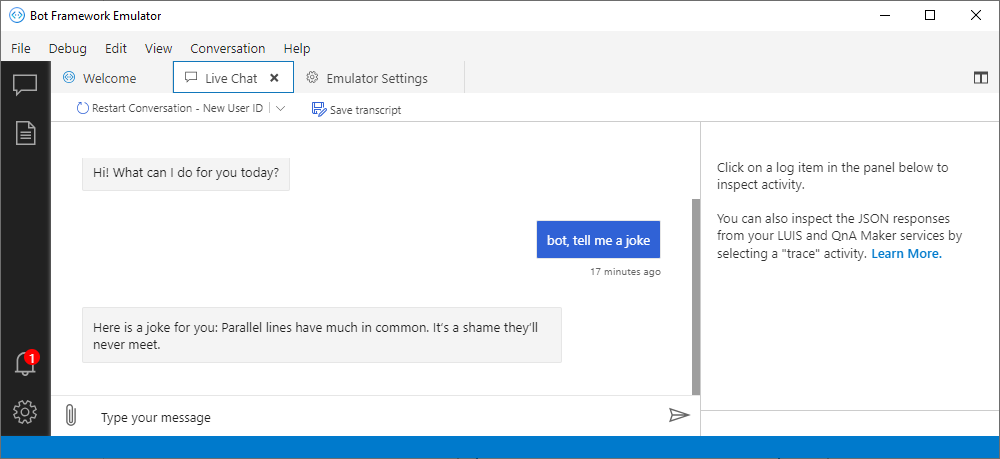
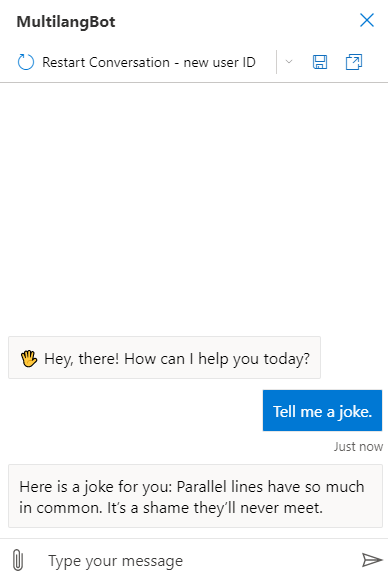
After adding LUIS details you can test your bot in Web Chat, as shown below:
Update language settings
You need to update the Localization settings on the Configure page to use multiple languages.
Select the Configure page from the left and then select the Localization tab. Select Manage bot language to choose your bot's languages.
A pop-up window will appear with the following settings that need to be updated:
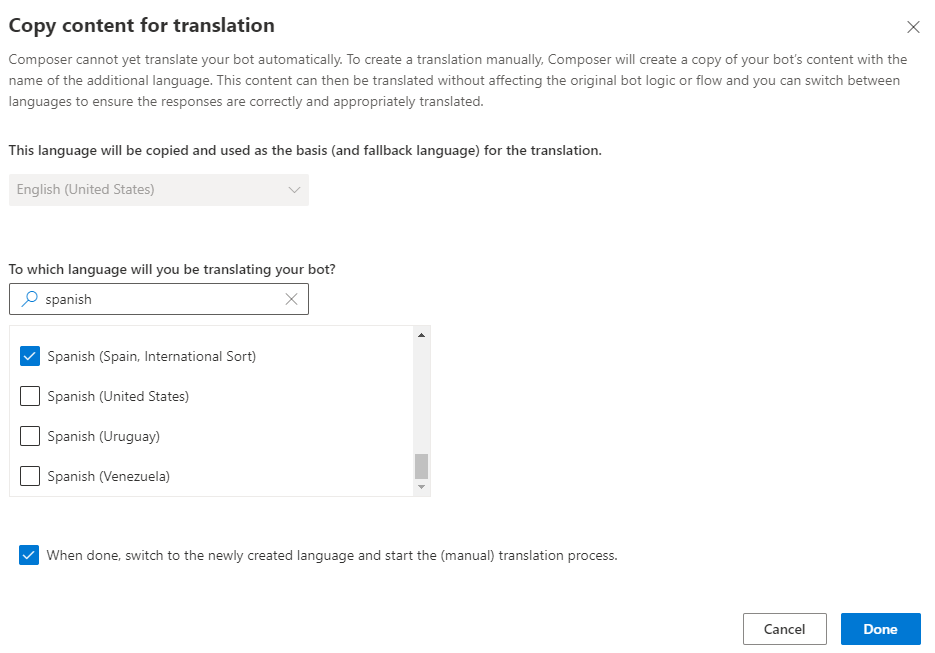
The first setting is the language to copy resources from. You can leave this as English (United States).
The second setting is the preferred bot authoring languages. You can select multiple languages. In this example, we use Spanish (Spain, International Sort). Hover your mouse over the selection and you'll see the
locale. For this example, it's es-es.The final setting is a check box. When checked, your selected language will be the active authoring language. When you have two or more languages, the first selected language becomes the active authoring language.
This is what your screen should look like:
Finally, select Done on the bottom right.
Your added language will now appear on the Localization tab along with your default language. The language will change on the top left of Composer, too.
Author your bot in the selected language
When you're done updating the language settings, you can start authoring your bot in your selected authoring language.
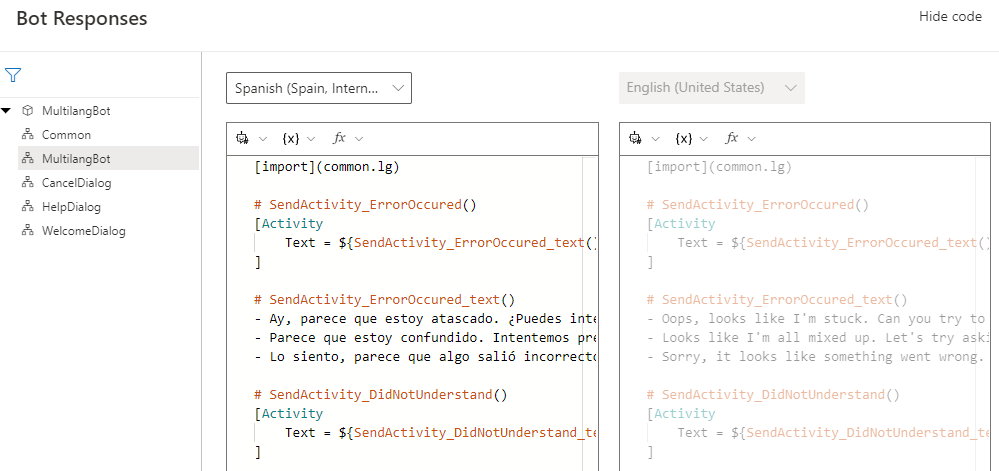
In the Bot Responses page, select Show code on the upper right corner of the screen to manually translate the responses in your selected authoring language. Make sure you select all the required dialogs and manually translate all responses.
See the example below for what your screen should look like while translating bot responses:
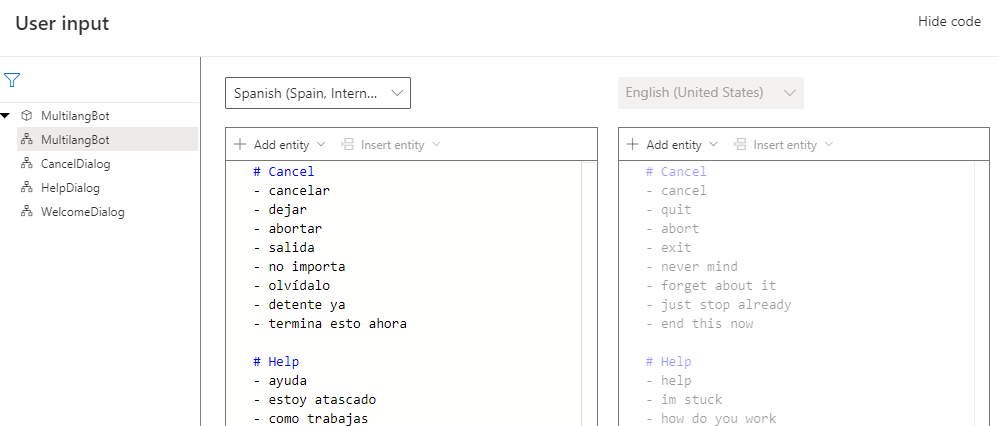
In the User input page, select Show code on the upper right corner of the screen to manually translate the responses in your selected authoring language. Make sure you select all the required dialogs and manually translate all responses.
See the example below for what your screen should look like while translating:
Test
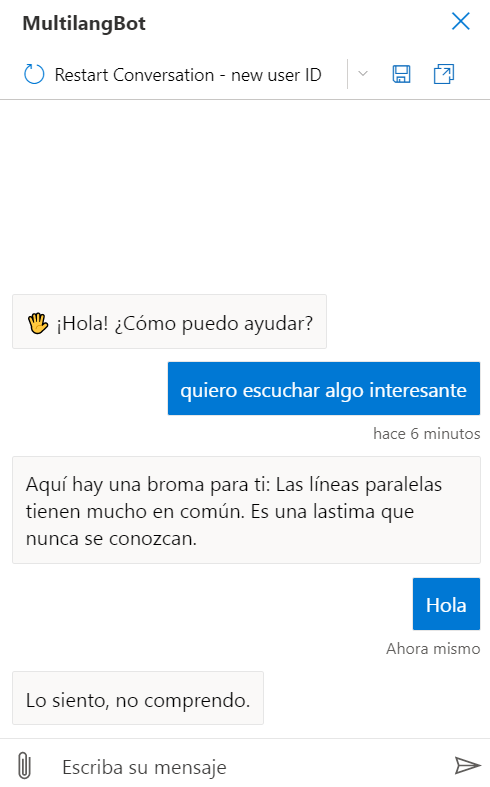
Go to Configure and select the Localization tab. Set the added language as your default language.
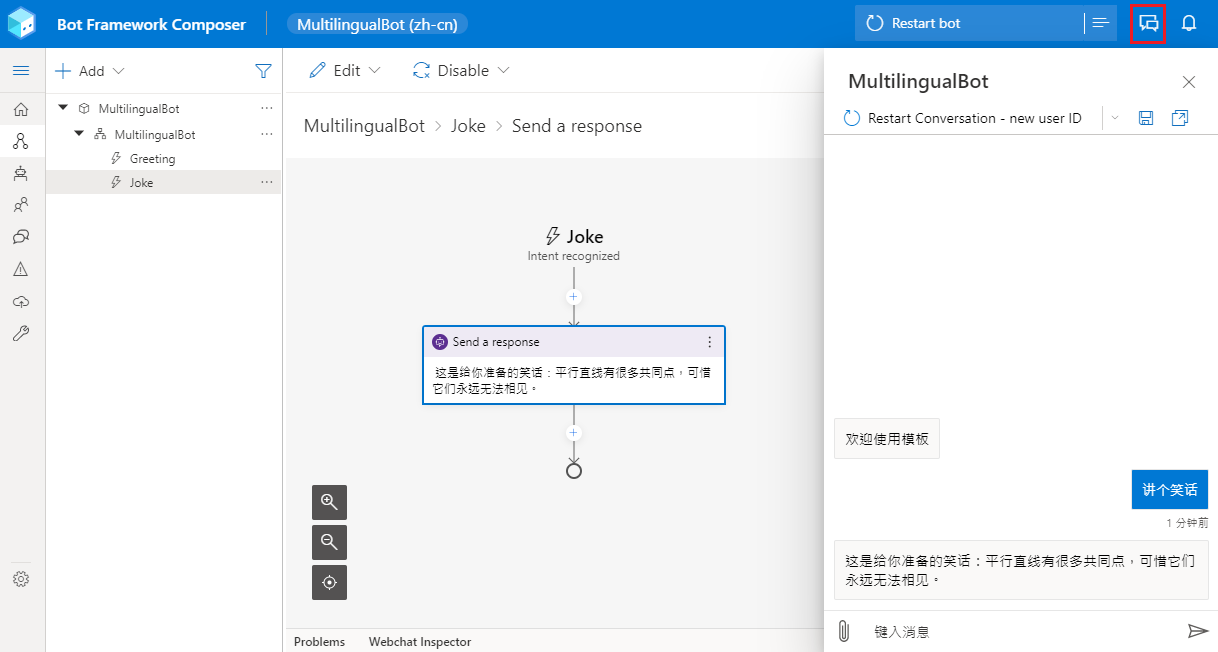
On the top right, select the Start bot button. Then select the Open Web Chat button to open Web Chat in Composer.
Send something to the bot. Notice that the bot responds appropriately given your message.
Important
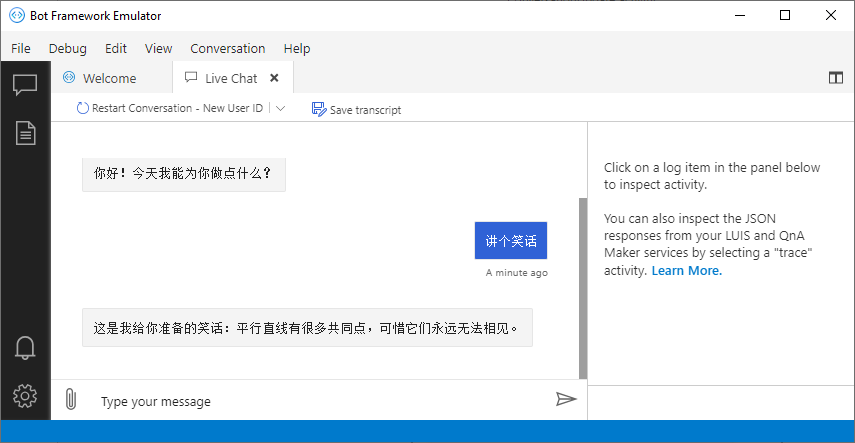
The Emulator locale needs to be changed locally to see added languages if you want to test with the Emulator instead of Web Chat. Take the following steps to do so:
- Open the Emulator.
- Open the Settings tab.
- Set your desired locale in the Locale field and select Save.
- Connect to the bot.
