Microsoft Flow – Copy files from SharePoint to a local PC
Microsoft Flow – Copy files from SharePoint Online to a local PC
I recently assisted a customer with an automated workflow through Microsoft Flow that copies files from a SharePoint Online site library to a file system share on a local machine being used as an archive server. I found several forum discussions and blog posts with a similar workflow, but nothing that helped solve the issues I was hitting. As a result, the goal of this post is to walk through this scenario including screenshots and descriptions of where I was getting stuck.
Log in to Flow (https://us.flow.microsoft.com).
In the top right, click on the settings/gear icon and navigate to the Connections site.
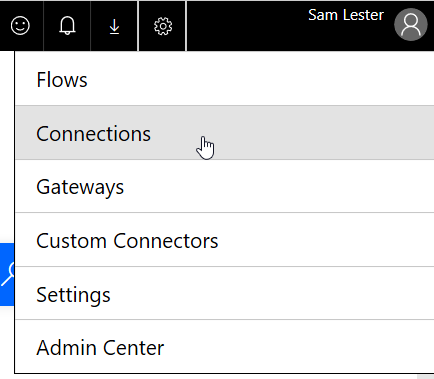
We will be creating a connection in Office 365 that leverages the on-premises data gateway. This connection will then later be used in our Flow scenario to establish the connection to the file share from Office 365 (or Azure).
In the Connections screen, click on the New Connection button to add a new connection.
In the search bar on the top right, enter “File System” and hit the search button. This will allow us to add the file system connection where you’ll see the following screenshot. 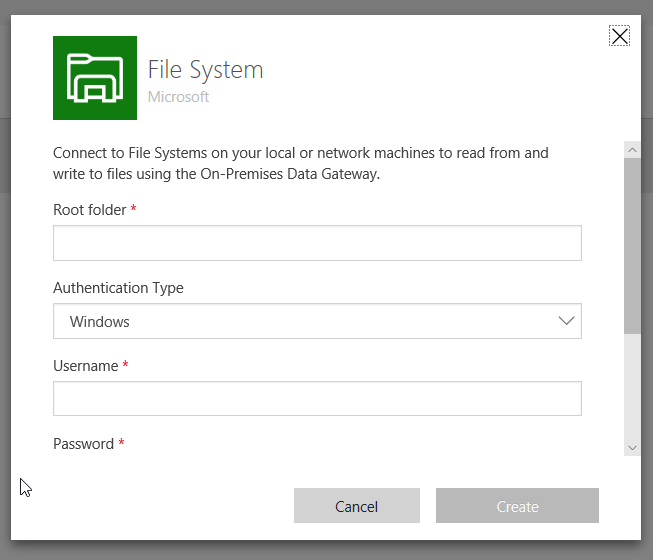
Enter the details for the root folder in the form of a local drive (c:\test) or a network share (\\server1\folder) and supply credentials to access this location. After supplying this information, you need to supply the valid on-premises data gateway, which acts as a bridge between on-premises data and Azure cloud services, such as Microsoft Flow, PowerApps, Power BI, and Logic Apps. If you haven’t yet set up the on-prem data gateway, it is very quick and straightforward following the documentation.
Now that we have the connection established, we will create the Flow. There are several methods to create a new Flow leveraging existing templates. In my scenario, I created it within the SharePoint library. 
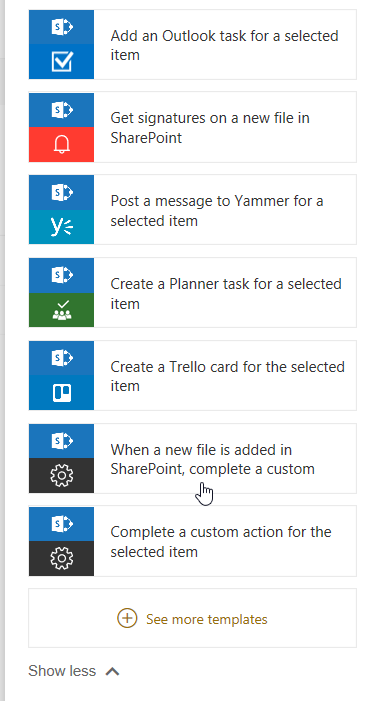
By initiating from this location, we see context-based suggestions based on the SharePoint items. Select the template titled “When a new file is added in SharePoint, complete a custom action”.
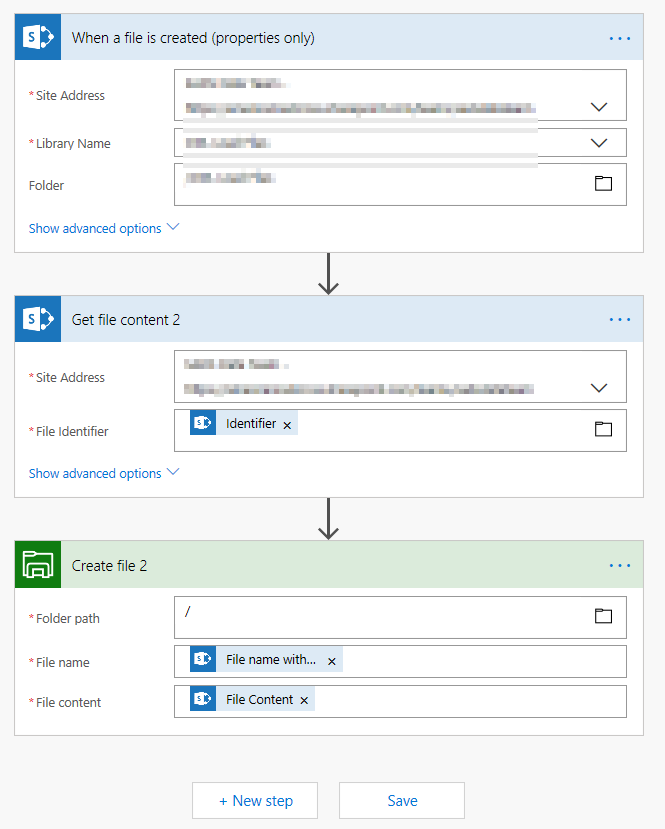
When you open the new Flow template, you will see a single task titled “When a file is created (properties only)”. One important thing to notice here is that the task only collects the metadata for the entry as opposed to the deprecated version which collected the actual file. This leads to one additional step to get the file contents. In this initial task, you can either provide the site address, library name, and folder where the files will be created or you can also set up another connection through the on-prem data gateway with this information that you can use in this step. 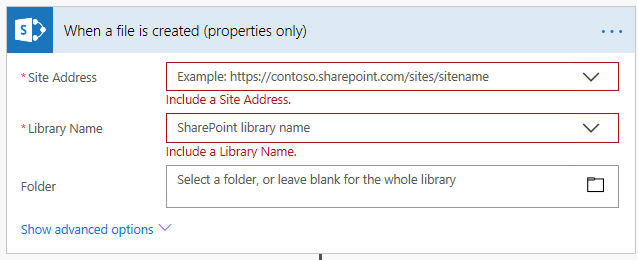
Next, we’ll add the step to get the file contents. Click the + button under the existing step and search for “Get file content” in the action search window. Select the highlighted step below to get file contents from SharePoint.
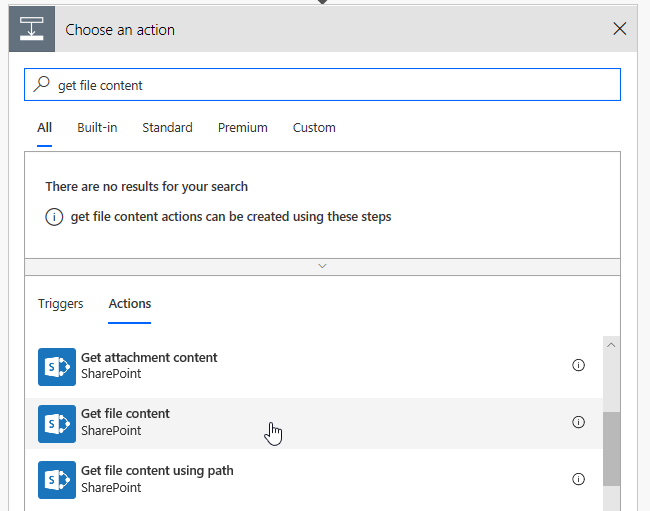
In this task, provide the SharePoint site address and select the file Identifier.

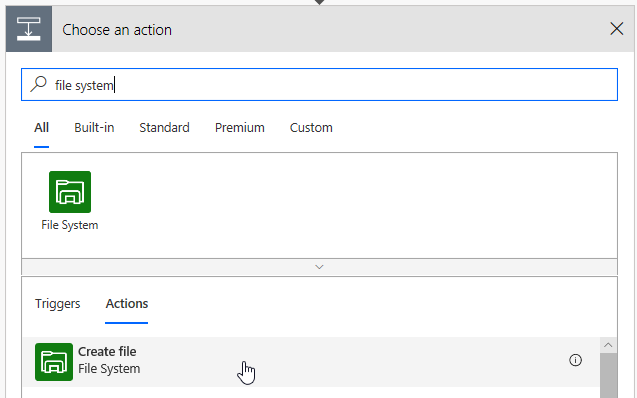
Now that we have the file contents, the final step is to create the task to copy the file. Add a new step and select the File System task to create a file.
Since you have already created the connection through the on-prem data gateway, this step is very easy to configure. Select the folder path from the folder icon. This will reference the path you created in the gateway connection. For the file name and contents, select the dynamic content from the previous steps to carry forward the name and contents. Notice here that you could modify the name for archival purposes if needed.

With that, you’ll have a 3-step flow that is initiated with the creation of an entry into a SharePoint library that copies the file to a local file share. Note that there are several very helpful templates in Flow that allow you to automate many other actions. This is a simple example to help get you started.
Enjoy,
Sam Lester (MSFT)
Comments
- Anonymous
October 18, 2018
Thanks for this, the timing couldnt have been better. I have to work on a solution like this ATM.- Anonymous
October 18, 2018
Nice to hear, thanks Glenn. The gotchas for me were in figuring out how to create the Connections through the on-prem DG for use in the Flow, and then in finding the right Flow template since there are so many that have similar names/functionality. The final snag was in getting the file contents in the second task, which required the Identifier property. From there it was smooth sailing and I added an additional step to insert the metadata into a local SQL Server instance as well.
- Anonymous
- Anonymous
April 07, 2019
Hi there,We have a sharepoint where an excel is uploaded daily. I need that daily data dowloaded and consolidated locally. (day over day). So now I am saving that daily file under different names every day in a folder and load from folder with an excel query. Can I use this flow to daily download that file and save under different name every day? Thansk a lot!