Create SharePoint Farms in the New Azure Portal
Azure has a new management portal that unlocks some cool new toys & features in Azure; stuff that SharePoint admins can benefit from it too if you know it’s there. A key new feature of the new portal is the new marketplace – it’s a much improved version of the previous marketplace, mainly because you can now deploy fully setup networks from templates and not just individual servers.
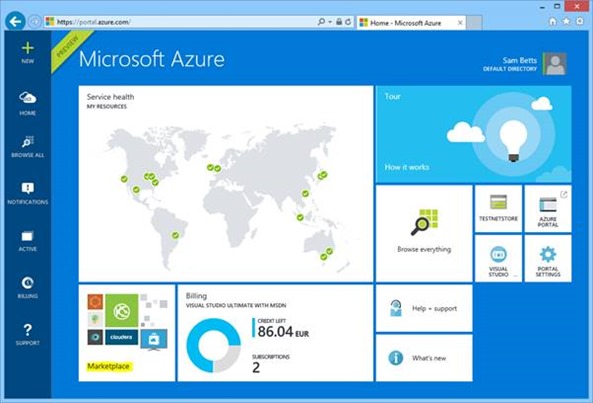
In our case, we can get a SharePoint farm with up-to 9 servers all deployed & correctly configured for various roles needed in a SharePoint farm if we want. Let’s have a look - here’s the new portal homepage – portal.azure.com.
Click on “browse marketplace” to take a look at all the templates available. We’re only interested in SharePoint Server Farm for this post so click that one.
Once you select it you’ll start the wizard to fill out details of your new farm.
Create a New SharePoint Farm
This wizard creates everything from scratch for your new farm; a new virtual network in Azure, Active Directory, SQL Server(s), and all the SharePoint servers, all configured on said network, etc, etc. It’s actually quite a mammoth task, which is partly why this new functionality is quite impressive.
Basic System Setup
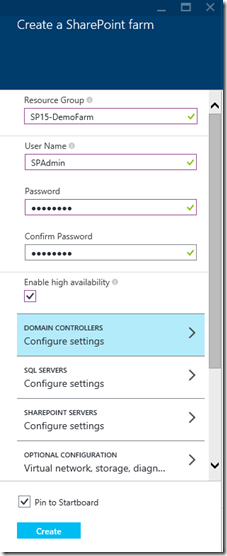
First & foremost some basic details; namely the Azure resource group name & an admin account for the Active Directory.
Also here you can specify if you want high-availability for your farm or not. High availability basically doubles-up all the servers for each role, and also creates an AlwaysOn SQL cluster for the SharePoint databases. Yep, all automatically.
Not selecting this will give you much less machines; x1 WFE, app server, SQL, etc. In this configuration the Azure uptime SLAs aren’t guaranteed because no Azure availability sets are being used, but it is half the price to run – perfect for testing environments.
Active Directory Setup
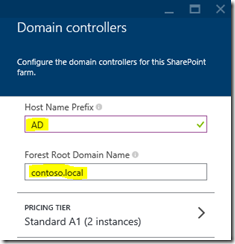
As mentioned, the wizard creates a new AD too. Give the details in the “domain controllers” panel for the basic settings.
I’d recommend using a “.local” domain name unless this new farm is to be a production environment. Just trust me, you don’t want a real DNS alias unless that farm really will own it on the real internets too.
SQL Servers Configuration
Next up are the SQL Servers. Not much to see here, just the service account name that SQL Server will use.
Of course you can play with the SQL Server(s) VM size(s) here too; the defaults are for production-like load expected so if this is pure testing you can probably scale the sizes down a bit and save some money.
SharePoint Farm Configuration
Finally we have the actual SharePoint farm options, which is basically account names & virtual machine sizes.
Give a setup user account and a farm user account. Remember too that the A3 size may be too small if you’re expecting production-like traffic.
Now we’re ready to create the farm!
Click “create” and Azure will start building your new farm. It’ll take 30mins-1hr depending on what you’ve asked for.
New SharePoint Farm Built!
Once everything’s ready, you’ll see this notification:
The new farm resource group will be pinned to your start-screen:
Incidentally, resource-groups are a new feature in the new Azure portal; a nice way of managing any cloud assets together.
Here’s what we get in the resource group if we setup a highly-available SharePoint farm:
Cloud-services, VMs, a network, and a storage account all created for us automatically by the wizard. Very nice!
Somewhat curiously, one of the SharePoint app servers got prefixed “AD” at the time of writing, instead of “SP”. This is just a naming flaw that’ll hopefully be ironed out by the time you try this.
Connect to SharePoint Machines
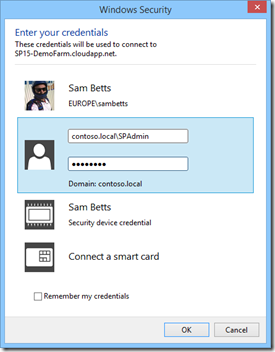
As ever we use remote-desktop to connect, using the credentials we setup. Let’s connect to the web-front-end:
If we open central-admin we can take a look at the farm. Curiously, the wizard has prefixed one of the application servers “AD”, but anyway here it is:
We can see there’s a default web-application created for us using the cloud-services public URL. The wizard has even created the load-balanced endpoint for us so there’s not much to do there.
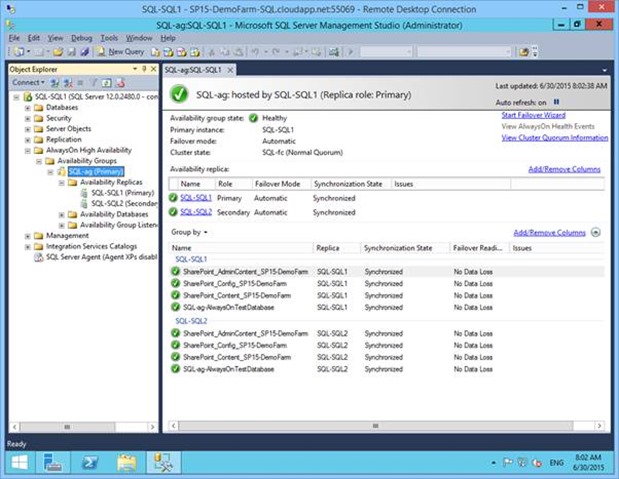
On the SQL Server side, we have pre-created an AlwaysOn cluster for us (very impressive, if I don’t say so myself) with a file-share witness for cluster quorum.
All of this is all done & configured for us automatically by the wizard. Clever!
Extending Existing Networks with the Wizard
A commonly asked question is whether this process can be used to extend existing infrastructure. Well, the short answer is “no” – it’s all fresh & new what’s setup, but that doesn’t mean you can’t integrate the newly created network with your own. More on that another day!
That’s it; I hope it’s been interesting!
Cheers,
Sam Betts
Comments
- Anonymous
March 19, 2016
After installing SharePoint Server Farm using the wizard, I noticed the version of Windows server is not 2012R2 but 2012. What is the reason for using 2012 instead of 2012R2 ?
