REST APIs in App Studio Part 3- Adding Any API
In the previous post, we worked on changing the source code in our App Studio project to support specifically the Rotten Tomatoes API. We replaced the existing ServiceDataProvider file with one specifically tailored towards the Rotten Tomatoes API. That file already had the Copy method filled out to copy the resulting data from the API call into the necessary object model as well as had predefined API Calls. However, in this post, we want to make the situation applicable to any API that you might be interested in using, If you would prefer to follow along in video, you can find it here.
The first thing we will do is create another empty App Studio project. We did this in Part 1, so I wont cover that part again here. Now, add a collection and call it something very general, say "Object". Then, in this collection, you want to add any columns of data that you are expecting to get back from your API call. For instance, although a call to Rotten Tomatoes returns tons of data, I only wanted columns for the image, title, year, and rating. So, this part is up to you. Which columns do you need? This example I will only need two, "number" and "joke", to use with the Chuck Norris API (yes, it's real :) ) as you can see below.
After creating the collection, you want go in to edit that section to set the data bindings appropriately and choose a layout. If you aren't going to be using pictures then pick a layout that only displays text. Here is what I chose.
Now go ahead and generate the source code and open up the Visual Studio solution. The file we want to replace is the ServiceDataProvider.cs file just like we did in the previous tutorial. However, this time we want to choose the more generic file rather than the Rotten Tomatoes specific one. You can download the appropriate file here. Once you have downloaded it, go ahead and replace the existing ServiceDataProvider file with this one.
Notice that in this new file instead of having specific API calls, we just have a string for API Key and one for API Call. The first thing you will need to change is to add your specific strings here. If you don't need an API Key, then you can leave that one blank. By default, this file will attempt to make a get request using the API_CALL string.
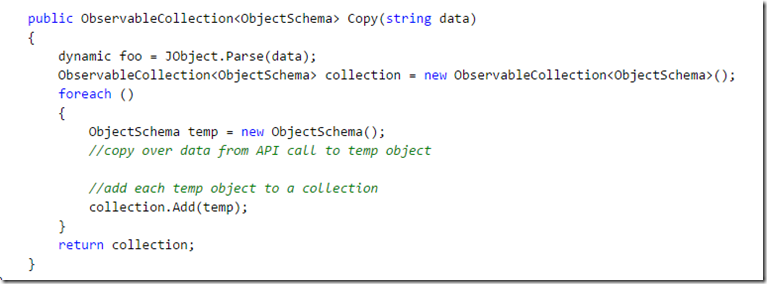
After you have updated these strings, you then need to update the copy method. You will need to copy whatever data you are pulling down into the appropriate object model. If you called your collection "Object" like I did, then we have already included the ObjectSchema as the appropriate object model. If you called it something different, you will need to update any reference to ObjectSchema.
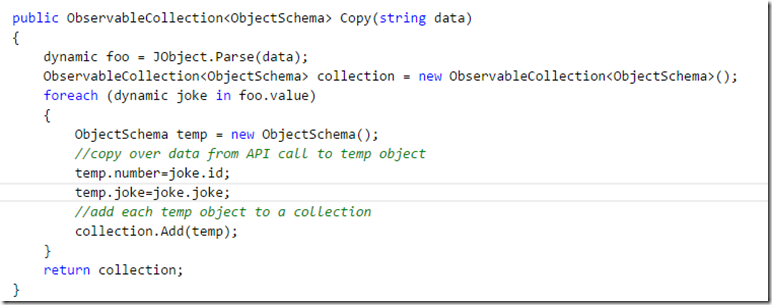
Now if I were to be using the Chuck Norris API, I would update the API_CALL to , https://api.icndb.com/jokes/random/3, which says I am looking to get back 3 random Chuck Norris jokes. Then, I would update the copy method to copy over the id and joke from each joke. You can look into this API yourself as it is so simple, but here is what my updated copy method would look like.
Notice I only had to add my API call, and then add two lines to the copy method to copy the data from the API response over to the Object Schema. Again, you have to be familiar with whatever API you are using, but once you are, it's extremely easy to update the copy method.
The very last thing we will need to do here is to update the ObjectDataSource.cs file (named differently if you didn't name your collection "Object"). When we create an instance of the ServiceDataProvider object, we no longer need parameters, so we can strip them out of the constructor. You might also need to read a reference to the new ServiceDataProvider file that we added. This part is the exact same as Part 2.
That's all it takes to incorporate REST APIs into your App Studio project. I hope you enjoyed this series! As always, comment below or find me on twitter @jquickwit with any questions, comments, or concerns!


