Storage Services Direct, Creating Pools, Disks and Volumes
Hi Everyone,
I've looked around, though hadn't found what I was looking for that spells out clearly what can be done. I want to create a shared disk configuration and utilize the 4gbs fiber channel cards and switch I have. During this effort I found I need to configure the switch. Though I had to order a cable first before I can even do that, so this is just about getting the storage ready, then I will worry about the fiber connections.
Let's talk about the hardware:
- Dell PowerEdge 2900 with 48gb of Ram and 700gb worth of Raid 5 drives (15k) with 2 3.14ghz quad core processors, with a Perc/6 Raid controller
- 4 MD1000, though only 1 has any drives right now (15 500gb SATA drives 7200)
WSSD (windows storage services direct) supports both JBOD or a RAID. Though here I wanted to go the JBOD route, I don't want to hunt down a new controller. So instead I will use what I have.
The Pros and Cons of JBOD:
A few Pros:
- Drives are independent of the array, so you can have a mixed set of disks to make a pool/disk/volume.
- Drives do not have to be all exactly the same (even beyond size, granted better if you can).
- You can add disks as needed, so as I grow my storage needs I can add disks and expand the configuration.
A couple Cons:
- No Hardware RAID control, rely on software to handle issues with the volume.
- Mixed disks can have performance issues.
Now, you can setup WSSD with RAID or JBOD, you can even use a raid controller like the PERC/6e controller and have a JBOD kind of setup.
Let's look at the setup here:

In the above, every drive was setup as a RAID 0, each one was initialized in the RAID BIOS configuration. This was done to build a JBOD scenario. The strengths of JBOD, the flexibility it brings gives me more options. So instead of changing controllers I simply did the above.
Now it is possible to simply create a Volume with just the RAID, for example I could have made one big RAID disk, then make a Volume.
Though this isn't what I want, I want JBOD without changing my hardware, so I created 15 RAID 0 disks and I'm going to pool them together into a pool:
Click on "Storage Pools" on the left panel:

Right click in the Storage Pools area:
Select: "New Storage Pool"

The above is simply an intro, click Next:
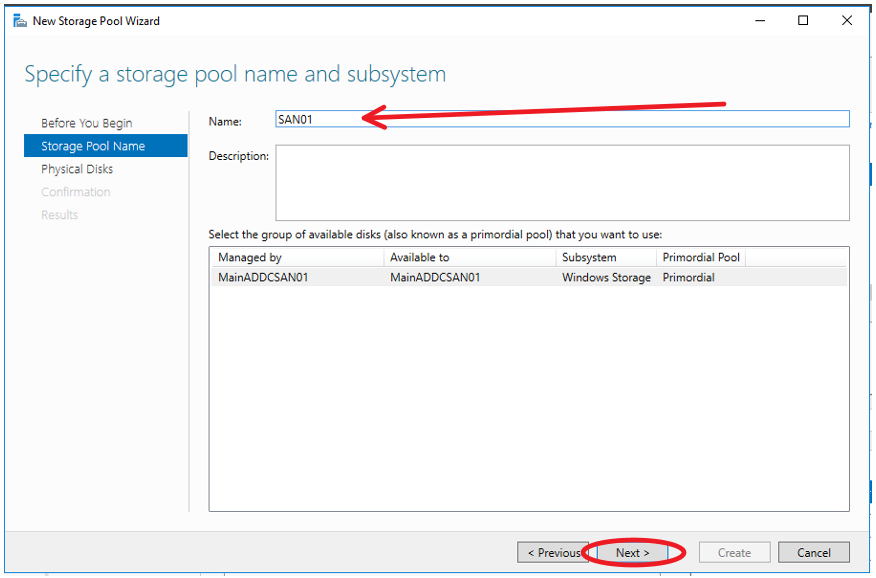
Give this Pool a name, click next:
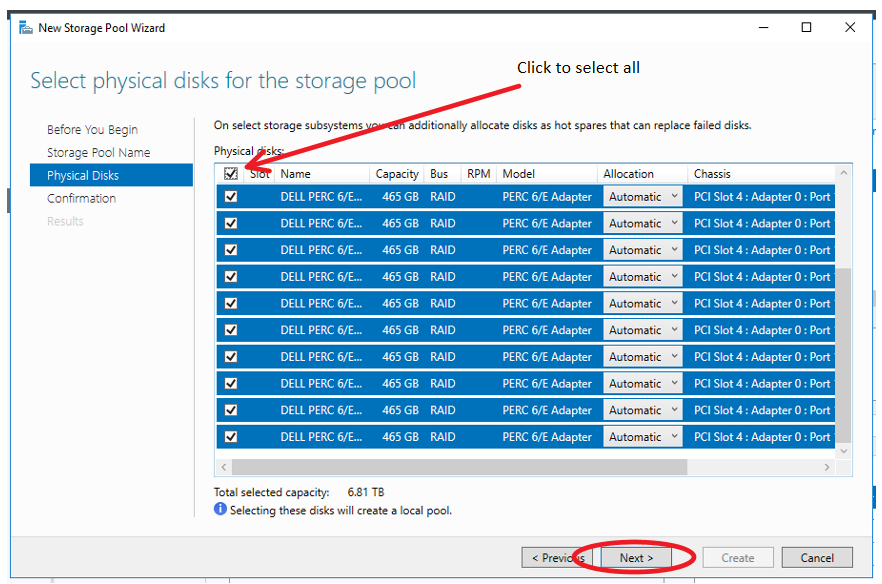
Here I selected all of the disks I want to use. Note I could have a pool across multiple enclosures and make one big pool, or I could do a pool per enclosure. This is really cool because I can make for some interesting options later.
NOTE: you can always expand a pool later to include more disks.
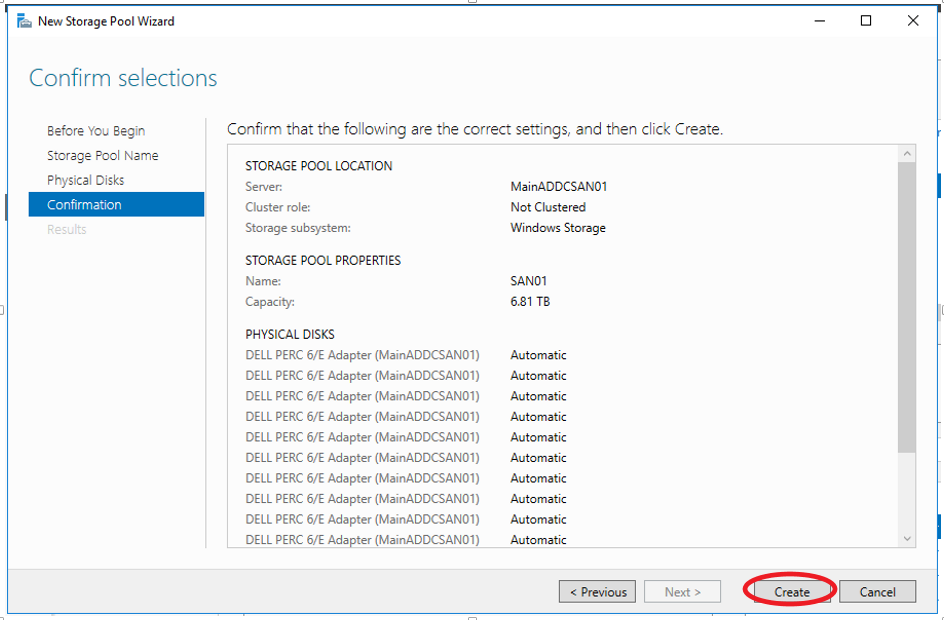
Preview what was done, then click "CREATE"
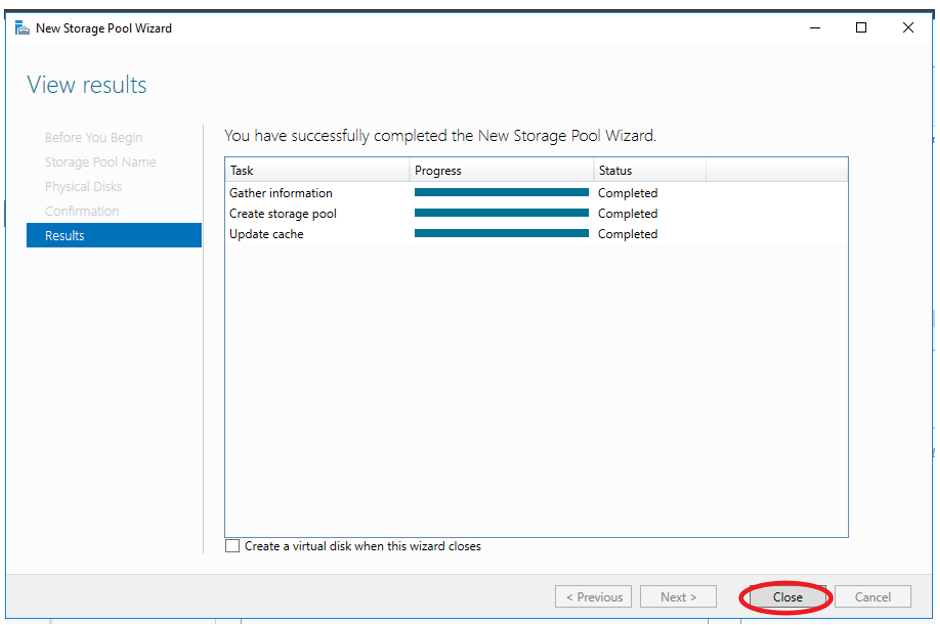
All completed successfully:

Now it's time to create a Virtual Disk:
This is the Disk that volumes will be made from. So think of it like this, we just pooled all the physical disks together, now we got to make logical disks, which can then be broken down further into volumes, and even further when you do shares/iSCSI.
Click on the link inside the Virtual disks Panel above: (or right click)
Select the Pool desired:

Info screen, click next:

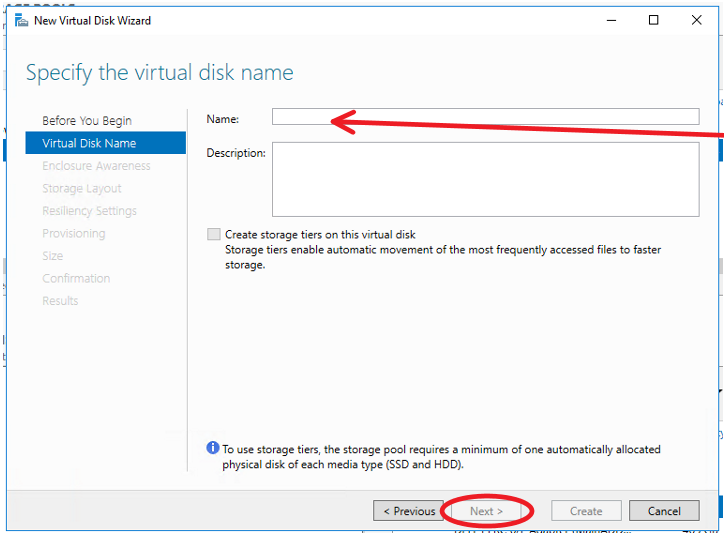
Give the disk a Name:
NOTE the grayed out check box, I can't use storage tiers because all my disks are the same. The ideal is if I had some SSD's and regular disks, then I can have slower stuff on the HD's and faster stuff on the SSD's, but not the case here.
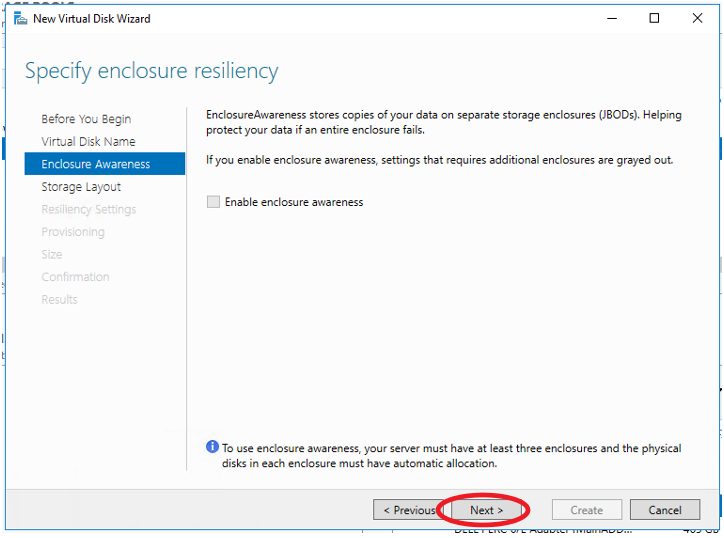
Note: since my controller doesn't have JBOD as part of its makeup, I probably don't get the enclosure awareness, which BTW with the MD1000 has two controllers and two power supplies, the chances of it going bad all at once are probably pretty low unless something takes out the whole rack maybe.
I'm going with Parity, mirror will basically cut your space in half (hence the term mirror, basically half for use, half for mirror).
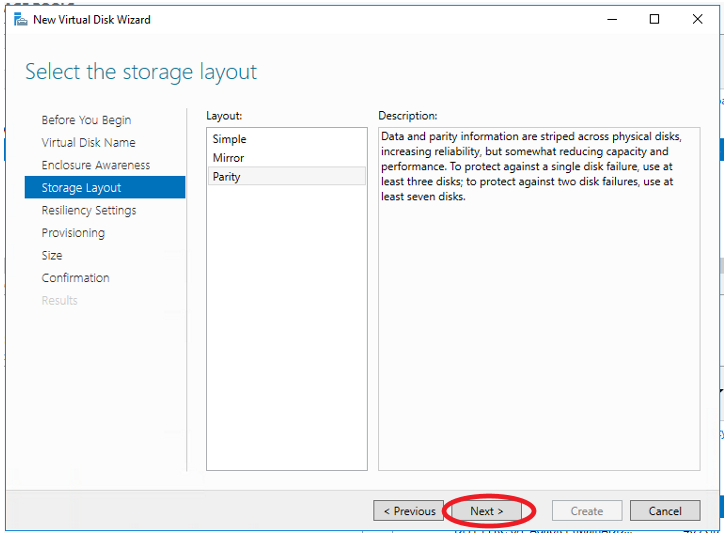
Select the Parity:
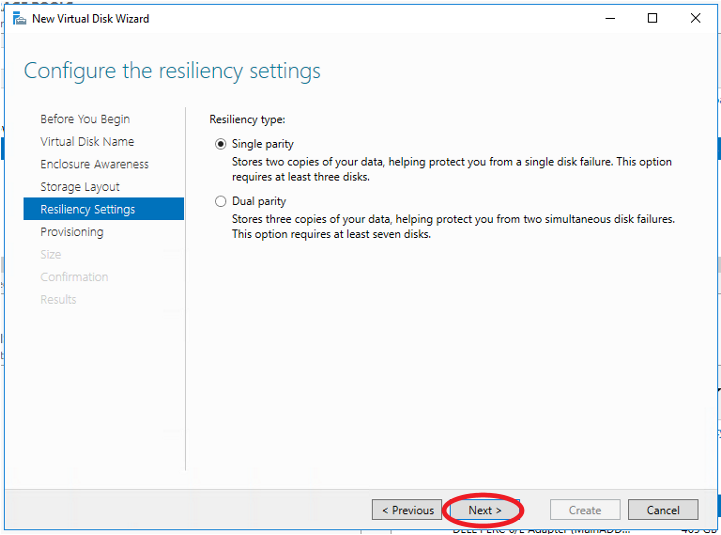
I selected single parity, keep in mind more copies means lower overall capacity. Dual parity means more copies, keep in mind this is a pool of disks, so data here is going to be shared on at least 2 disks out of 15 with single parity.
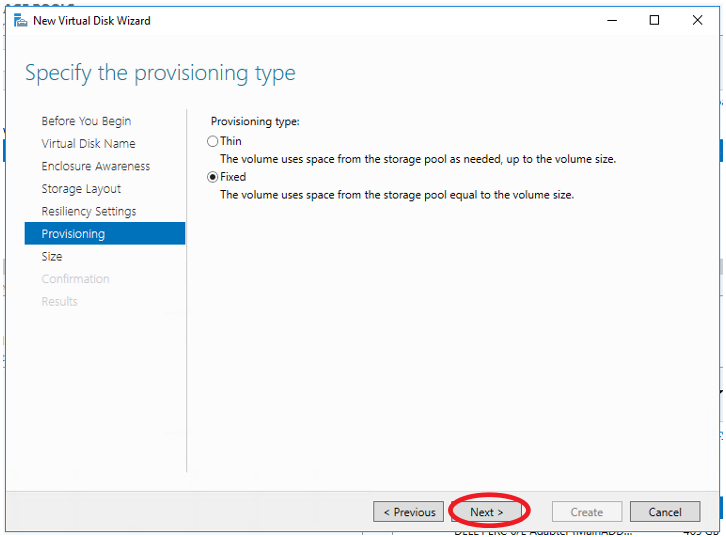
Both of these options have their advantages, though fixed won't have some of the performance issues that thin has because of its dynamic nature. I prefer to know exactly what space is going to be used where.
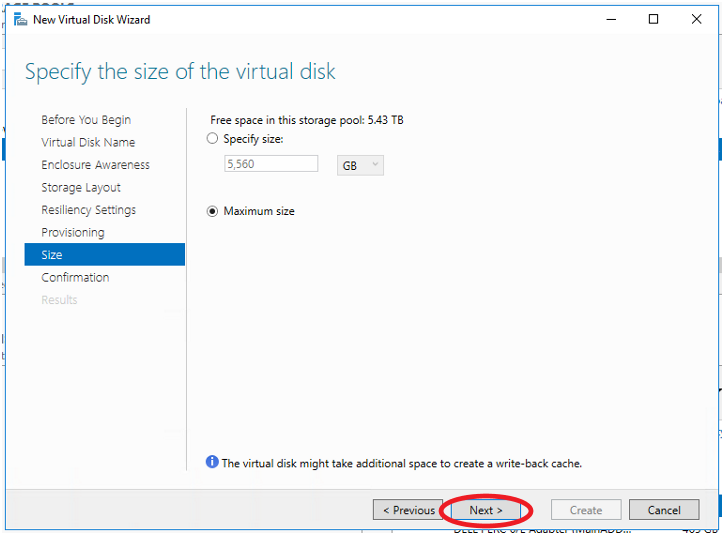
Now when I used the Raid BIOS I had a bigger disk at RAID 5, though more is going on here at WSSD.
Also note I could do a disk smaller, I'm sure there are a number of reasons to create several smaller disks out of a pool, though one could create several volumes from a disk as well.
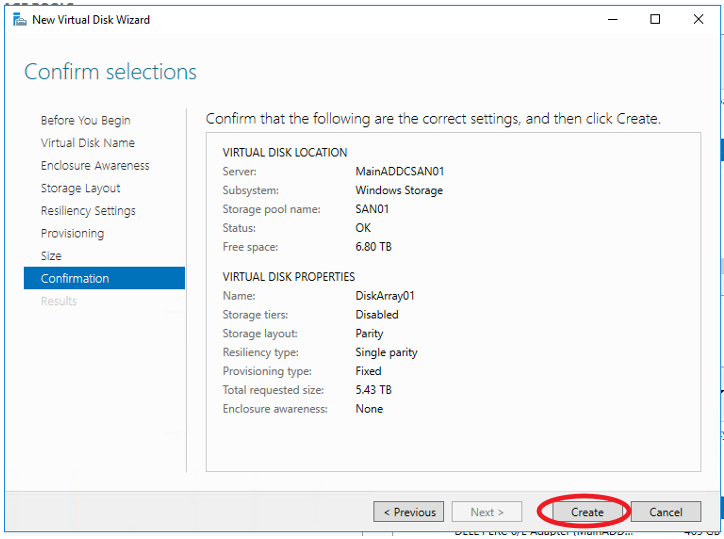
Review if everything is OK: Click "Create"
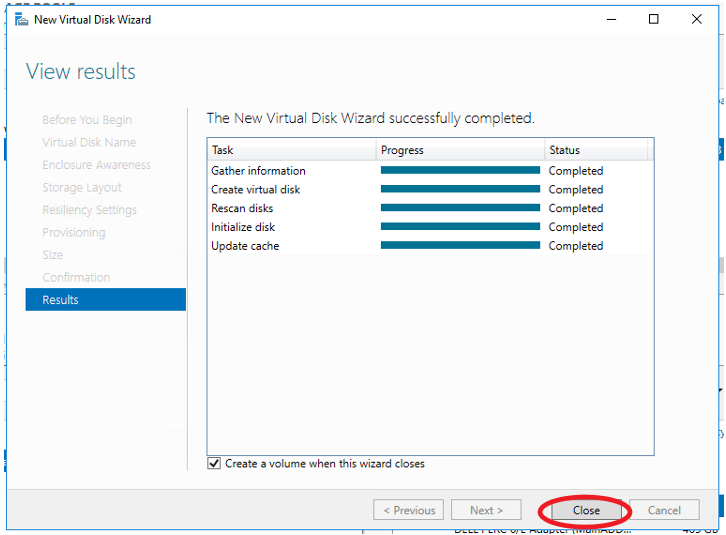
Note the checkbox, it will now go through the create the volume wizard, which is different than if you simply created a volume from a physical disk.
Keep in mind that all of the above with pools could have been avoided by just creating a big raid(x) at the controller BIOS level and then simply creating volumes.
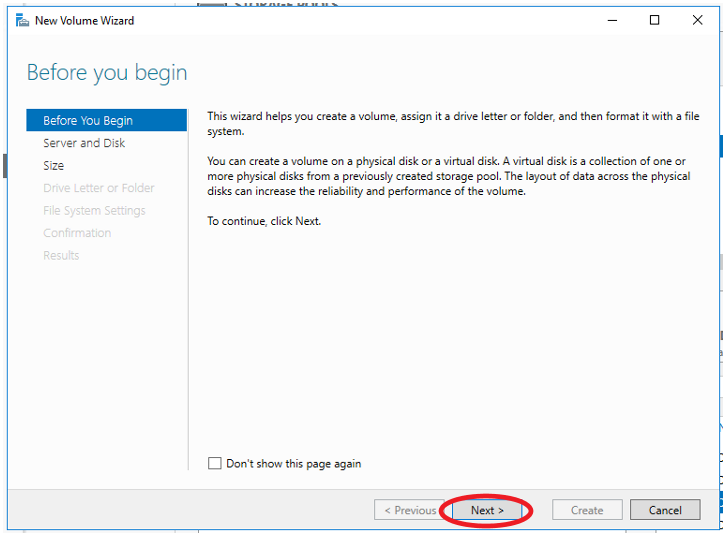

Click on the disk in question, since all the physical disks have been joined to an array, there are no other disks to create a volume.
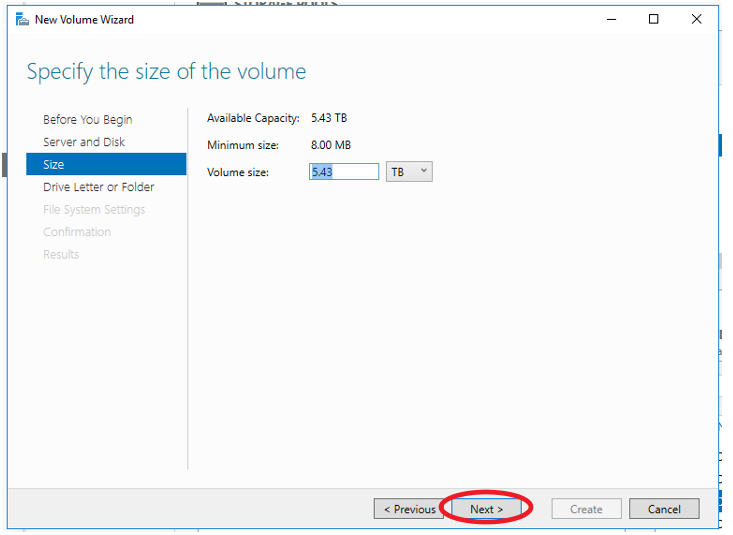
Set the size for the volume above, again you could have several volumes.
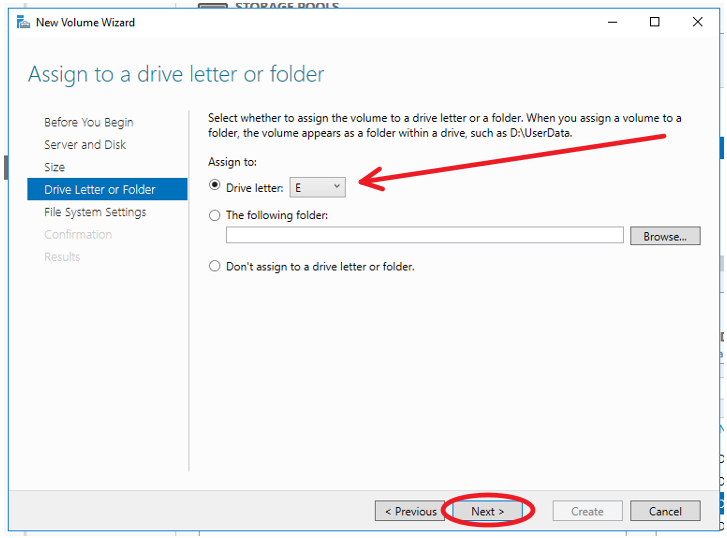
Setting up a folder vs. a drive letter, if you want to do anything with the disk from the host it might be easier if it was accessible.
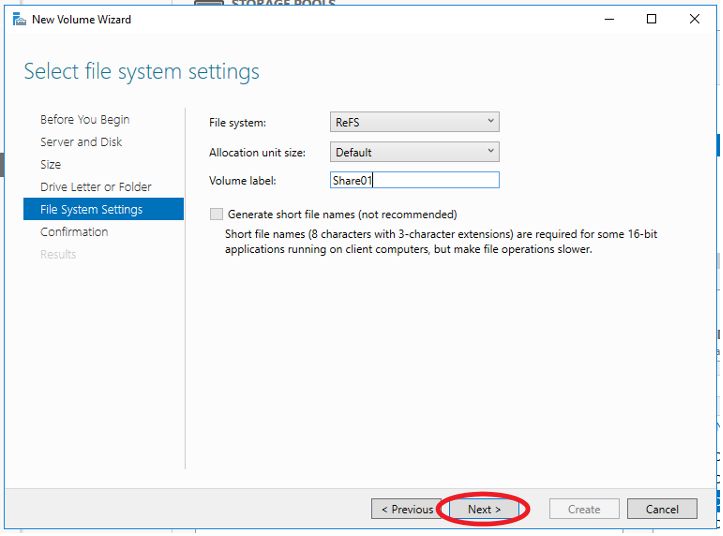
Give the Volume a name, here I choose ReFS, review this link for more information: https://msdn.microsoft.com/en-us/library/windows/desktop/hh848060(v=vs.85).aspx This is where Microsoft is going in file systems.
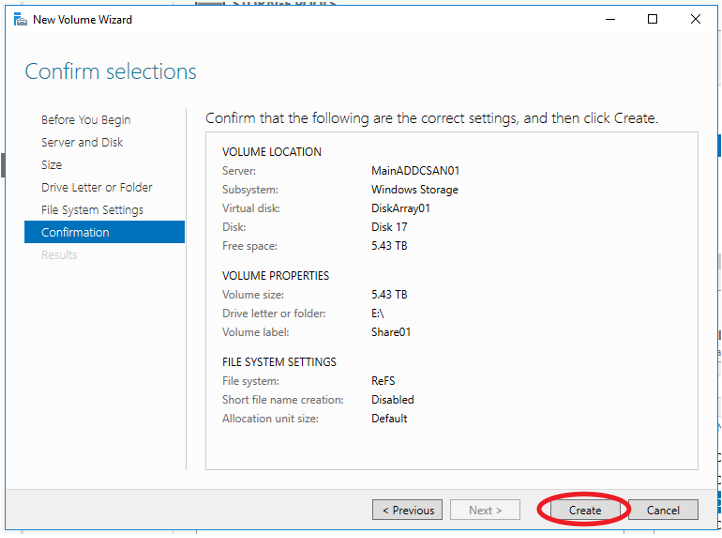
Review and then click Create:
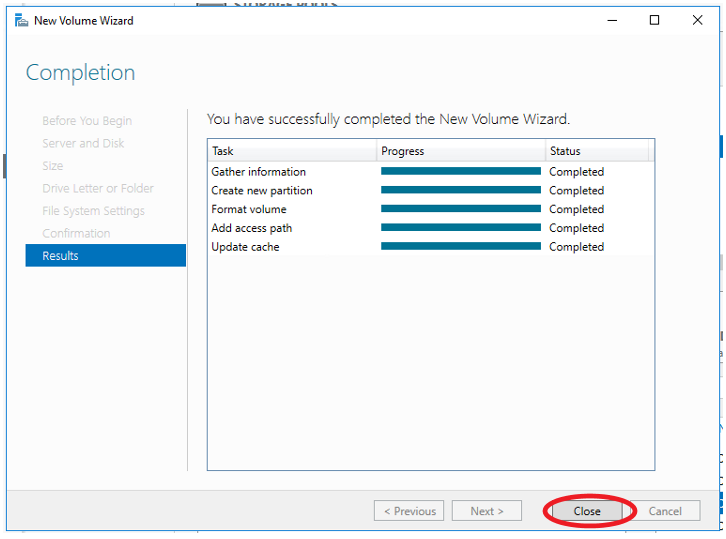
This concludes the basic setup of the disks, there are shares as well as iSCSI, to be explained later. I am waiting on my serial female/female cable so I can hook up to the switch in console mode and figure out how to set it up.