Building an Occasionally Connected ADO.Net Data Service with “Astoria Offline” Preview
Building an Occasionally Connected ADO.Net Data Service with “Astoria Offline” Preview
This is a step by step walkthrough of creating a new ADO.Net Data Service that support offline and synchronization with the recently released “Astoria Offline” alpha preview.
1. Create an ADO.Net Data Service that Allows Synchronization
Create a new standard Web Application project.
Add a new Entity Data Model. This time, make sure you select the [Offline Preview] ADO.Net Data Model template. Also notice that the extension of the file is now .edmxpreview instead of .edmx.
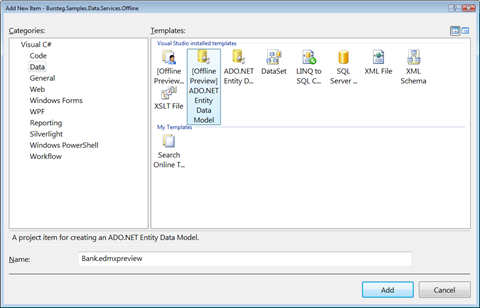
Continue with the wizard to create the data model. When the wizard completes, notice that the project has a new reference to System.Data.Entity.Preview.dll.
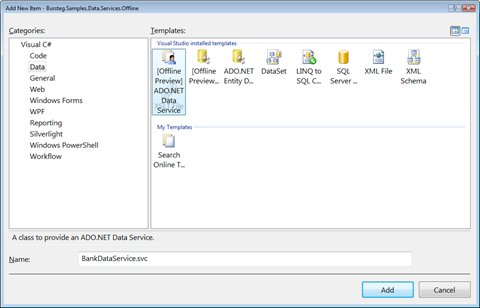
Add a new ADO.Net Data Service to the project, but make sure you select the [Offline Preview] ADO.Net Data Service template.
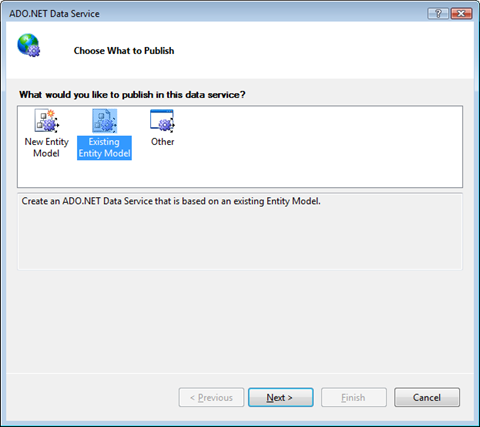
In the “Choose what to publish wizard” select Existing Entity Model. We could have started from this wizard from the beginning and create a new Entity Data Model from here.
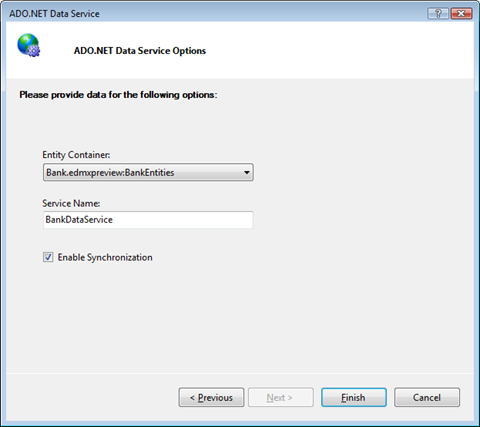
Select the Entity Container that is part of the Entity Data Model you created earlier. In my sample it is BankEntities. Also notice the new “Enable Synchronization” checkbox – make sure it is checked.
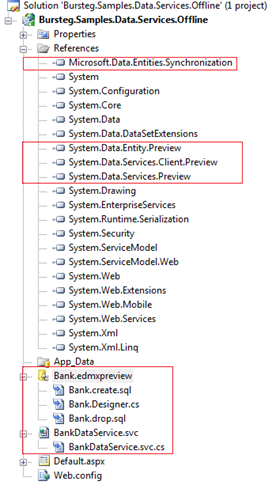 This adds several things to your project:
1. Several new references were added to the project: Microsoft.Data.Entities.Synchronization is the extension for Sync Services that enables entity Synchronization. System.Data.Services.Preview and System.Data.Services.Client.Preview are the ones that does the magic of Astoria Offline.
2. Two new SQL Scripts were added to the Entity Data Model (notice the Bank.create.sql and the Bank.drop.sql scripts in the image). These contain the DDL statements needed to change the database schema in order to support synchronization.
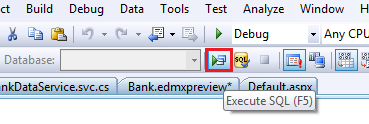
To actually enable synchronization, you’ll have to run the create script. To do that, open it in Visual Studio, and execute it against your database.
3. The ADO.Net Data Service is added to the project and it is now empty. It is already connected the the entity data model, but right now does not support anything.
Set the access rules to the resources of the data model (in this sample I give full access to all the resources). In addition to that, tell the data service that it supports synchronization. To do that, cast the config object to IDataServiceConfiguration2 interface (new in this preview) and assign true to the AllowSynchronization property.
public class BankDataService : DataService<BankEntities>
{
// This method is called only once to initialize service-wide policies.
public static void InitializeService(IDataServiceConfiguration config)
{
config.SetEntitySetAccessRule("*", EntitySetRights.All);
((IDataServiceConfiguration2)config).AllowSynchronization = true;
}
}
The ADO.Net Data Service is now ready to run. Press F5 to run it and play with the URL in the address bar to navigate through the resources.
2. Create a Occasionally Connected Client Application
Add a standard Windows Forms Application to the solution.
Add a Service Reference to the project and let visual studio discover the data service in your solution. When you add the reference Visual Studio will tell you that this ADO.Net Data Service is offline enabled.
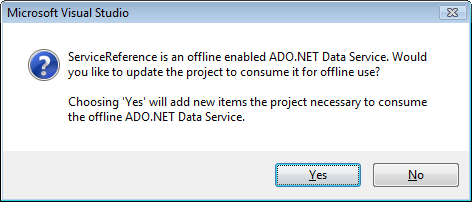
Click Yes to enable offline scenarios in the client application.
A scary dialog should appear and tell you that an error has occurred. You can disregard it by pressing Cancel.
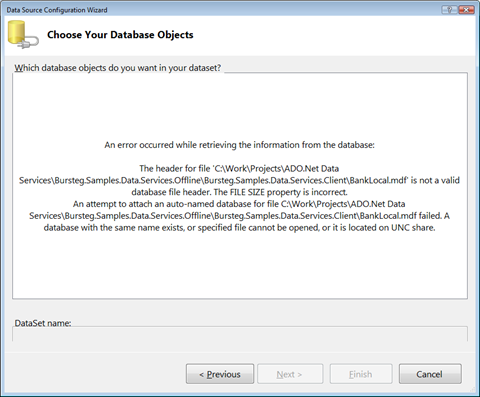
Adding this service reference has added not only the client side proxy for consuming this service, but also a local database with the database schema that matches your model.
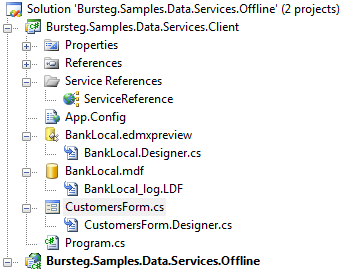
Open the Data Sources window (Shift + Alt + D), and add a new data source of type Object. Select one of the object types in your client application that matches the model and click OK.
Drag the list of objects onto your form and let Visual Studio create all the necessary controls for navigating through the data.
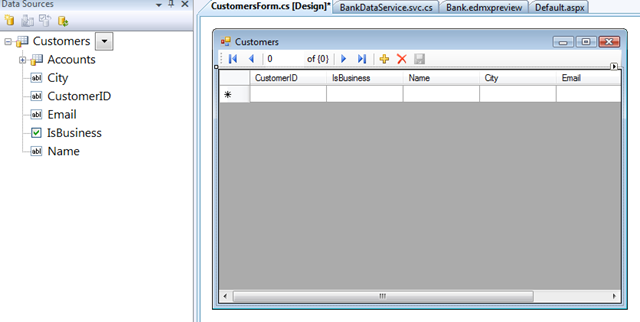
Double click the window title to add an event handler to the form’s loaded event. In this event handler we will load the data from the Local Database. Add a new for the context, and in the Load event handler – use it to get the data and bind it to the binding source.
public partial class CustomersForm : Form
{
public CustomersForm()
{
InitializeComponent();
}
BankEntities db;
private void CustomersForm_Load(object sender, EventArgs e)
{
db = new BankEntities();
var query = from c in db.Customers
select c;
this.customersBindingSource.DataSource = query;
}
}
In order to support saving changes to the local database – enable the Save button on the Form and double click it to add an event handler. In the handler – simply apply the changes to the database.
private void customersBindingNavigatorSaveItem_Click(object sender, EventArgs e)
{
db.SaveChanges();
}
Add another menu item the the binding navigator that will do the actual synchronization. For it click event handler – implement the synchronization logic:
Add a Microsoft.Data.Entities.Synchronization.DataServiceSyncProvider instance, and point to the the ADO.Net Data Service URL.
Create a Microsoft.Data.Entities.Synchronization.ObjectContextSyncProvider instance, which is the client-side wrapper for the BankEntities’s ObjectContext.
Create a new Microsoft.Synchronization.SyncOrchestrator instance and set the local and remote providers.
Then, do the actual synchronization. Notice that the sync operation sync between the service and the local database, therefore the data needs to be fetched from the local database again.
private void syncItem_Click(object sender, EventArgs e)
{
DataServiceSyncProvider dsp = new DataServiceSyncProvider(
new Uri("https://localhost:8474/BankDataService.svc/"), "global");
ObjectContextSyncProvider esp = new ObjectContextSyncProvider(
() => new BankEntities());
SyncOrchestrator so = new SyncOrchestrator();
so.RemoteProvider = dsp;
so.LocalProvider = esp;
so.Direction = SyncDirectionOrder.UploadAndDownload;
so.Synchronize();
// Load the data again
CustomersForm_Load(null, null);
}
Finally, set the client application as the startup project and run it. Sync it for the first time to get the data from the remote server to your local database, and then sync it occasionally to upload changes and download changes to your client.
Enjoy!
Comments
- Anonymous
March 06, 2009
PingBack from http://www.clickandsolve.com/?p=19169 - Anonymous
March 07, 2009
Thank you for submitting this cool story - Trackback from DotNetShoutout