Create and manage data products
A data product in Microsoft Purview Unified Catalog is a set of information with a defined use case that is meant to be shared with other users. For example: a sales report, an ML model, or a data model and its associated tables. A data product is a logical grouping of related physical assets, created for a specific purpose.
It can be hard to find the value of data presented by itself, but data already associated with a purpose is easier to find and use. Data products in Unified Catalog provide practical context for your users and for intelligence systems, to help users identify what data is useful to them.
To create data products for your organization and ensure those products have enough definition to be useful to your user base, follow these instructions.
Prerequisites
- To view data products, users need Unified Catalog reader permissions.
- To manage or edit data products, users need data product owner permissions.
View data product
In Unified Catalog, select Catalog management.
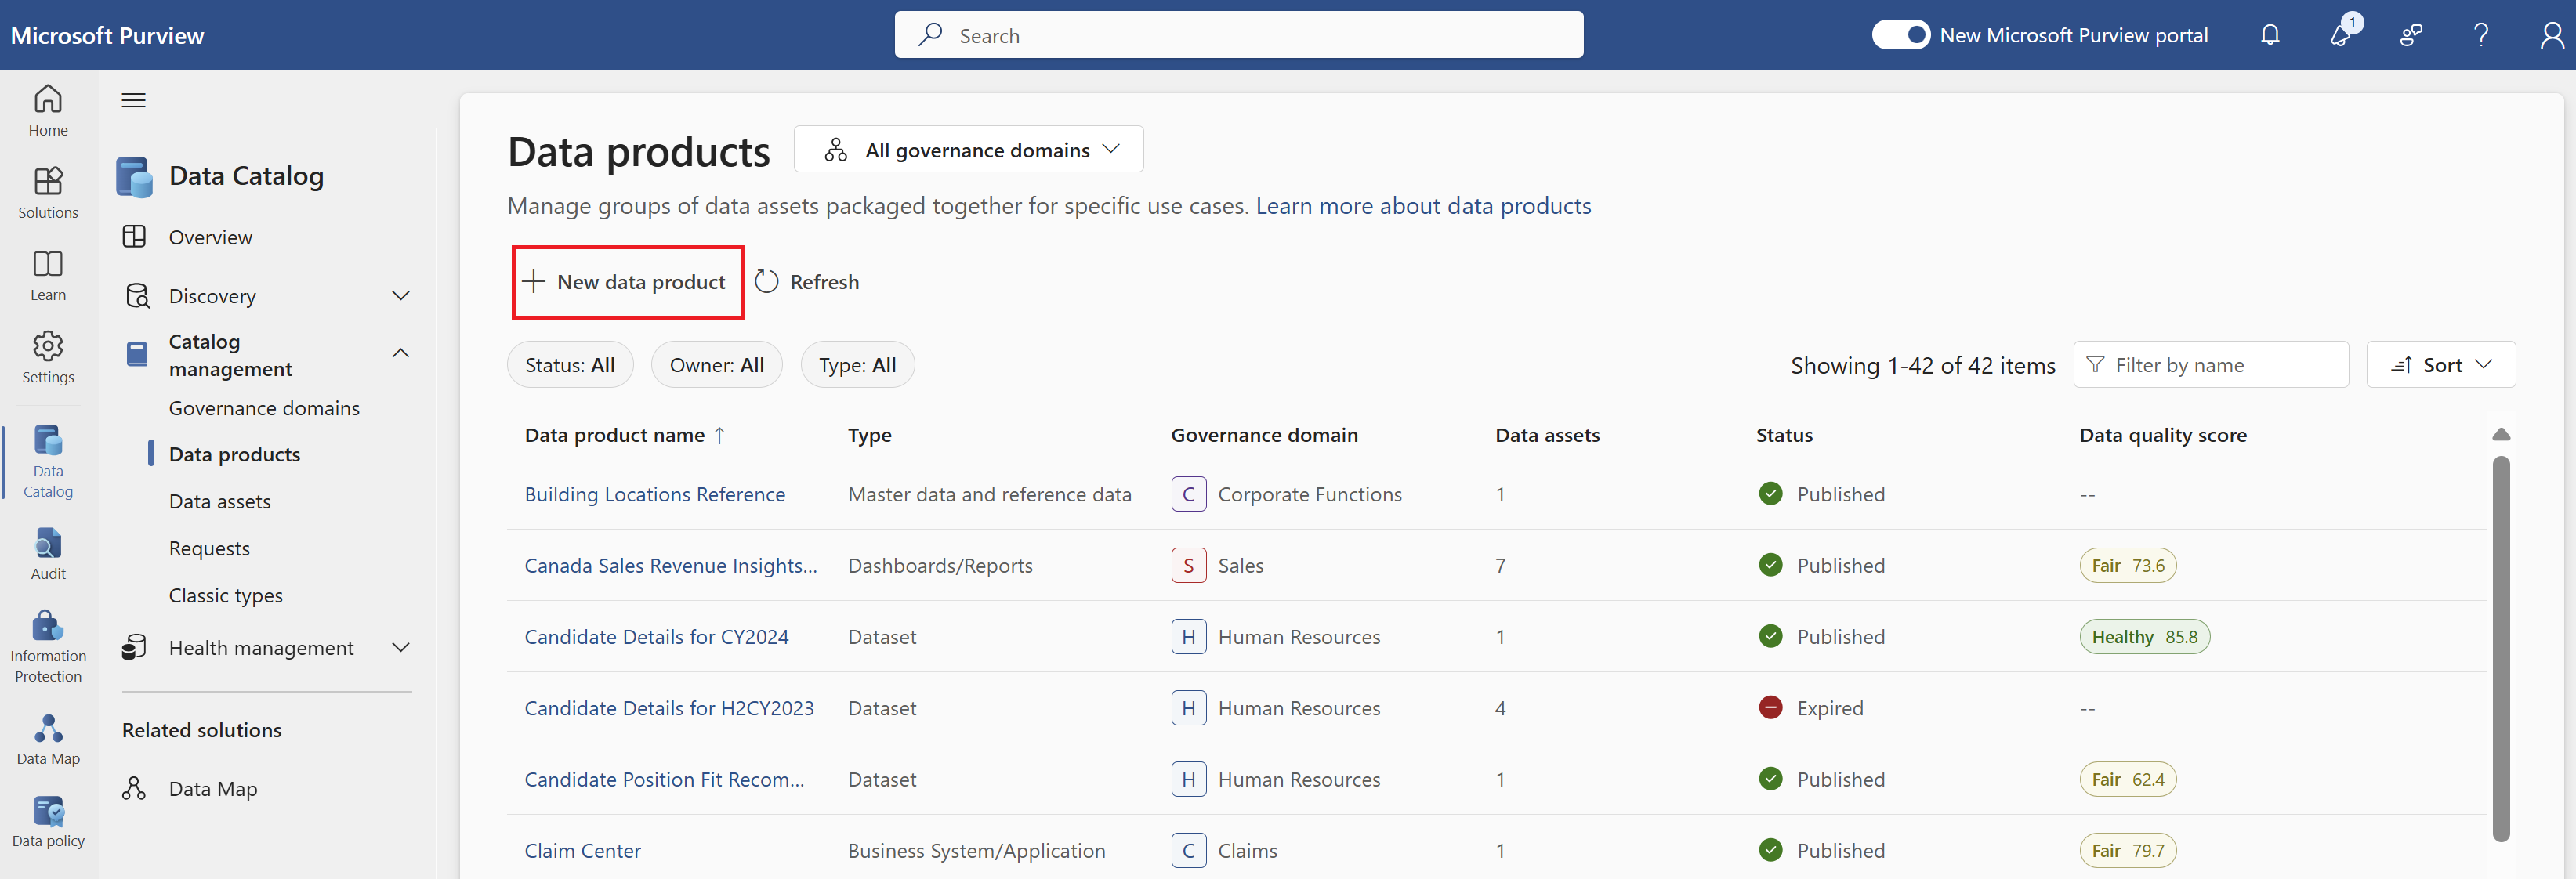
Select Data products
You see a list of all the data products you have access to based on your permissions.
You can scroll, sort, filter, and search through these data products to find the ones you're looking for.
For more details about a specific data product, select that data product.
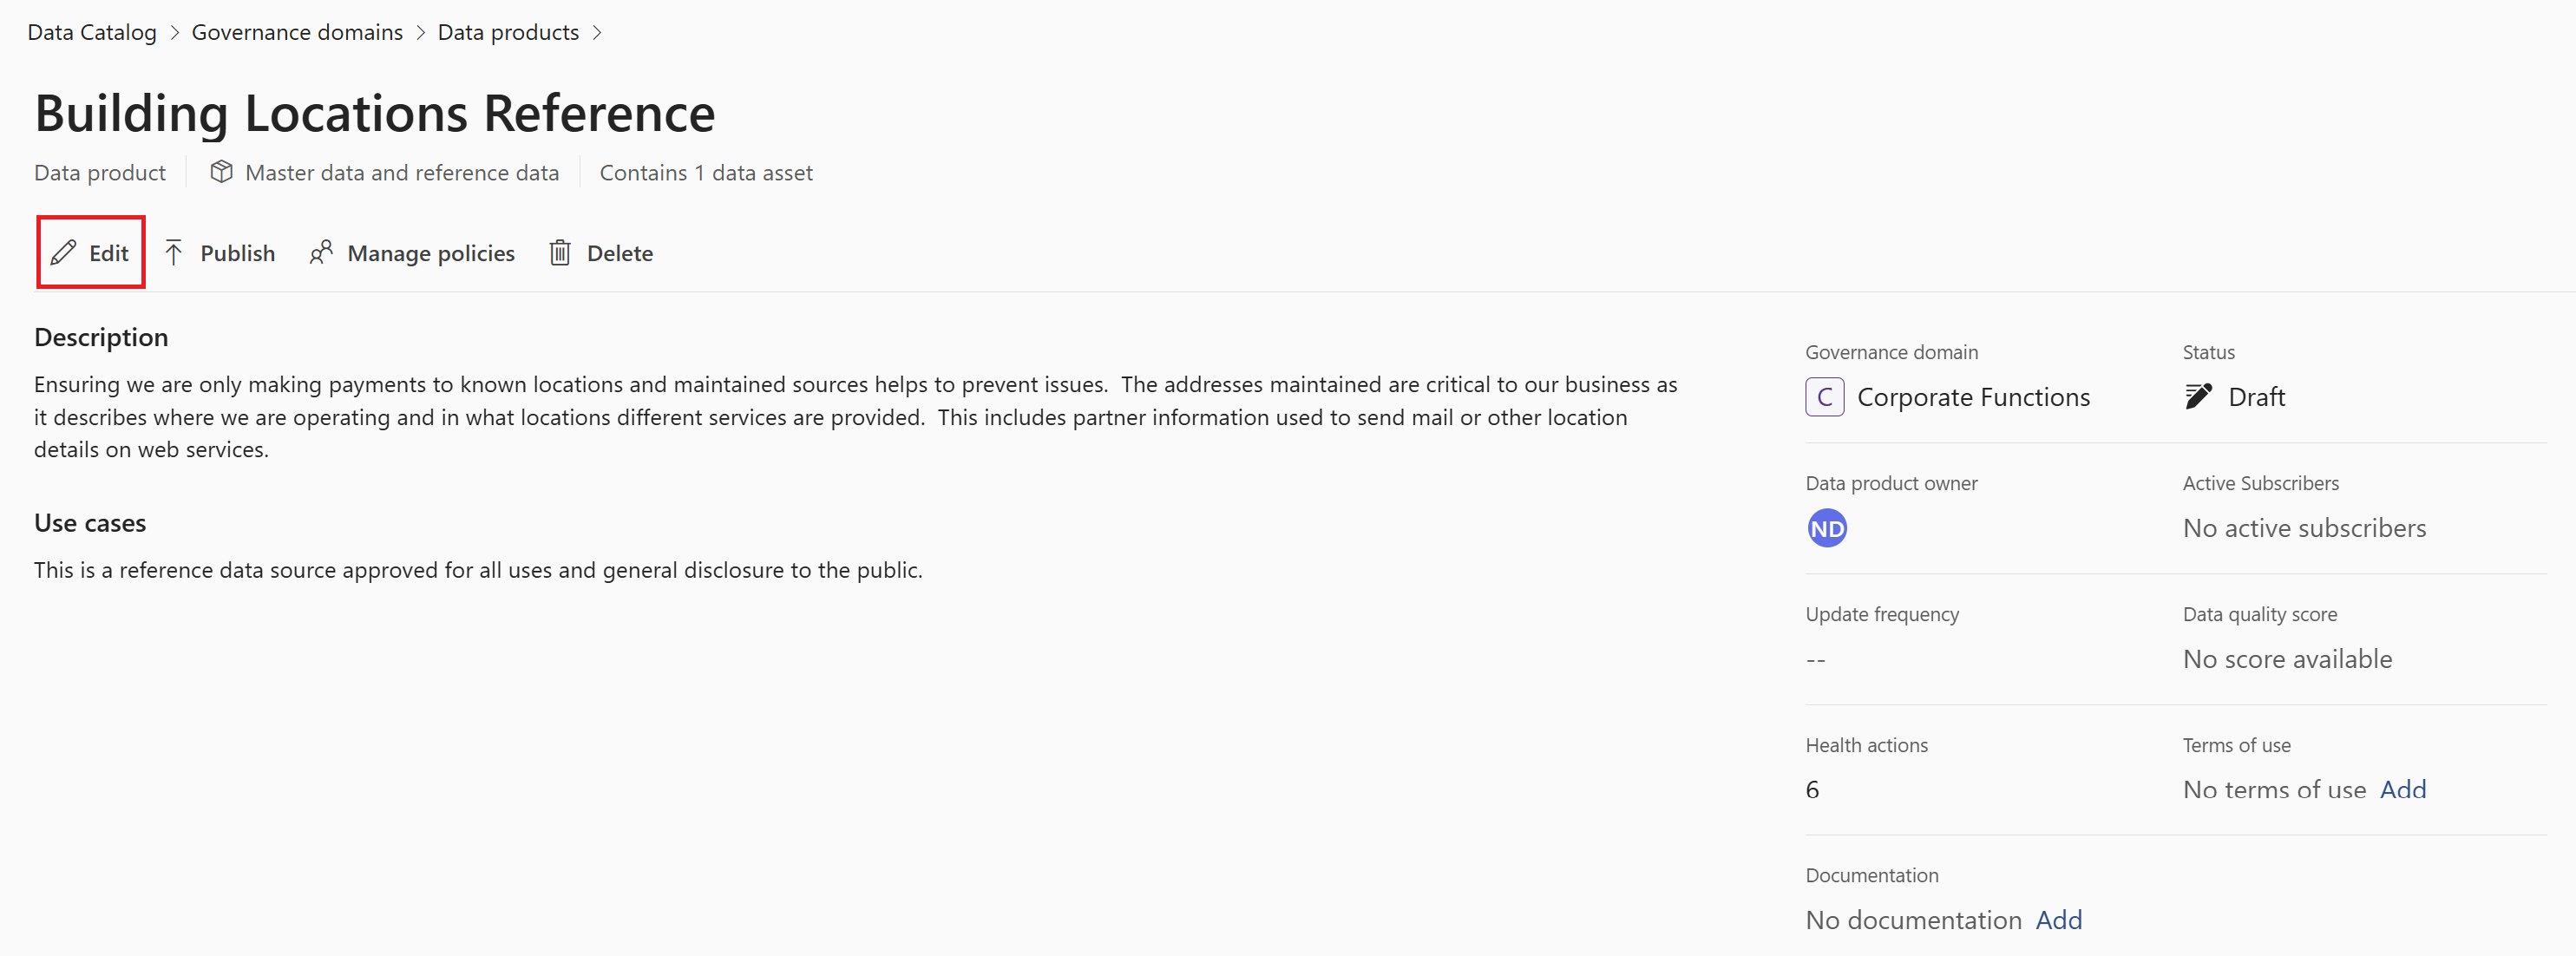
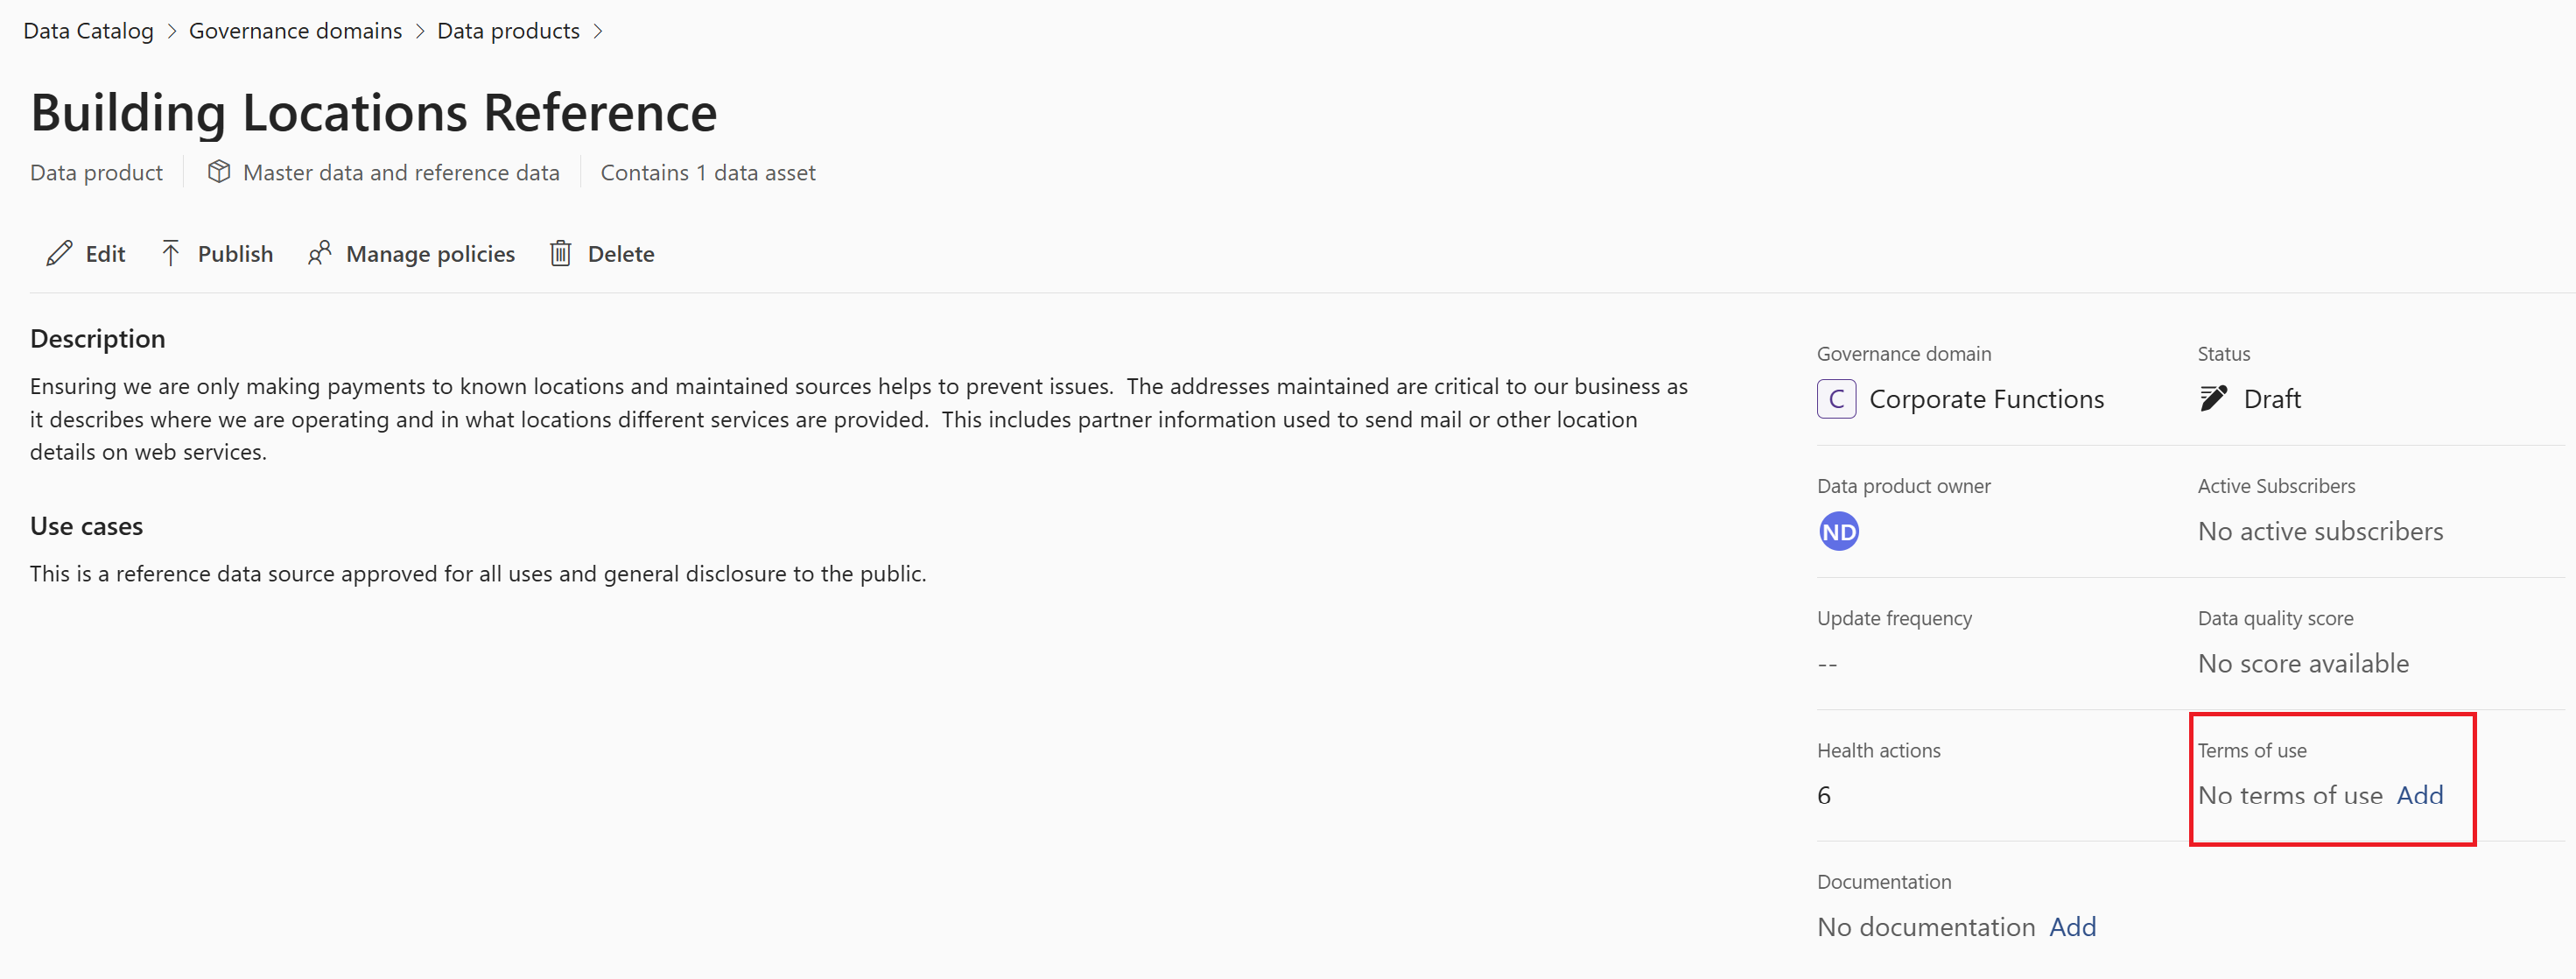
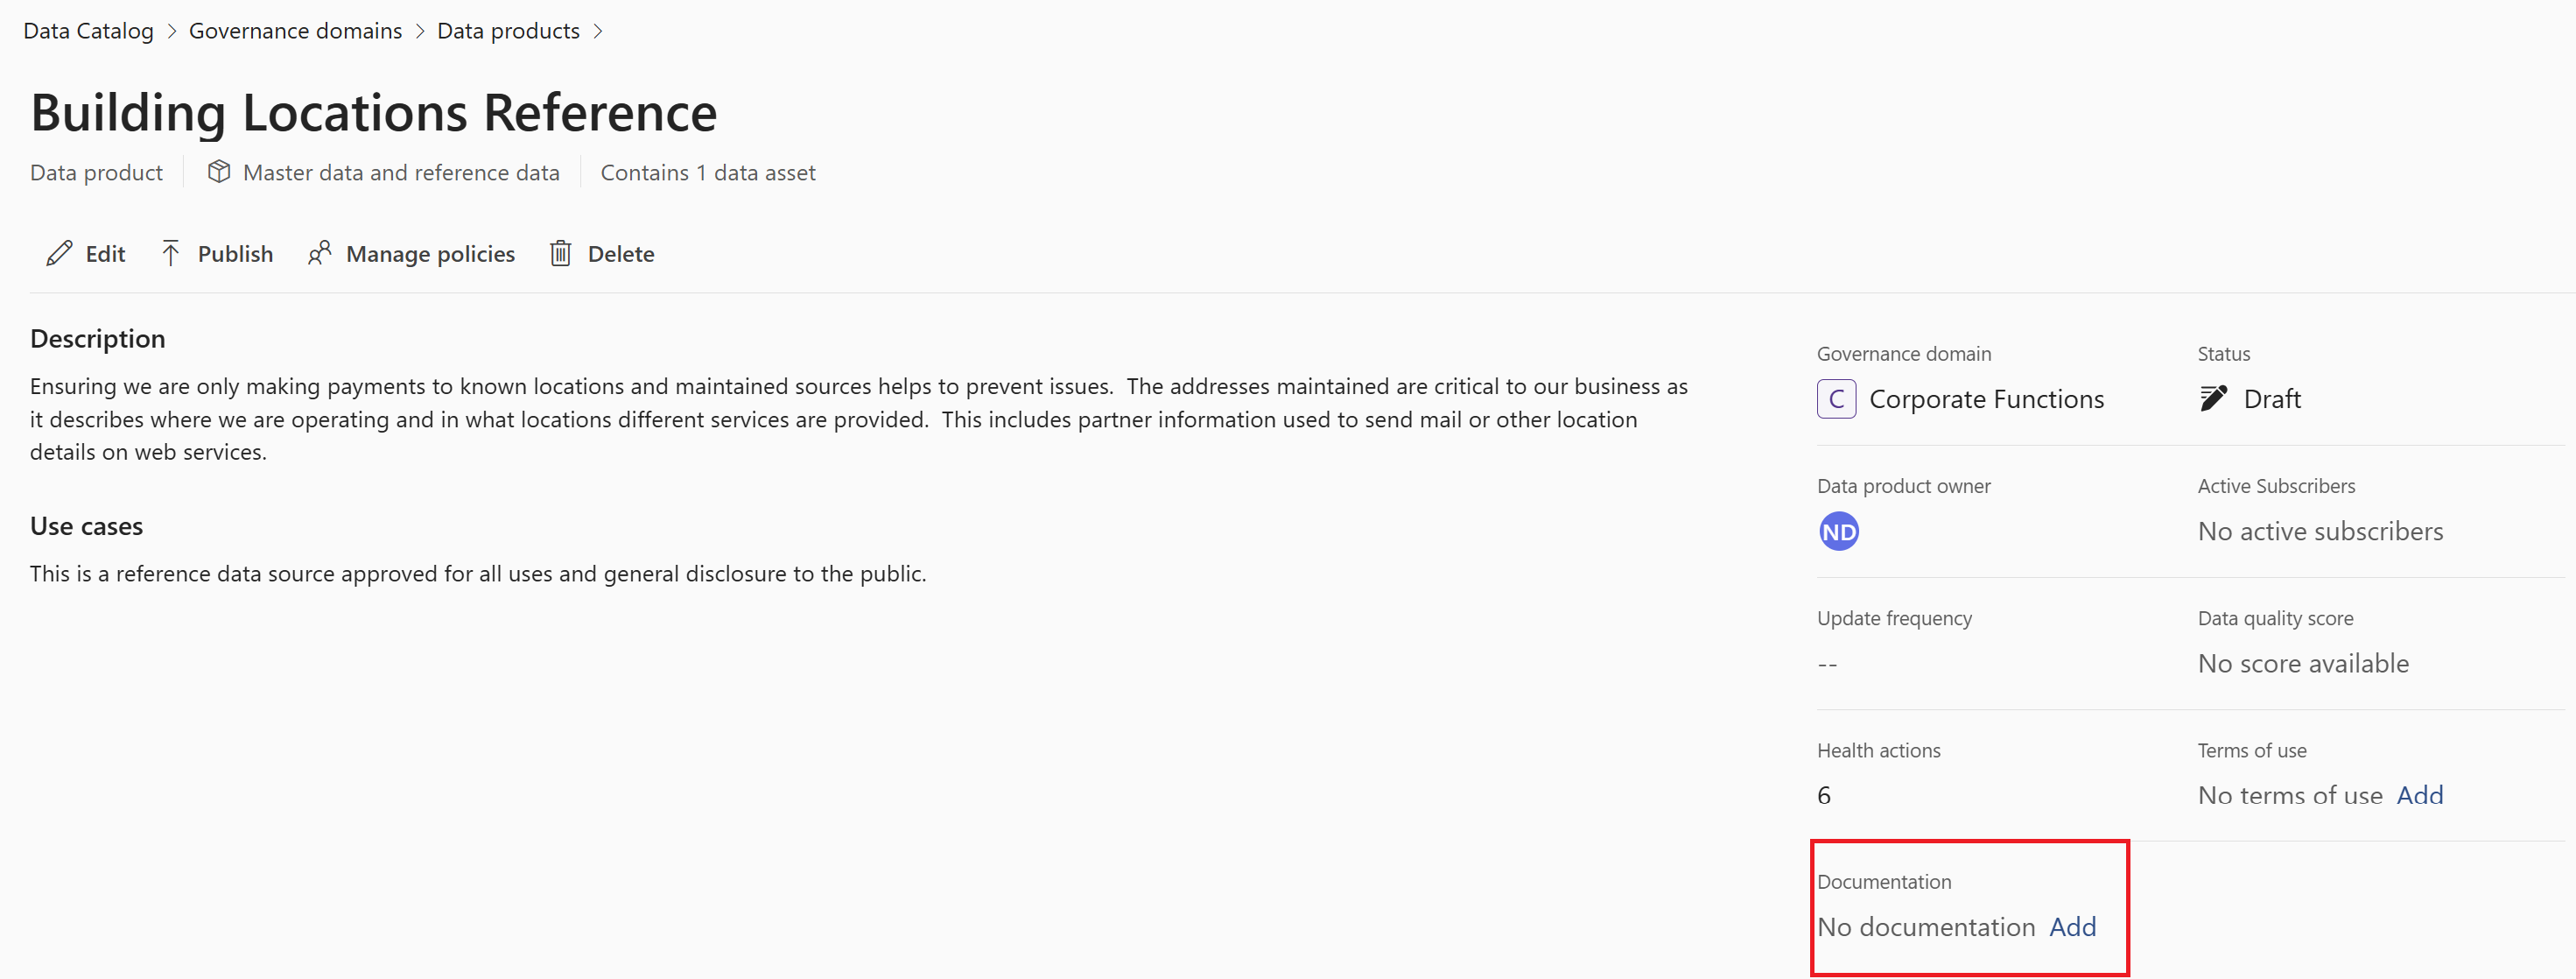
On the data product's detail page, you can view the governance domain, update frequency, status, owner, subscribers, terms of use, aggregate data quality score, health actions, and documentation.
Create data products
Important
To manage or edit data products, users need at least data product owner permissions. You can only create data products in governance domains you have data product owner access to.
In Unified Catalog, select Catalog management, then select Data products.
Select New data product.
Provide the basic details: name, description, and type.
- The description should be a business narrative about the data, where it came from and why it was captured. The goal is for a new user to understand the basics of when, what, why, and how the data came into existence and provide clarity about the meaning of the specific data to the business.
Select an owner or owners for your data product.
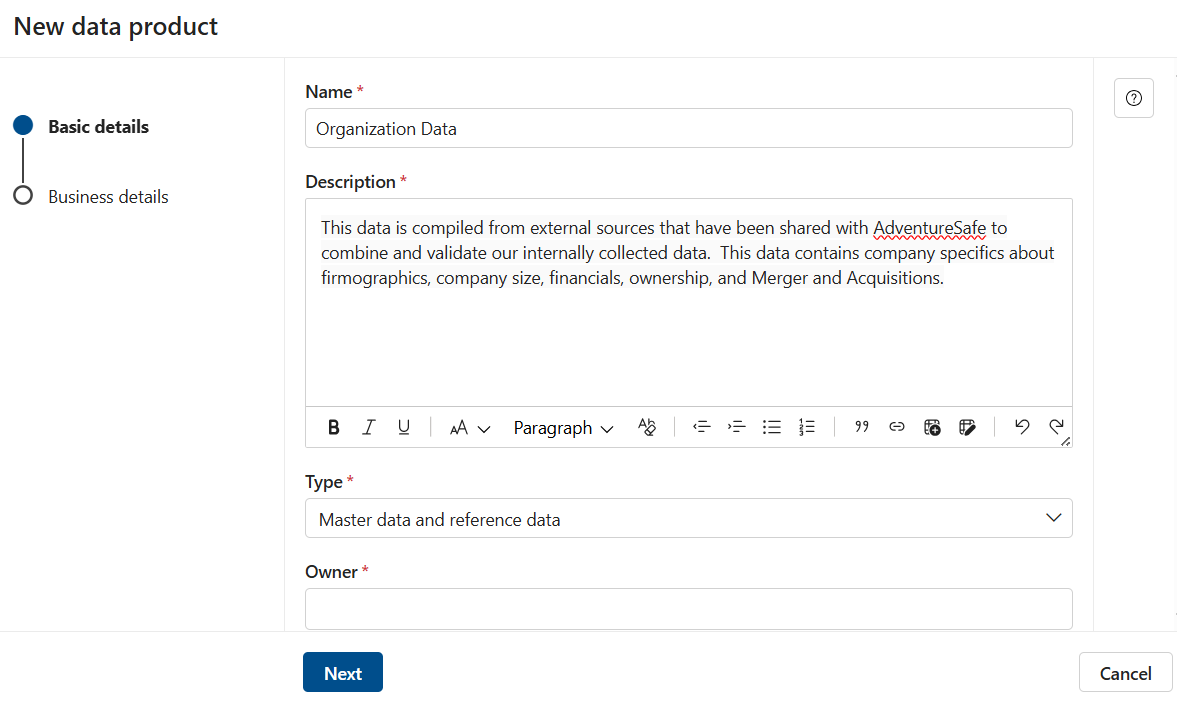
Select Next.
Select the governance domain your data product should be associated with.
Provide the business use case:
- The use case describes what the data is used for today and how a user can effectively apply it to their own scenario. Information like what filters or dimensions are available or which asset contains the view that is easiest to parse, or any other details that can accelerate the usage of the data can be added to the use case. If the data is only appropriate for specific purposes, include these details so users don't request access for data that they won't be approved for or won't help them to achieve their goals.
Select Create.
Once your data product is created, you're taken to the newly created product's details page. This is where you can make other edits to the data product, which is currently in a draft state.
Important
The data product isn't visible to other users yet. For it to be visible to other users, you need to add data assets, create an access policy, and then publish the data product.
Data product types
When you create a data product, you can optionally identify it as one of the following types. These types help identify the kinds of users that might want to use the data product, and can be used to filter data products in a search.
- Dataset - analytical data designed for reporting and other use cases
- Master data and reference data - common data that every use case should apply because of its importance to all business areas
- Business System/Application- data within a single system or large quantities of data that model an entire system for down stream solutions
- Model types (ML, AI, Gen AI, Analytics) - notebooks and semantic models that provide a specific output that others can apply while building new solutions
- Dashboards/Reports - a typical end point for data that is visualized and used by decision makers to better understand the business and gain insights
- Operational - a group of assets that need to be governed and managed for regulatory purposes, lineage mapping, and source of truth identification
Manage data products
Data product owners can view and modify the properties of a data product following these steps.
In Unified Catalog, select Catalog management, then select Data products.
Select the data product to open its details page.
Select Edit.
From the data product page you can:
- Edit details about the data product
- Update frequency
- Change the data product's status
- Manage data product access policies
- Add or remove associated data assets
- Manage associated terms or OKRs
- Manage terms of use
- Manage associated documentation
- Endorse a data product
Edit data product
To edit a data product, you need data product owner permissions.
- On your data product page, select the Edit button.
- Select Details.
- On the basic details page you can update the name, description, type, and owners.
- On the business details page, you can update use cases and endorsement status.
- To save your changes, select Save.
Update frequency
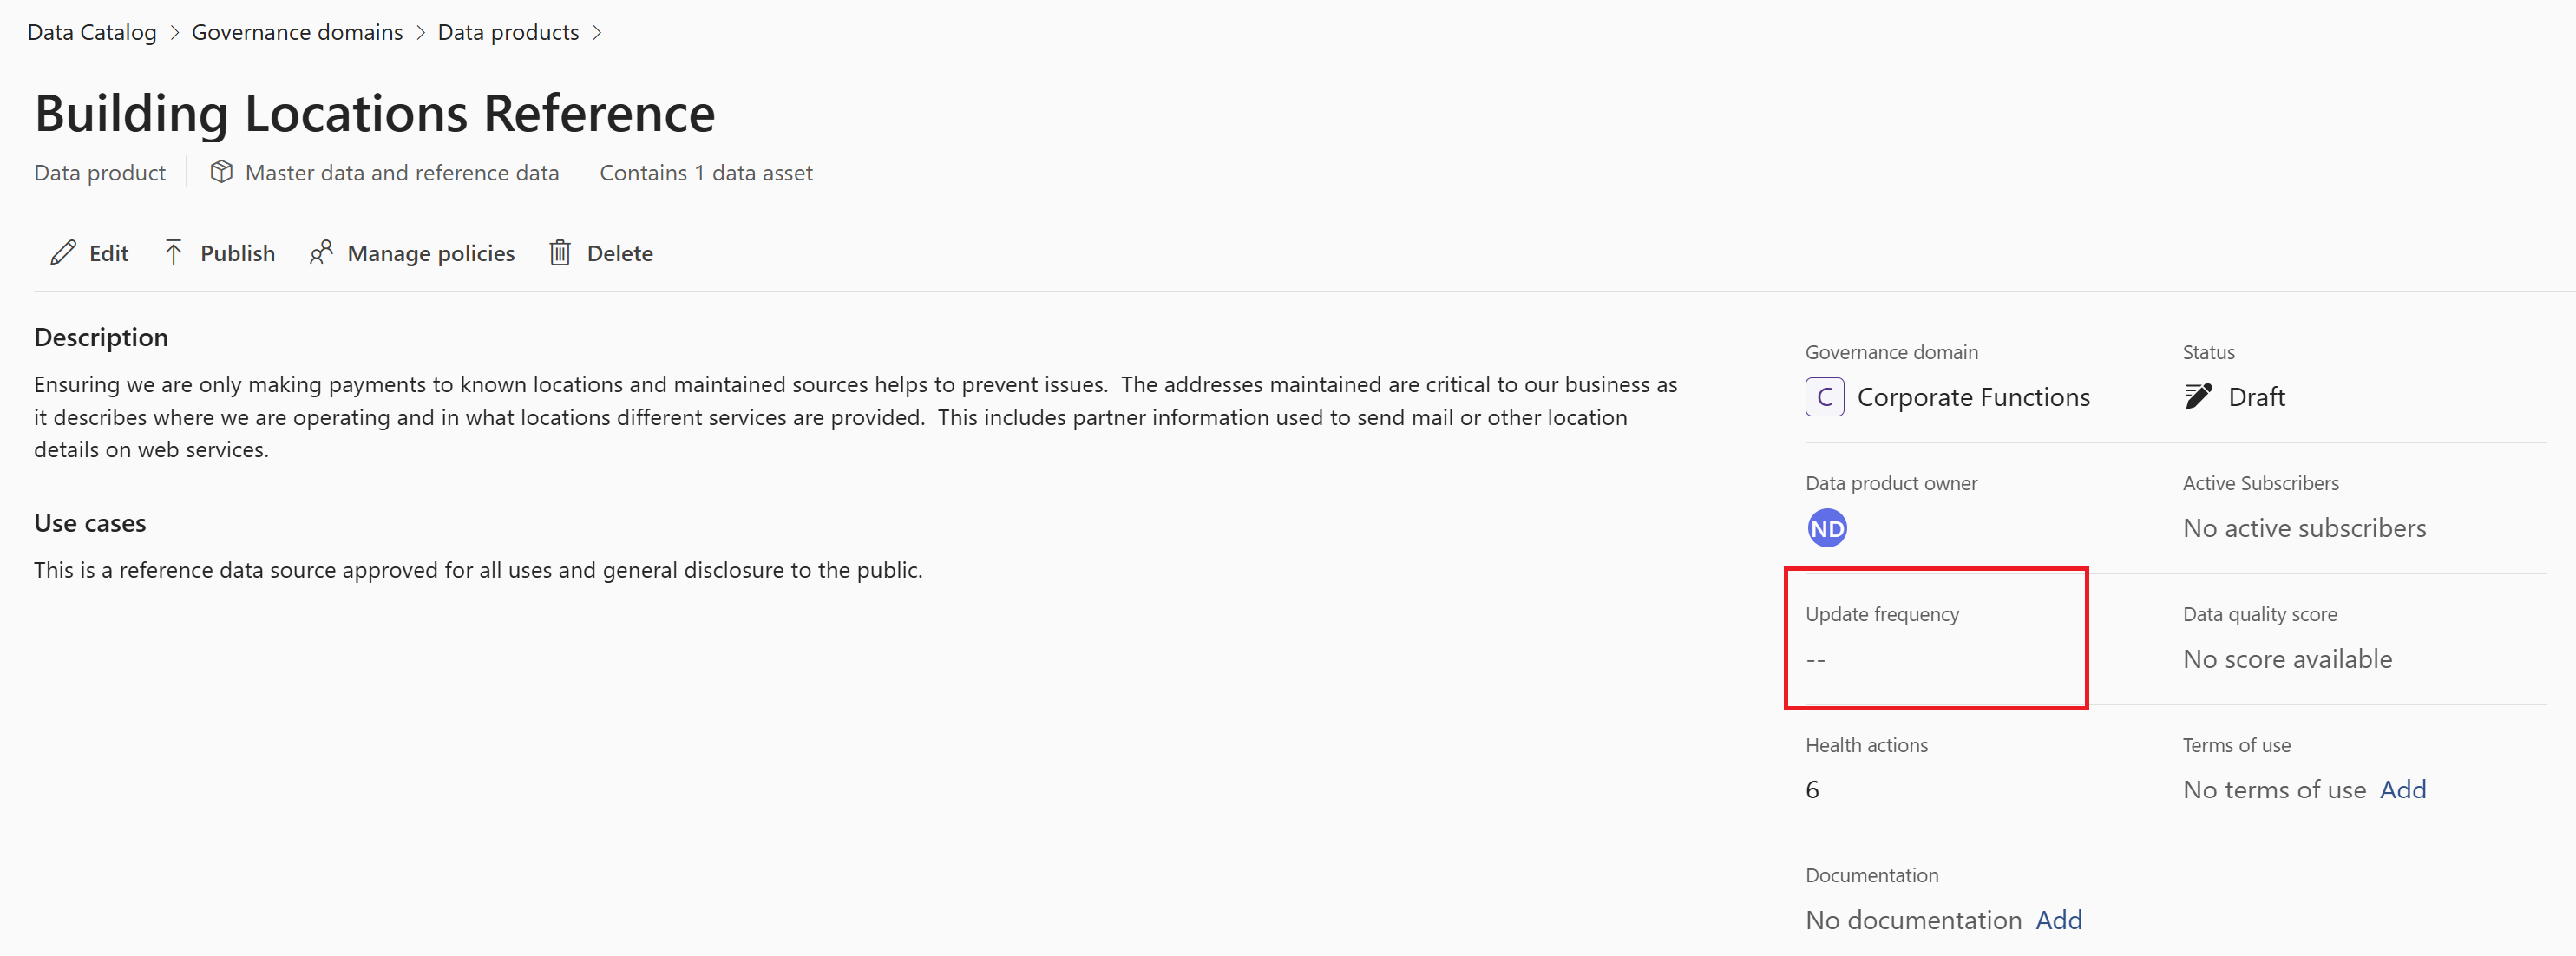
Update frequency can be used to indicate how regularly a data product is managed. This is an indicator and isn't currently automated.
To edit the update frequency, select the update frequency attribute.
Select the update frequency you expect for your data product.
Select Done.
Publish, draft, and expire
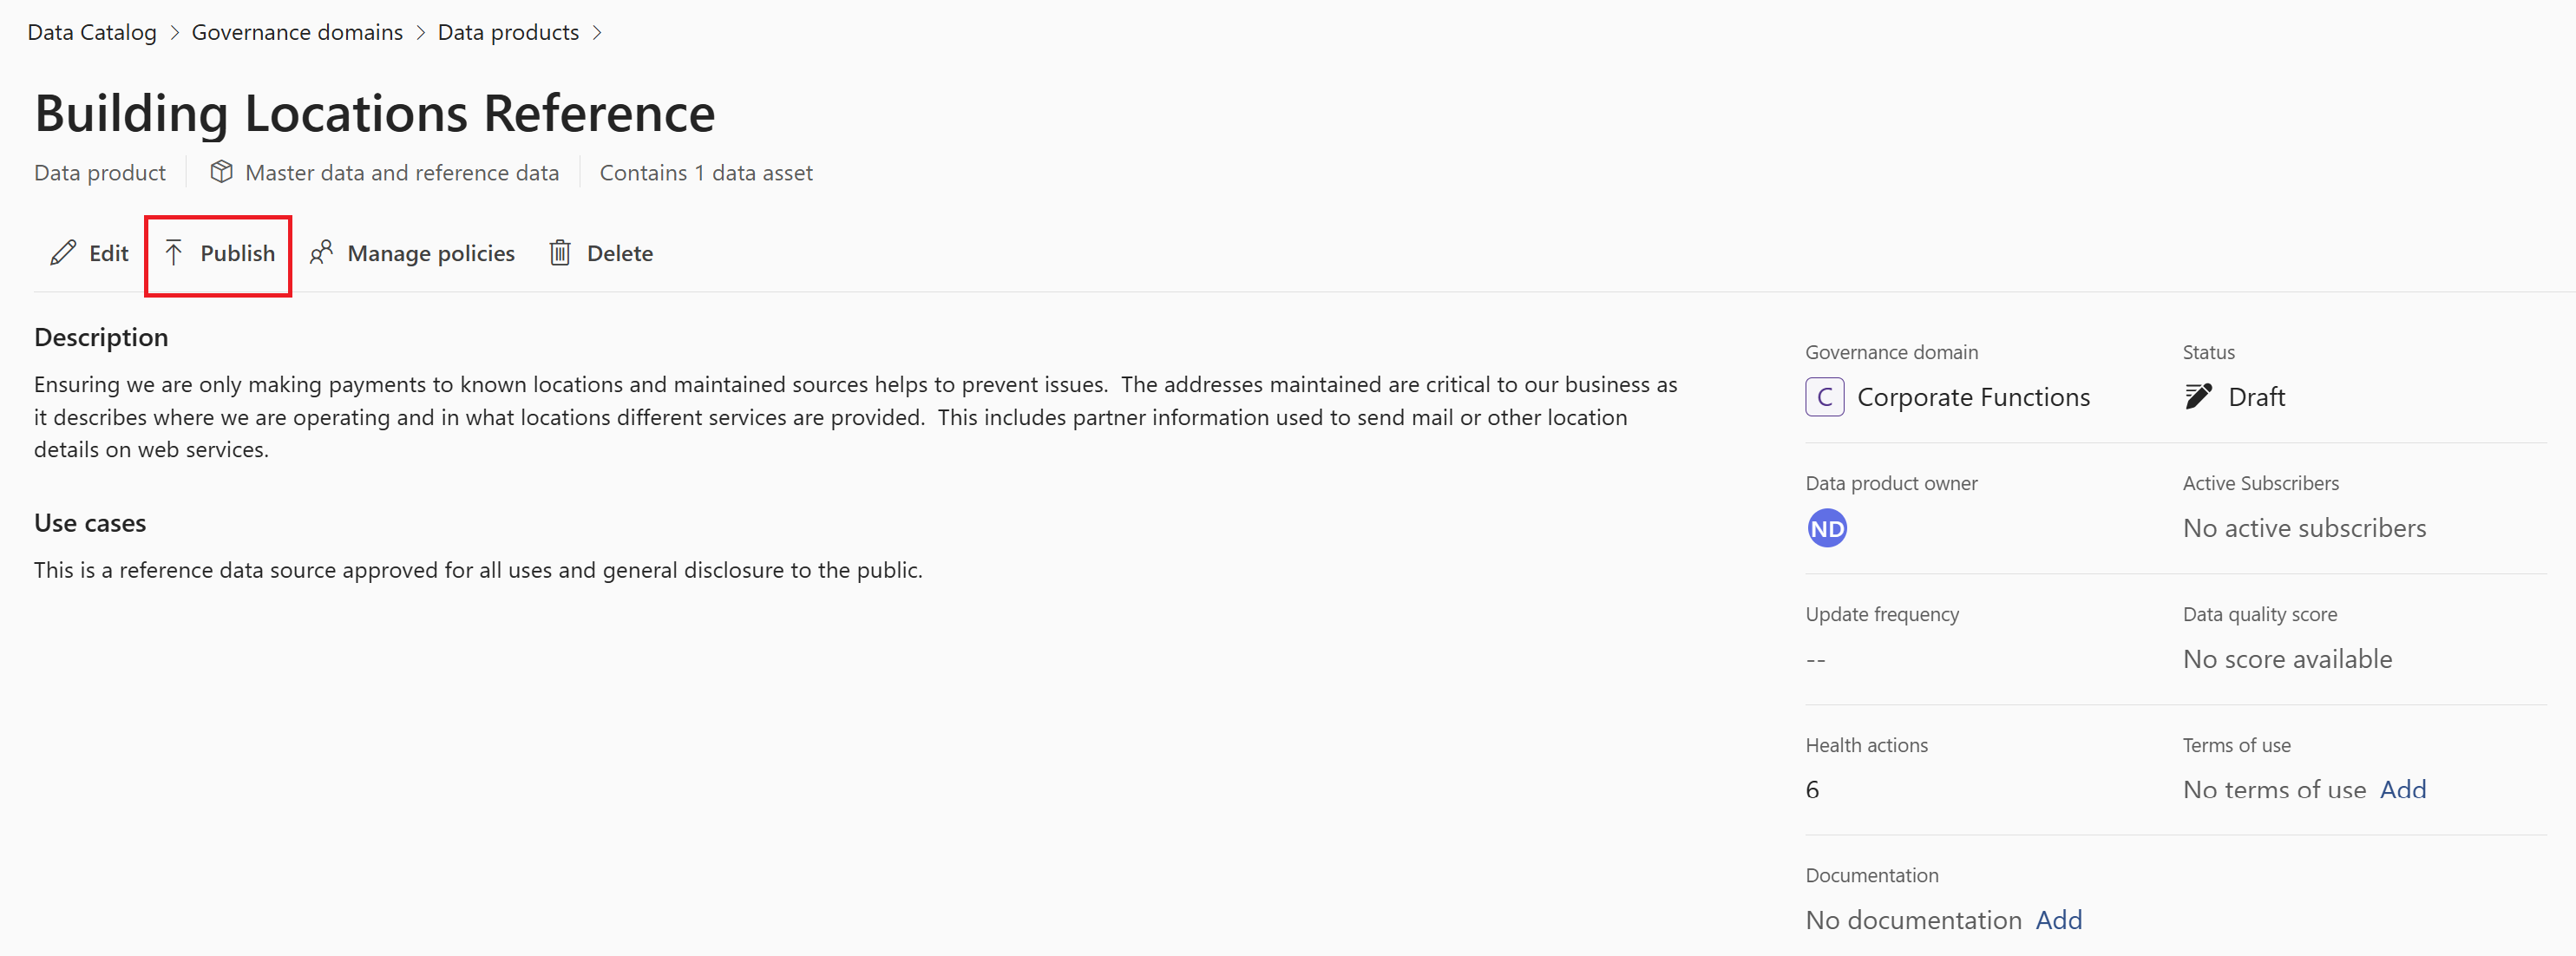
To publish a drafted data product, you can select the Publish button next to the edit button. Before you can publish, you need to add data assets to your data product, and set up a data access policy so users can request access to your data product.
Note
Ensure your governance domain is published before you publish your data products.
After completing the requirements, you can publish your data product, which will make the data product available for users in Unified Catalog.
You can also set a previously published data product to a draft by unpublishing it:
- Select the Unpublish button in the data product.
- Select Set to draft which will allow only stewards, governance domain owners, and data product owners to view and manage it.
You can also set your data product to Expired:
- Select the Unpublish button in the data product.
- Select Set to expired which makes it visible only to stewards, governance domain owners, and data product owners.
Manage data product access policies
To manage access policies, you need data product owner or data steward permissions.
If your data product is published, first it needs to be unpublished to manage policies.
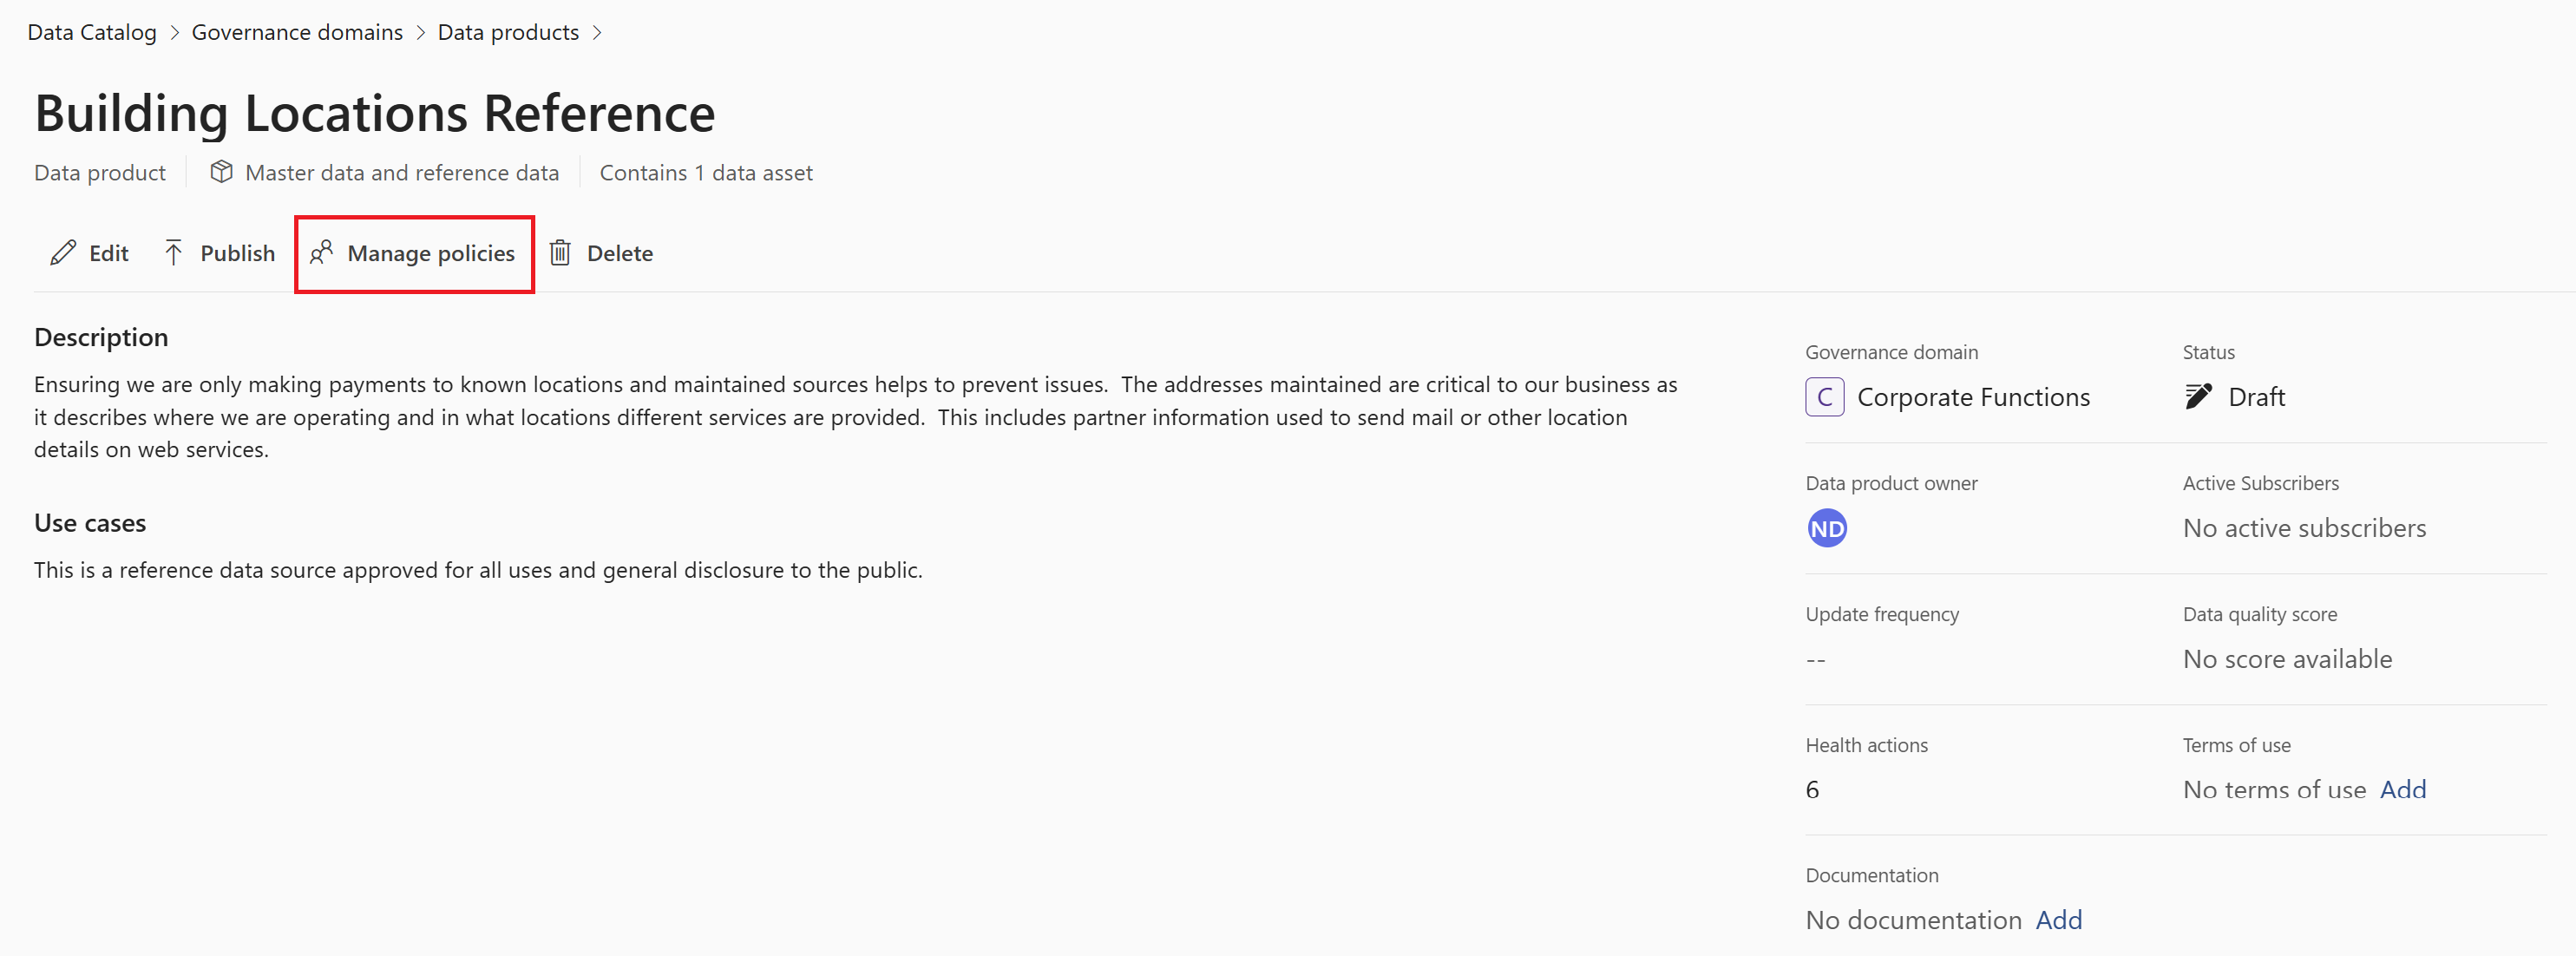
On your data product page, select Manage policies.
From the policy configuration window, you're able to create and manage your data product's access policy. Learn how to set up data product access policies.
Add and remove data assets
A data product groups together data assets. Grouping assets in this way allows them to be more easily discovered. View the instructions below for adding data assets to, or removing assets from, a data product.
Add data assets
Note
When adding data assets, only assets that the governance domain has been scoped for, or that the user has access to in the Data Map, appear in the search.
To add data assets to a data product:
In Unified Catalog, select Catalog management, then select Data products.
Select the data product you want to add assets to.
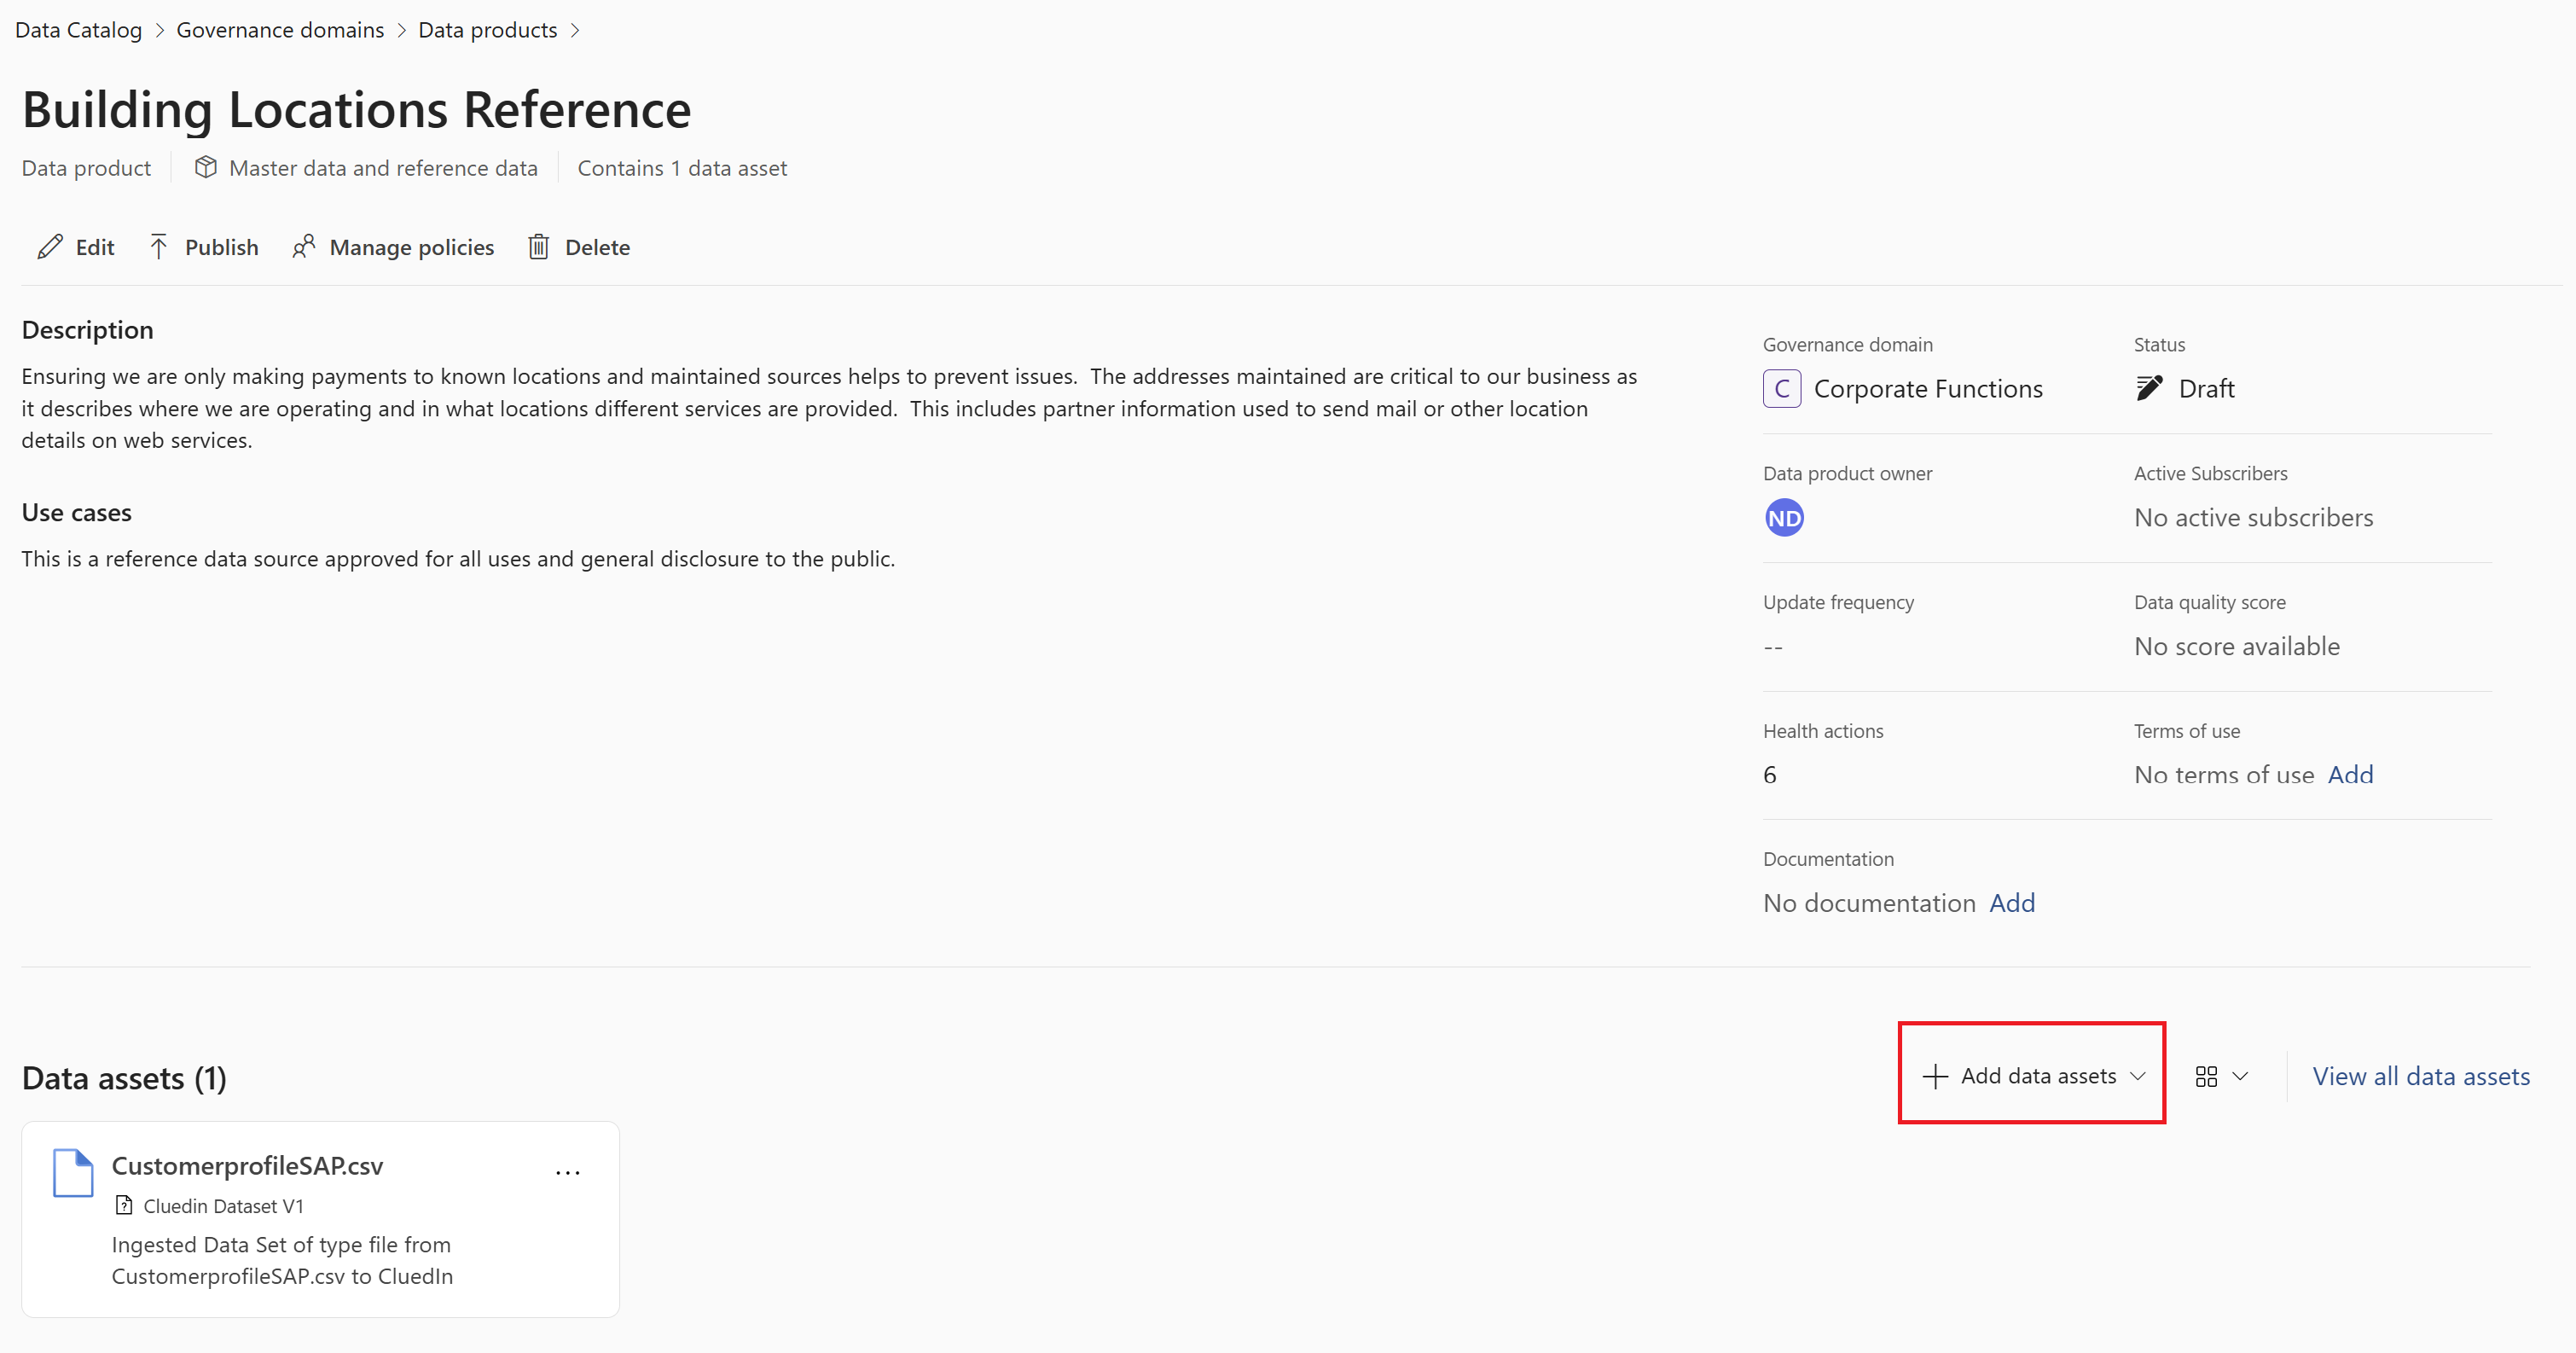
Select Add data assets under the description and use cases.
Search for your data assets using keywords, or by using the filters by selecting the Add filter button.
Select any assets you want to add to the data product.
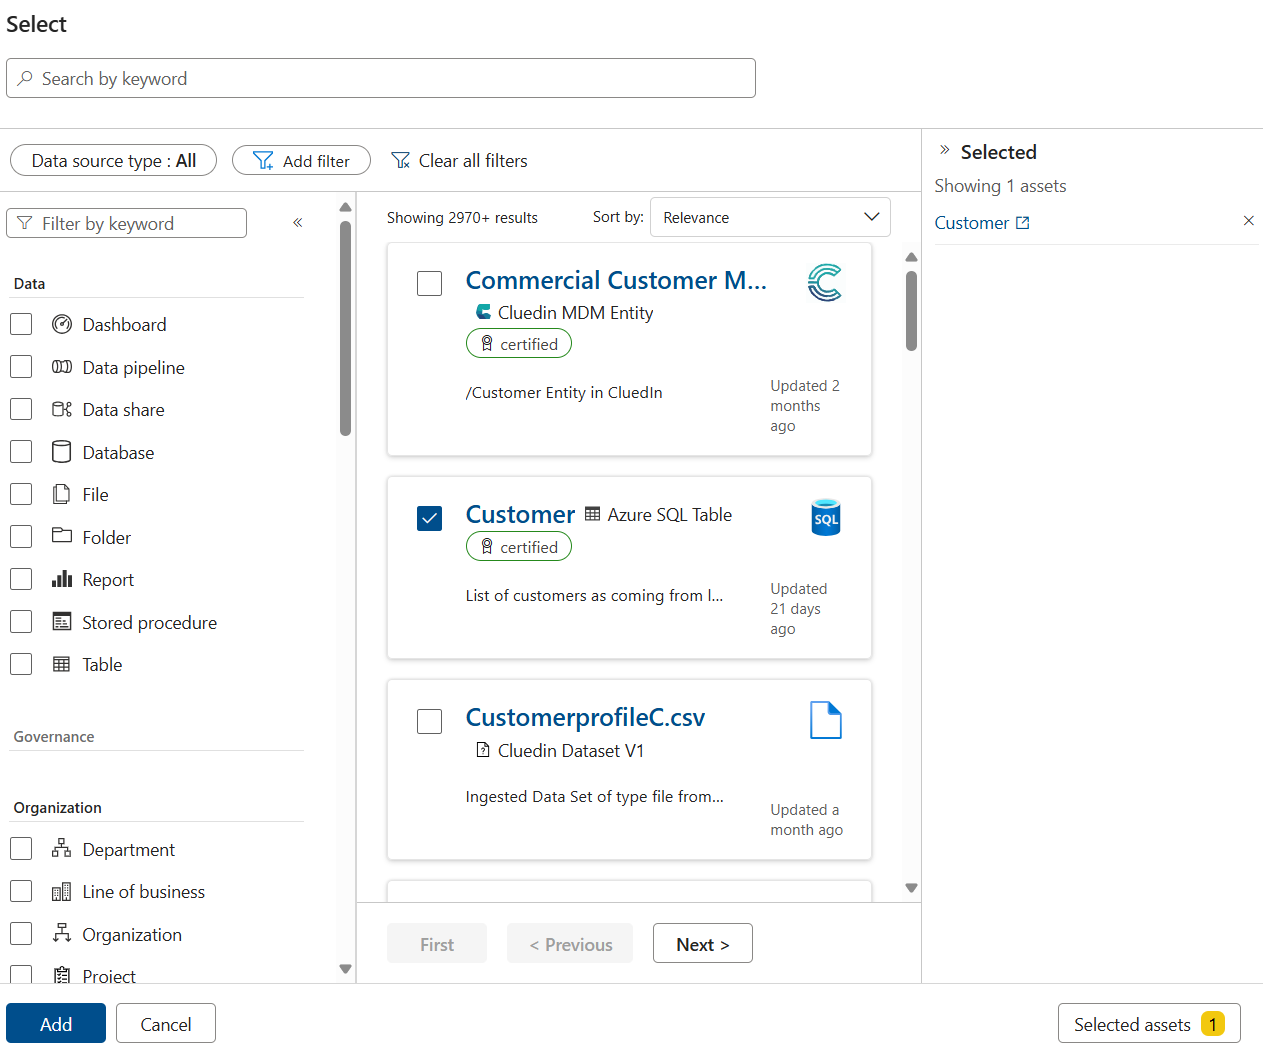
You can edit your selected asset list by selecting the Selected assets button.
Once you've selected all your assets, select the Add button.
You'll see your newly added assets in your data product.
Remove data assets
Tip
We recommend collaborating with your data quality team to perform necessary cleanup work, as described below, before removing data assets and deleting data products.
Before a data asset can be removed from a data product, all data quality rules and previous data quality scans must be removed from the asset. Get instructions for deleting data quality history.
Although data quality stewards may not be involved in creating data products, they are the subject matter experts in data quality rules and scans. Only users holding the Data Quality Steward role can remove data quality rules and scans, so data product owners should work with data quality stewards to get rules and scans removed before the asset in question can be removed from the data product.
Follow these steps to remove a data asset:
In Unified Catalog, select Catalog management, then select Data products.
Select the data product you want to remove assets from.
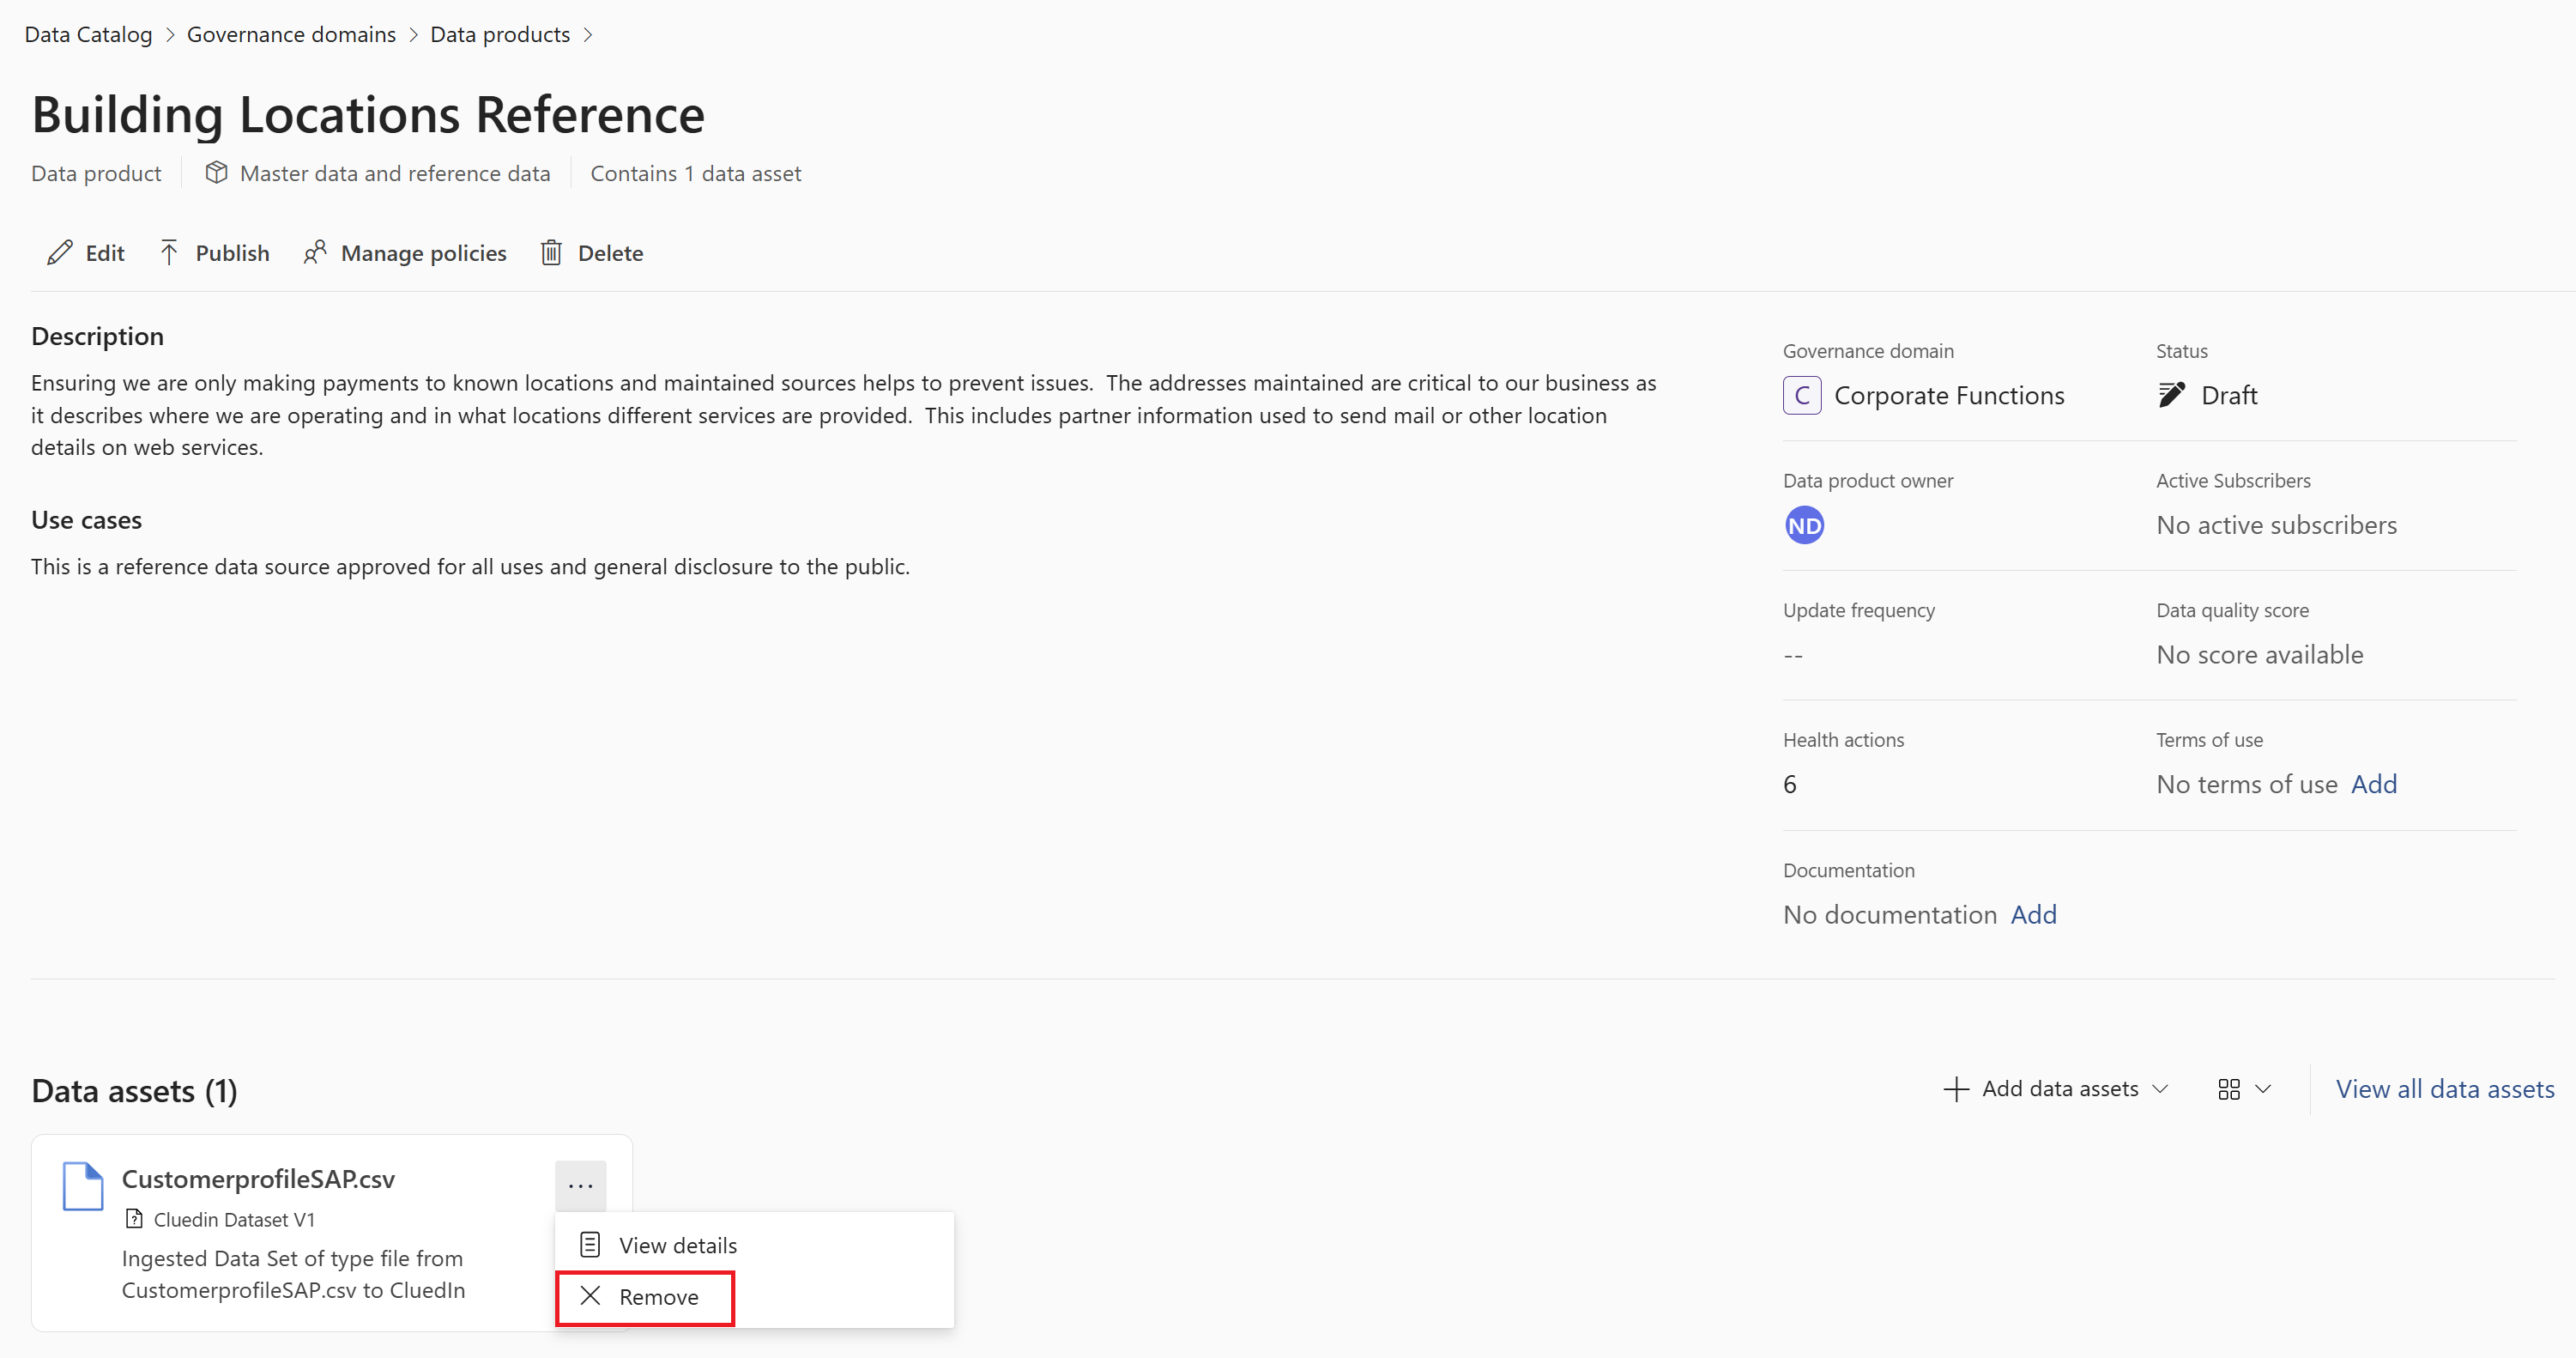
If the assets you want to remove are on the front page, you can select their ellipsis button and select Remove.
If you don't see the assets on the main product page, select View all data assets. There you're able to search and filter the assets. To remove them, select their ellipsis button and select Remove.
Note
The remove action is greyed out if the data asset has data quality rules running on it or failed data quality run history. You need the Data Quality Steward role to resolve these issues before the asset can be removed.
Manage linked resources
You can link glossary terms and OKRs to your data products directly to improve understanding, apply policies, and associate your data products with your business' goals.
Critical data elements are added automatically when assets in your data product are mapped to critical data elements. For more information, see the critical data elements article.
Add linked resources
On the data products page, select the data product you want to add terms or OKRs to.
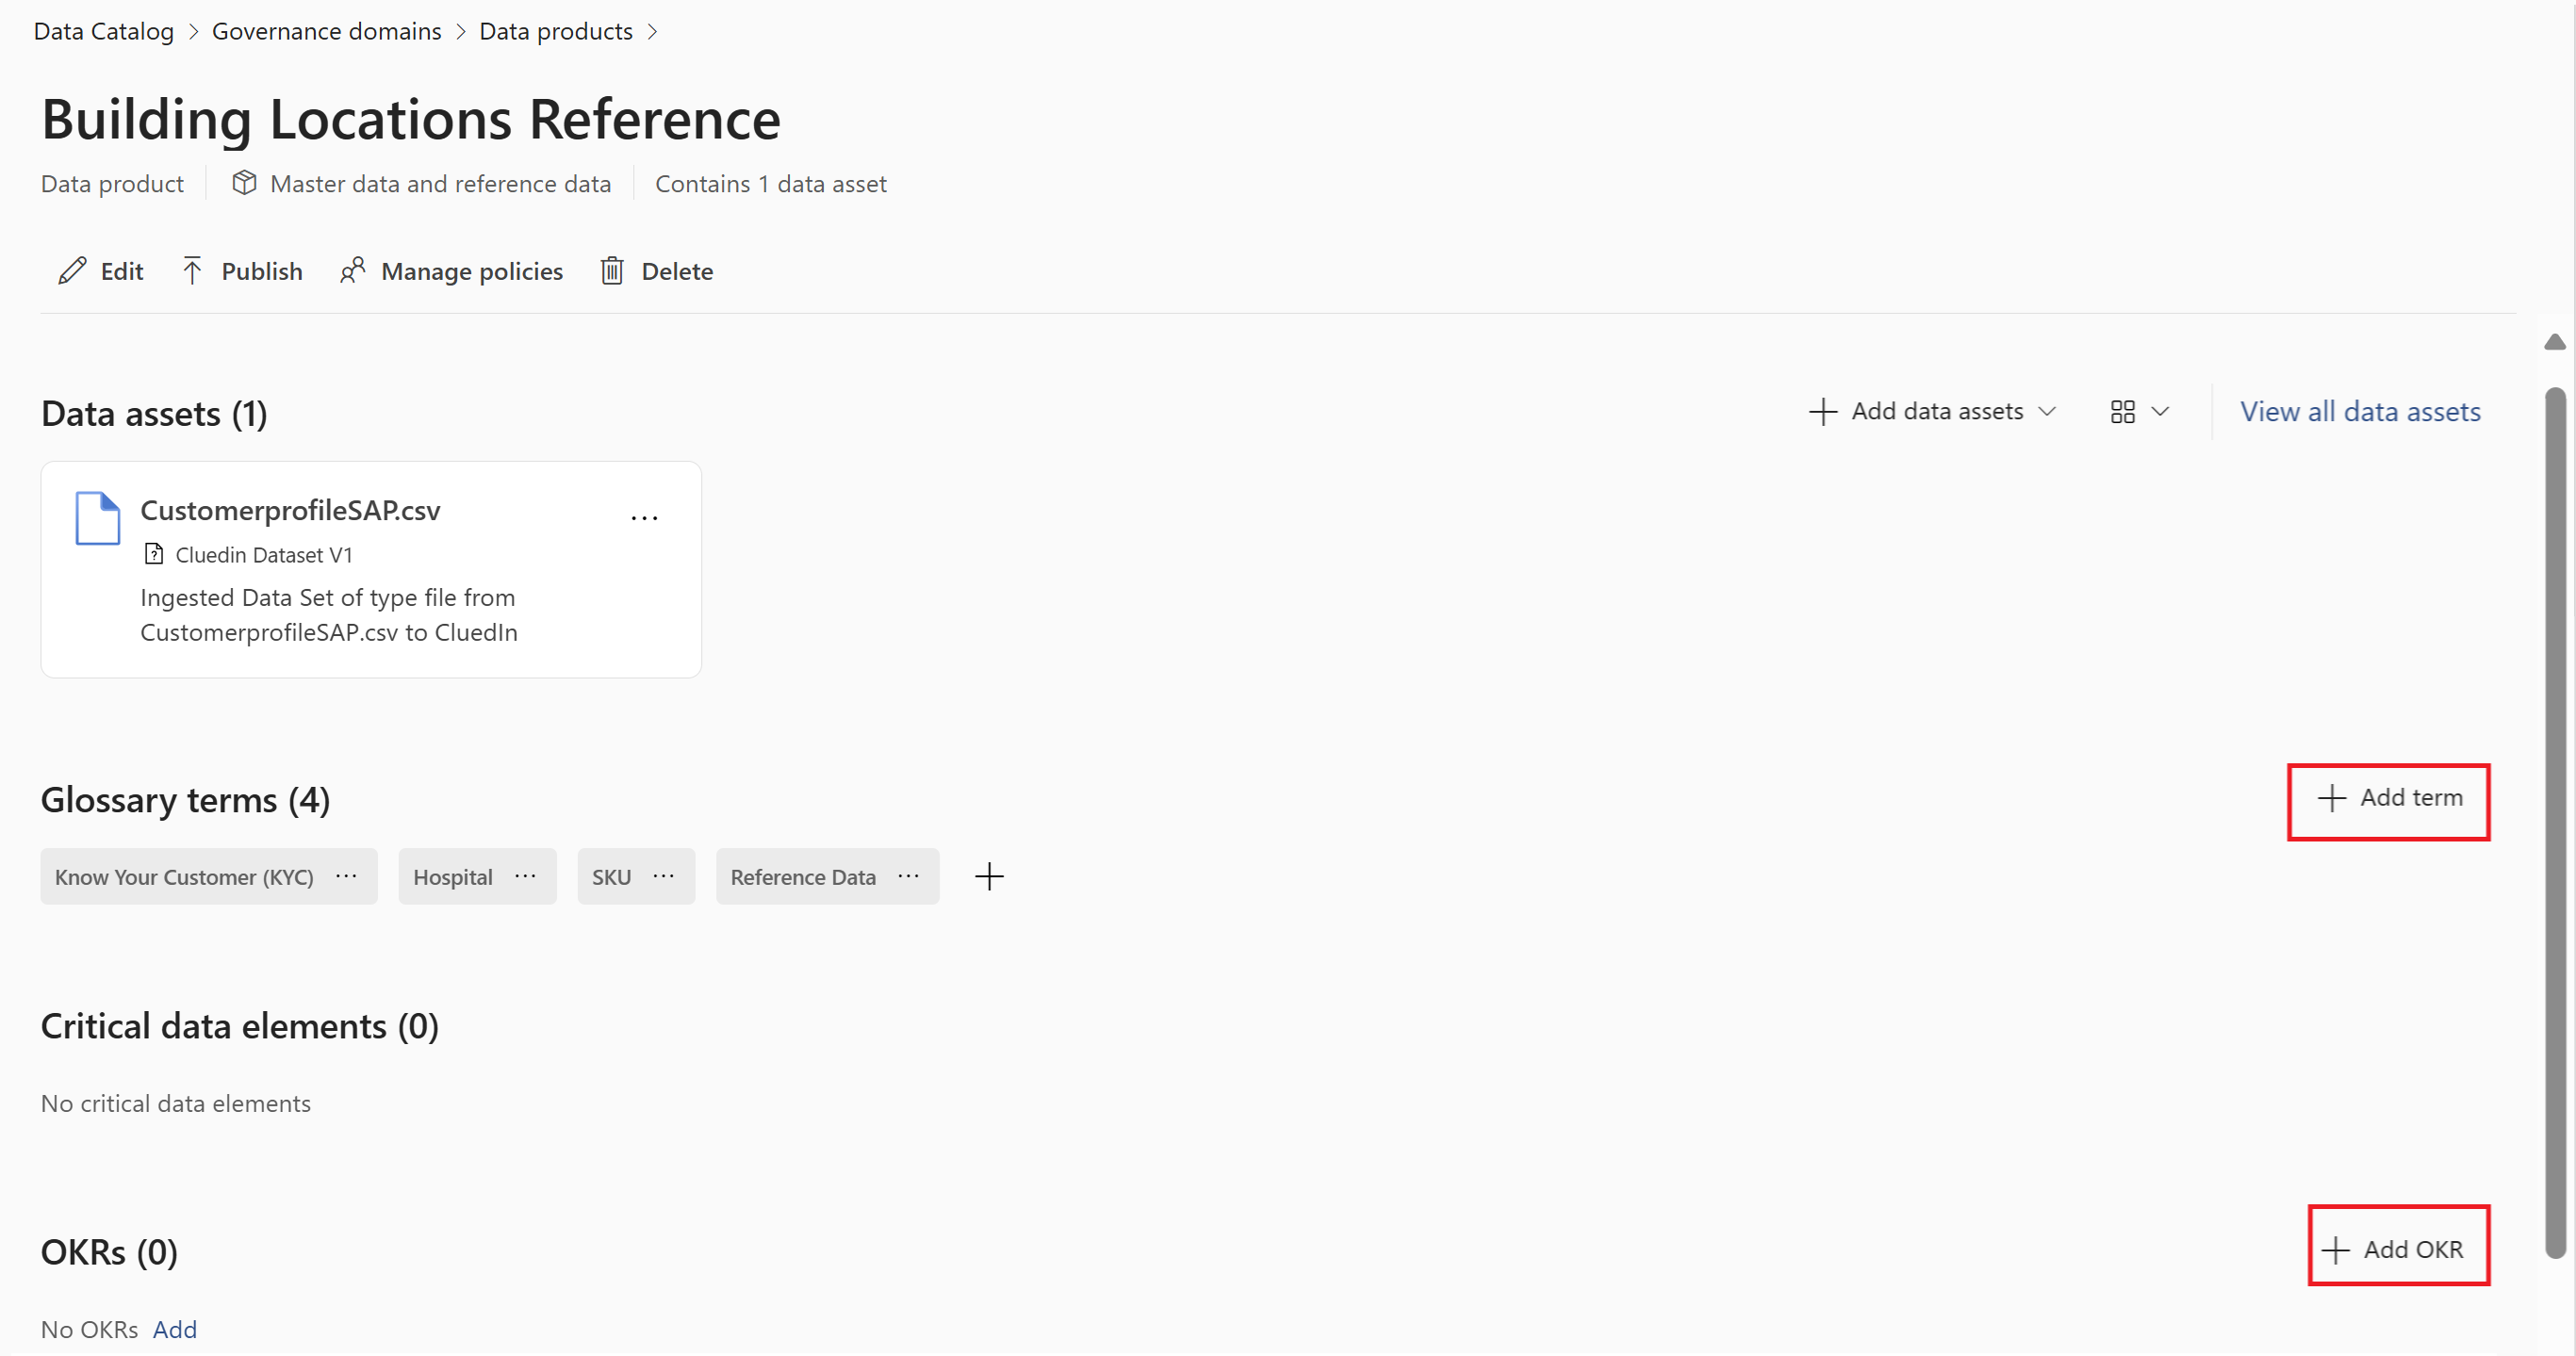
Under Glossary terms or OKRs select the + or the Add button.
Search for your terms or ORKs using keywords, governance domain, or by using the filters by selecting the filter button.
Select any you want to add to the data product.
Select the Add button.
You can now see the term or OKR in the list for your data products.
Remove linked resources
- On the data products page, select the data product you want to remove terms or OKRs from.
- Under Glossary terms or OKRs, find the item you want to remove, and select its ellipsis button.
- Select Remove.
Note
Critical data elements are added automatically based on the assets in your data product. For more information about managing critical data elements, see the critical data elements article.
Terms of use
On the data products page, select the data product you want to manage terms of use for.
Select the terms of use attribute.
To add more terms of use:
- Select the + Add link button.
- (Optionally) Choose a particular data asset to link the use to.
- Provide a friendly name for the terms.
- Provide the link to the terms of use.
- Select Create.
- Select Done.
To remove any terms of use:
- Hover over the term you want to remove.
- Select the trashcan remove button.
Once you've made your edits, select the Done button.
Documentation
On the data products page, select the data product you want to manage documentation for.
Select the documentation attribute.
To add documentation:
- Select Add link.
- (Optionally) Choose a particular data asset to link the documentation to.
- Provide a friendly name for the documentation.
- Provide the link to the documentation.
- Select Create.
- Select Done.
To remove any documentation:
- Hover over the documentation you want to remove.
- Select the trashcan remove button.
Once you've made your edits, select the Done button.
Endorse a data product
As a Microsoft Purview Unified Catalog grows in size, it's important for data consumers to understand what data they can trust. Data consumers need to know if a data product meets their organization's quality standards and can be regarded as reliable.
Data product owners can now set the 'Endorsed' flag for their data products to indicate that they have certified their data products, and build confidence in the quality of their data product.
To endorse a data product, you need data product owner permissions.
On your data product page, select the Edit button.
Select Details.
Select the Mark as 'Endorsed' button.
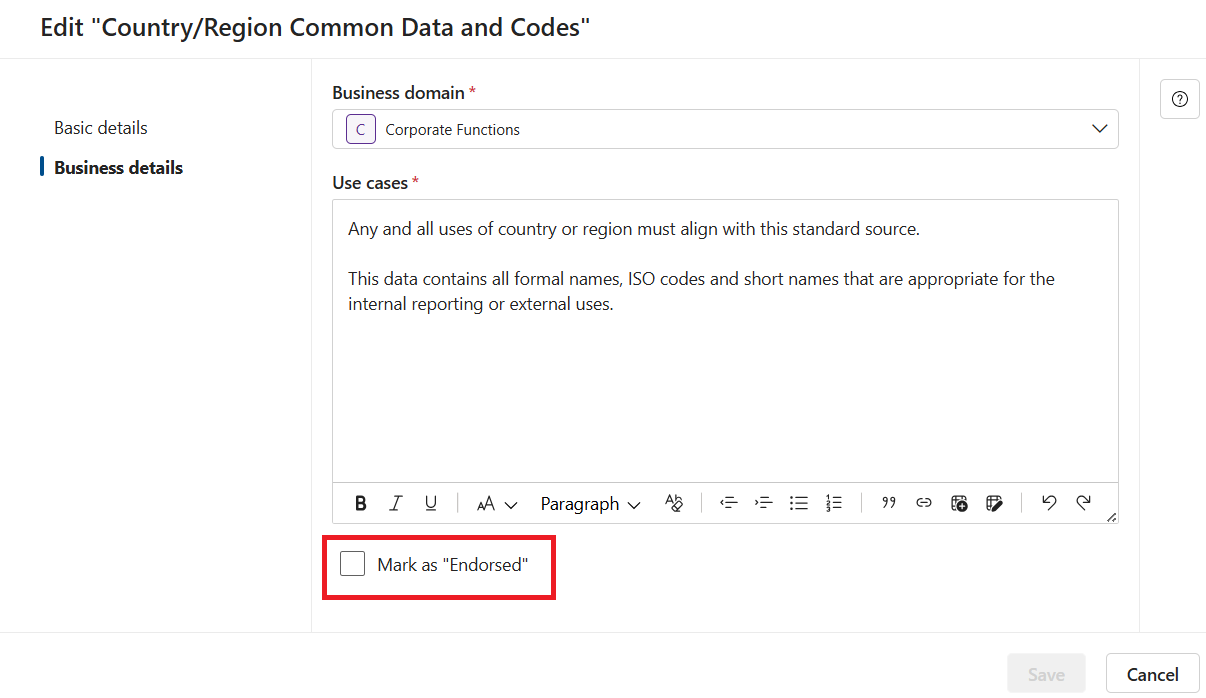
To save your changes, select Save.
Delete data products
Deleting a data product needs to be a planned undertaking, as there are several steps that need to happen before the deletion.
First, you need to unpublish the data product.
- You must also remove links to all related business concepts and remove any data assets within the data product.
- If any assets have data quality rules running on them or failed data quality run history, you need to delete the data quality history.
Then you need to inform subscribers of the data product about the upcoming deletion and delete their access request to the data product.
Once all tasks are completed, you can select Delete on the data product's page to successfully delete the data product.


