Set up a task flow (preview)
This article describes how to start building a task flow, starting either from scratch or with one of Fabric's predefined task flows. It targets data analytics solution architects and others who want to create a visualization of a data project.
Prerequisites
To create a task flow in a workspace, you must be a workspace admin, member, or contributor.
Open the workspace
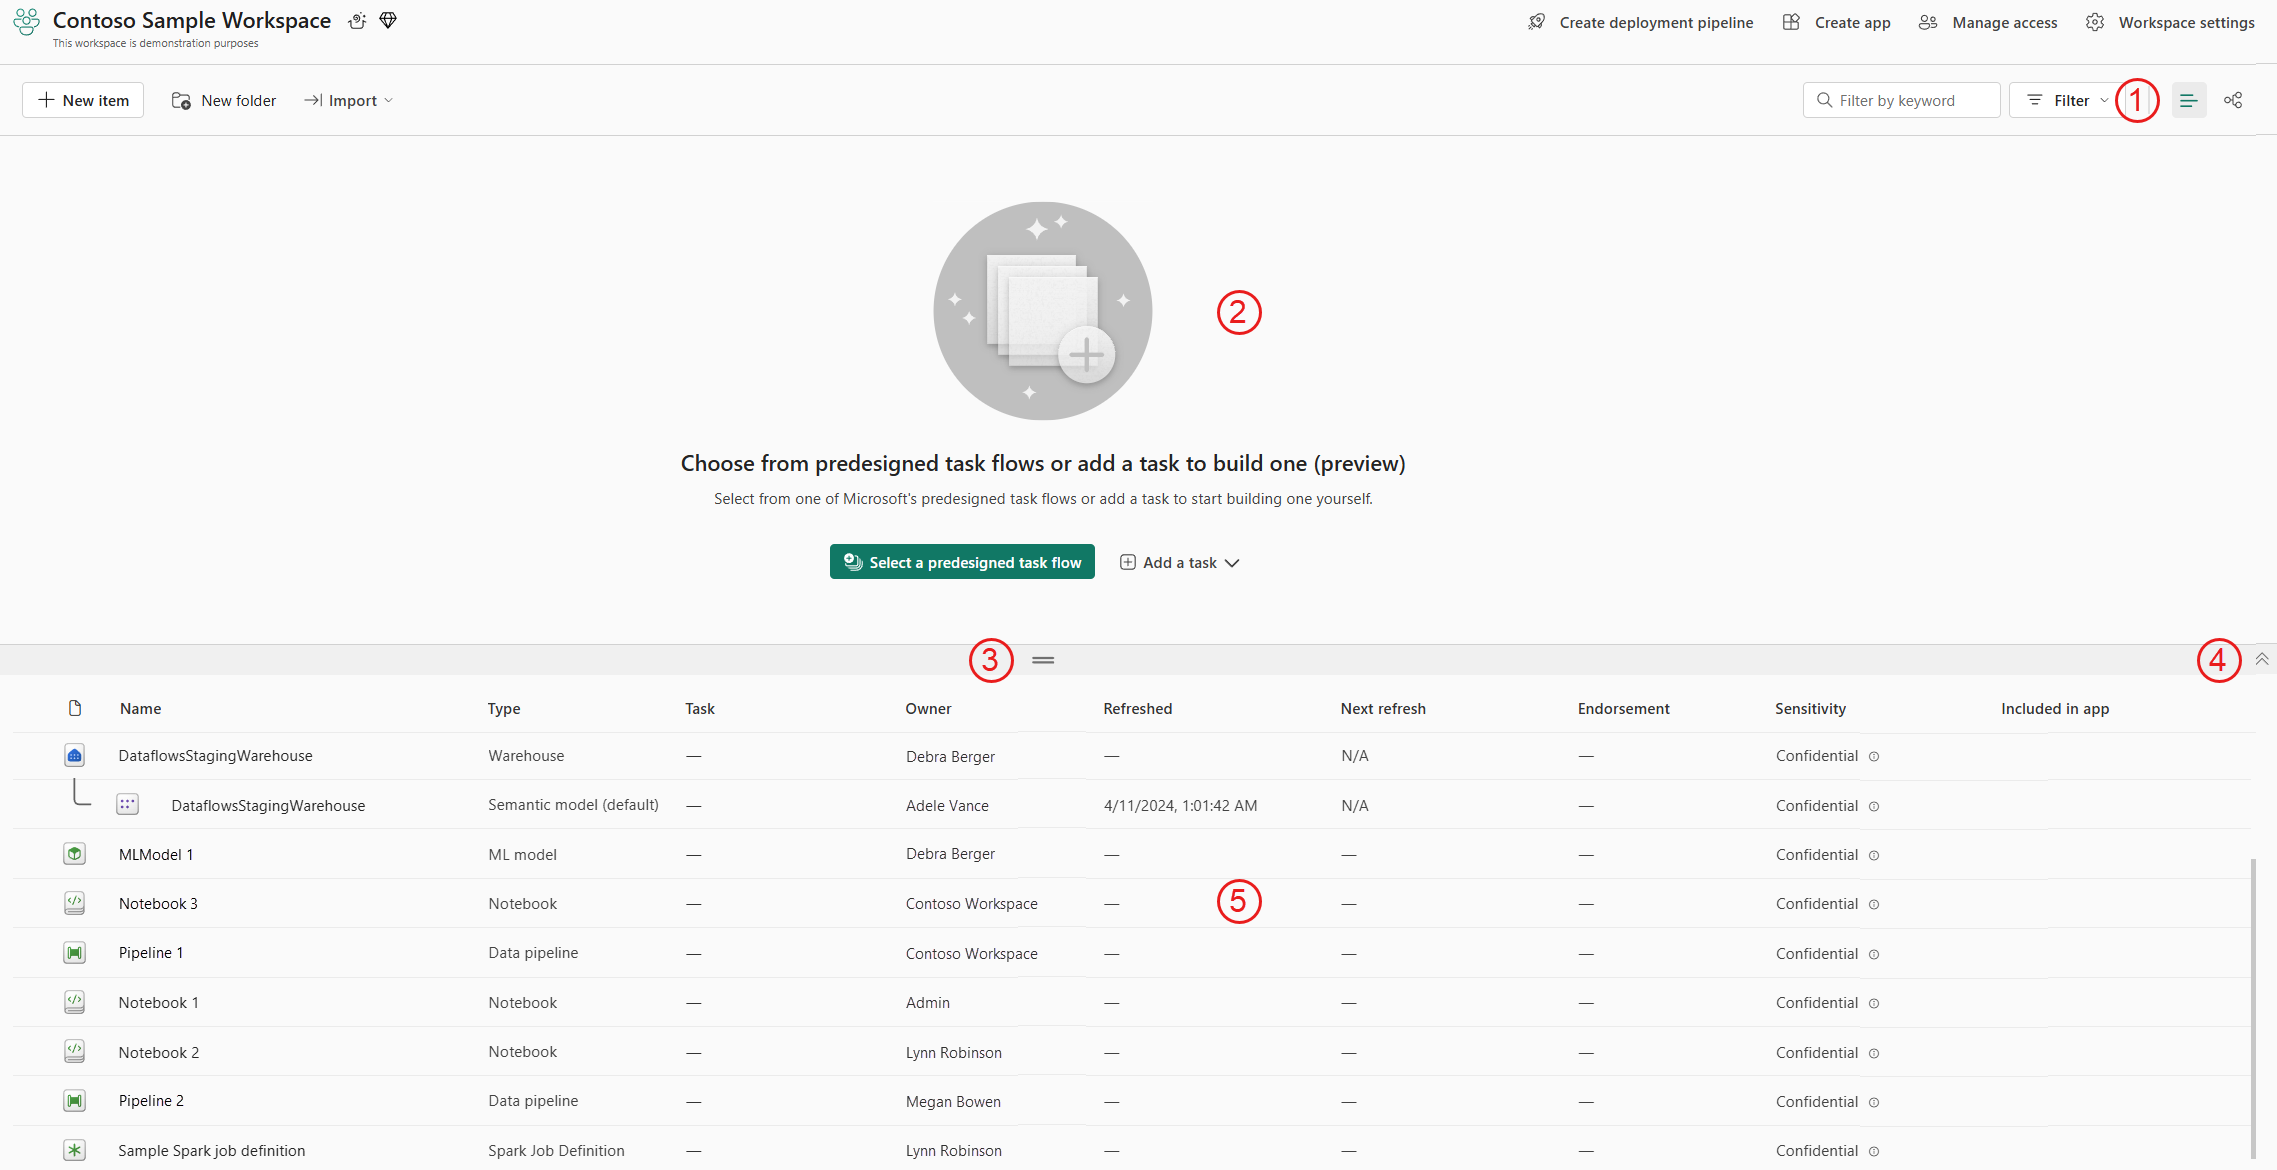
Navigate to the workspace where you want to create your task flow. It should open in list view, but if not, select the List view icon. You'll see that the workspace view is split between the task flow, where you'll build your task flow, and the items list, which shows you the items in the workspace. A moveable separator bar allows you to adjust the size of the views. You can also hide the task flow if you want to get it out of the way.
- List view selector
- Task flow canvas
- Resize bar
- Show/hide task flow
- Items list
When no task flow has been configured, the task flow area prompts you to choose between starting with a predesigned task flow or adding a task to start building your own custom task flow.
To build your task flow, you need to:
- Add tasks to the task flow canvas.
- Arrange the tasks on the task flow canvas in such a way that illustrates the logic of the project.
- Connect the tasks to show the logical structure of the project.
- Assign items to the tasks in the workflow.
To get started, choose either Select a predesigned task flow or Add a task to start building one from scratch.
If the workspace contains Power BI items only, the task flow canvas will display a basic task flow designed to meet the basic needs of a solution based on Power BI items only.
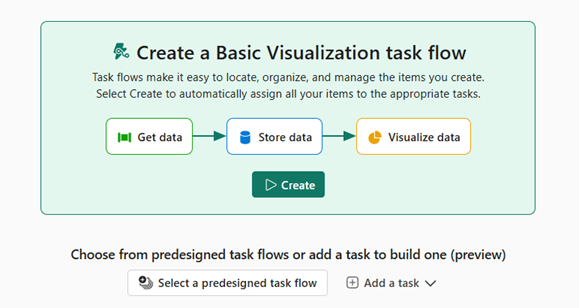
Select Create if you want to start with this task flow, or choose either of the previously mentioned options, Select a predesigned task flow or Add a task.
Start with a predesigned task flow
In the empty task flow area, choose Select a predesigned task flow.
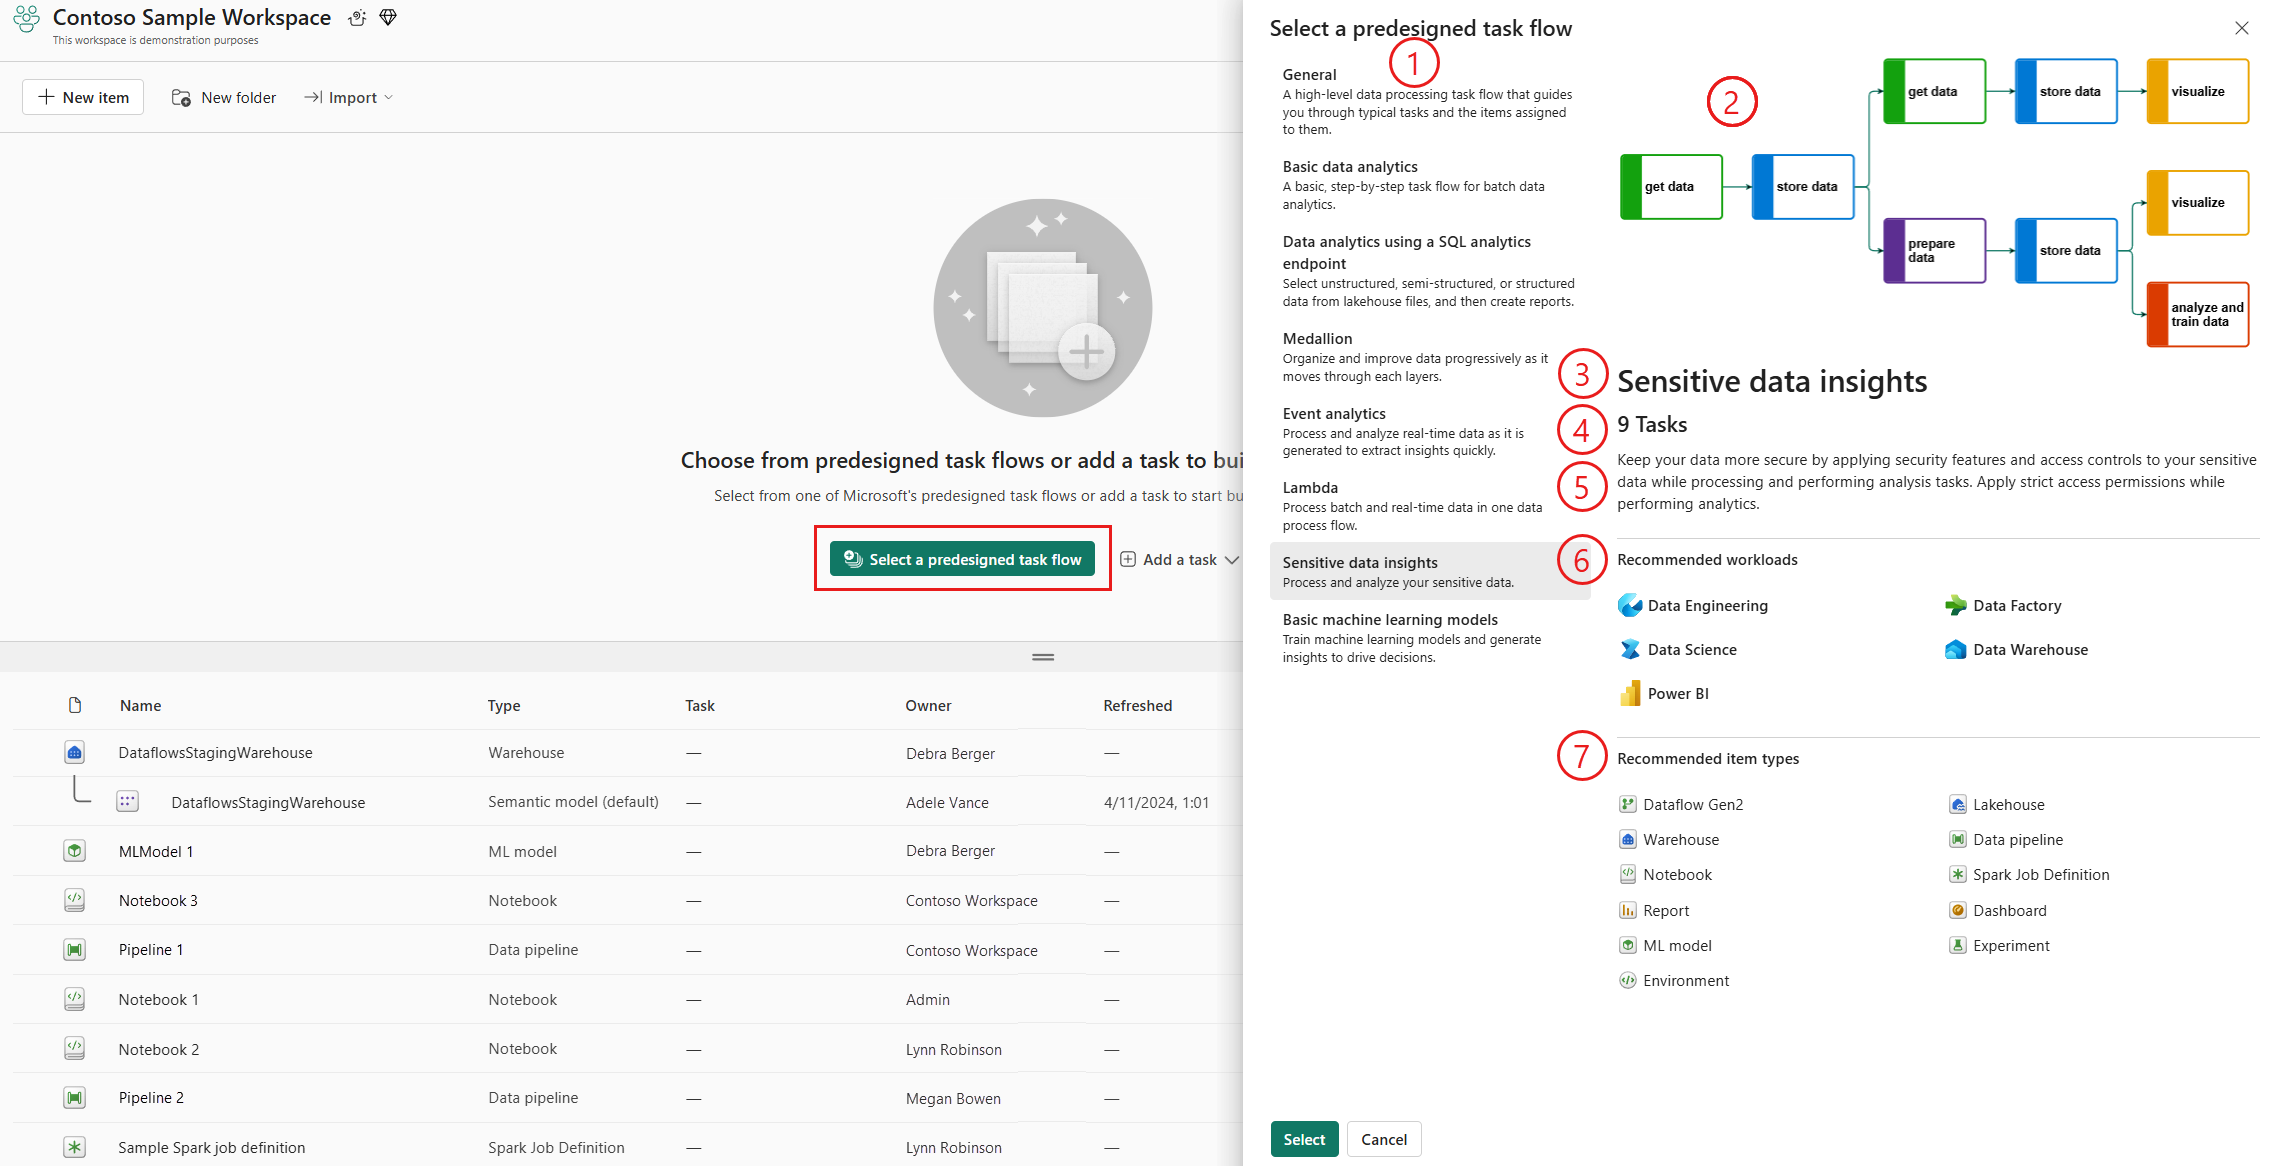
The side pane lists the predesigned task flows provided by Microsoft. Each predefined task flow has a brief description of its use case. When you select one of the flows, you'll see a more detailed description of the flow and how to use it, and also the workloads and item types that the flow requires.
- List of predesigned task flows.
- Layout of selected predesigned task flow.
- Name of selected predesigned task flow.
- Number of tasks in the task flow.
- Detailed description of the task flow and how it's used.
- The workloads that the task flow typically requires.
- The item types that are typically used in task flow.
Select the task flow that best fits your project needs and then choose Select. The selected task flow will be applied to the task flow canvas.
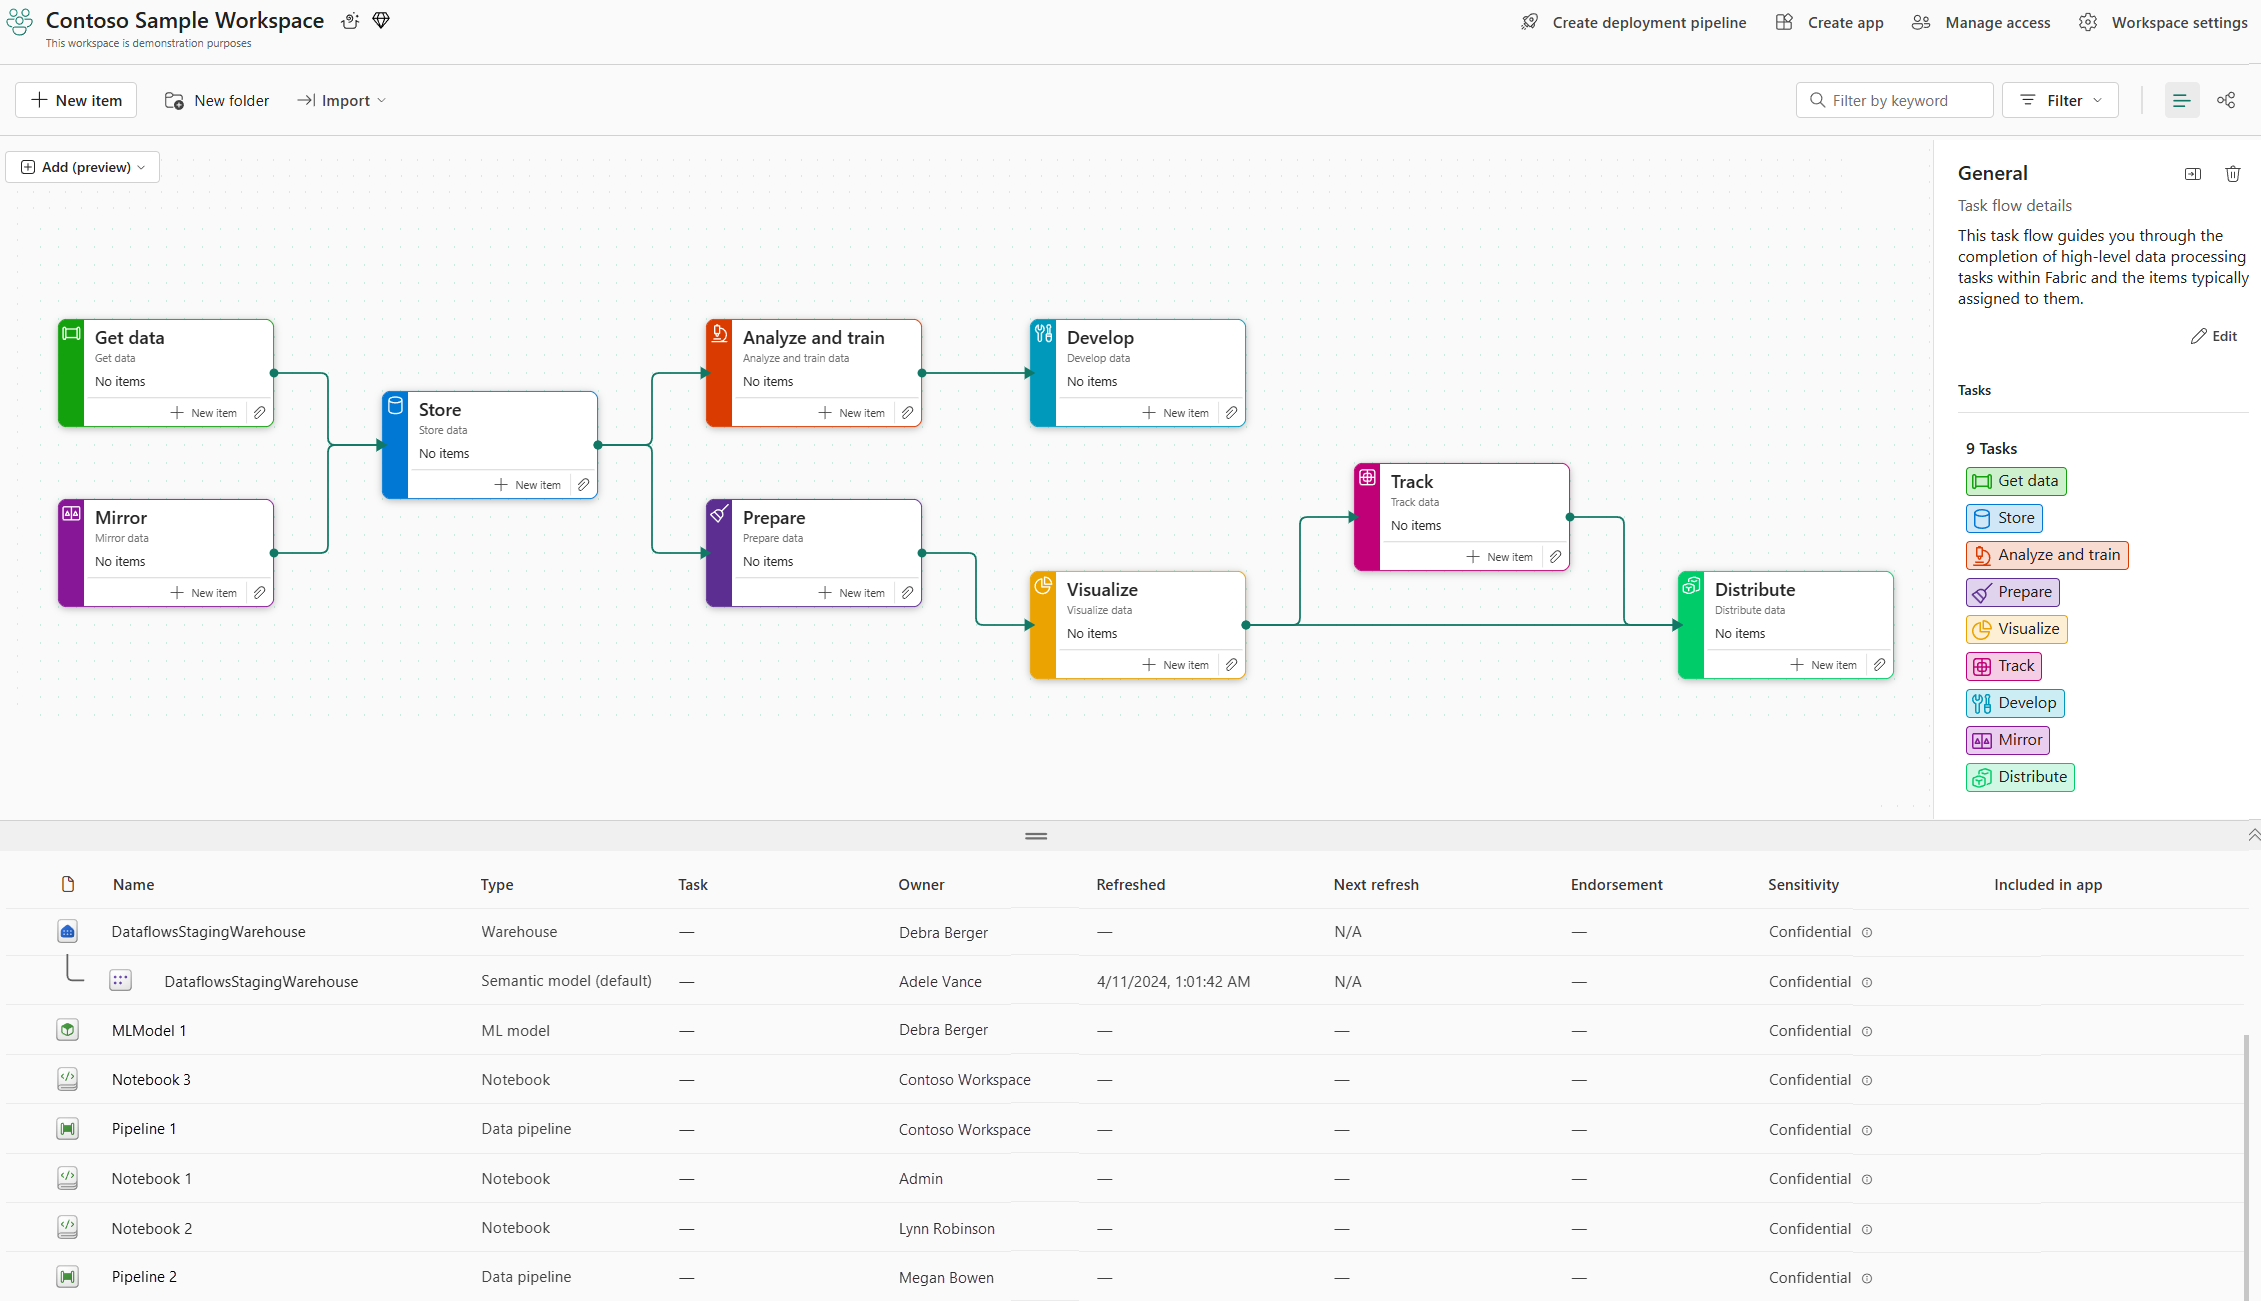
The task flow canvas provides a graphic view of the tasks and how they're connected logically.
The side pane now shows detailed information about the task flow you selected, including:
- Task flow name.
- Task flow description.
- Total number of tasks in the task flow.
- A list of the tasks in the task flow.
It's recommended that you change the task flow name and description to something meaningful that enables others to better understand what the task flow is all about. To change the name and description, select Edit in the task flow side pane. For more information, see Edit task flow details.
The items list shows all the items and folders in the workspace, including those items that are assigned to tasks in the task flow. When you select a task in the task flow, the items list is filtered to show just the items that are assigned to the selected task.
Note
Selecting a predefined task flow just places the tasks involved in the task flow on the canvas and indicates the connections between them. It's just a graphical representation - no actual items or data connections are created at this point, and no existing items are assigned to tasks in the flow.
After you've added the predefined task flow to the canvas, you can start modifying it to suit your needs - arranging the tasks on the canvas, updating task names and descriptions, assigning items to tasks, etc. For more information, see Working with task flows.
Start with a custom task flow
If you already have a clear idea of what the structure of your task flow needs to be, or if none of the predesigned task flows fit your needs, you can build a custom task flow from scratch task by task.
In the empty task flow area, select Add a task and choose a task type.
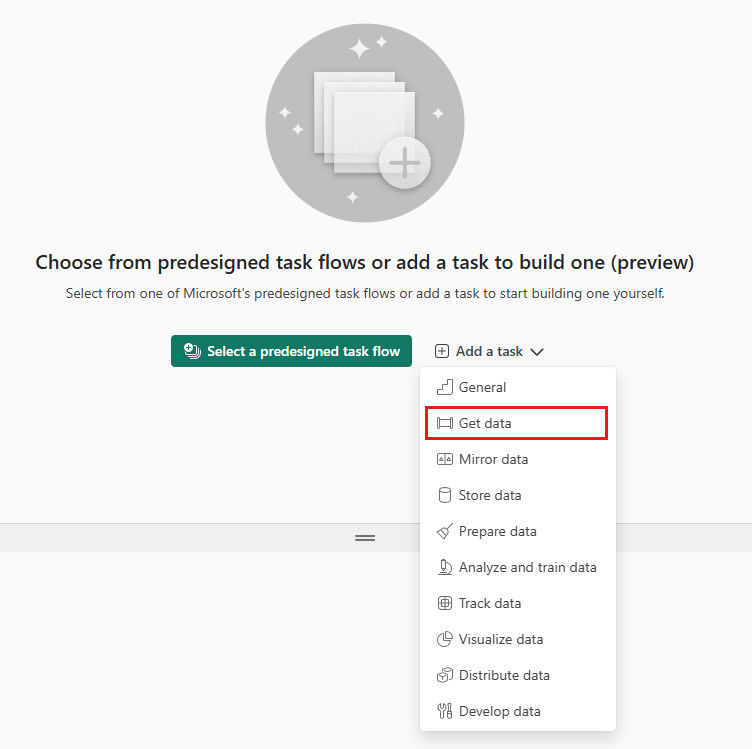
A task card appears on the canvas and the task details pane opens to the side.
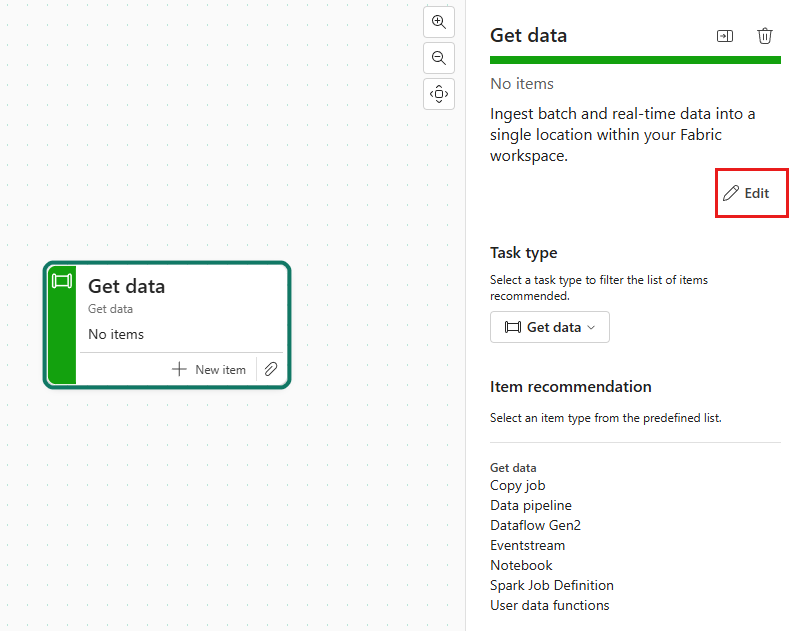
It's recommended to provide a meaningful name and description of the task to help other members of the workspace understand what the task is for. In the task details side pane, select Edit, to provide a meaningful name and description.
Deselect the task by clicking on a blank area of the task flow canvas. The side pane will display the task flow details with a default name (Get started with a task flow) and description. Note that the task you just created is listed under the Tasks section.
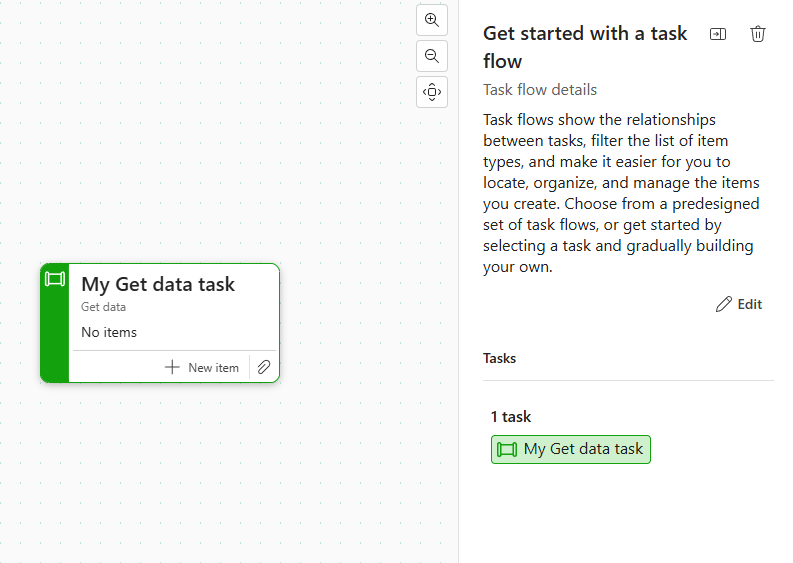
Select Edit and provide a meaningful name and description for your new task flow to help other members of the workspace understand your project and the task flow you're creating. For more information, see Edit task flow details.
You can continue to add more tasks to the canvas. You'll also have to perform other actions, such as arranging the tasks on the canvas, connecting the tasks, assigning items to the tasks, etc. For more information, see Working with task flows.
