Grant permissions to workspace managed identity
This article teaches you how to grant permissions to the managed identity in Azure Synapse workspace. Permissions, in turn, allow access to dedicated SQL pools in the workspace and Azure Data Lake Storage Gen2 account through the Azure portal.
Note
This workspace managed identity is referred to as managed identity through the rest of this document.
Grant the managed identity permissions to Data Lake Storage account
A Data Lake Storage Gen2 account is required to create an Azure Synapse workspace. To successfully launch Spark pools in Azure Synapse workspace, the Azure Synapse managed identity needs the Storage Blob Data Contributor role on this storage account. Pipeline orchestration in Azure Synapse also benefits from this role.
Grant permissions to managed identity during workspace creation
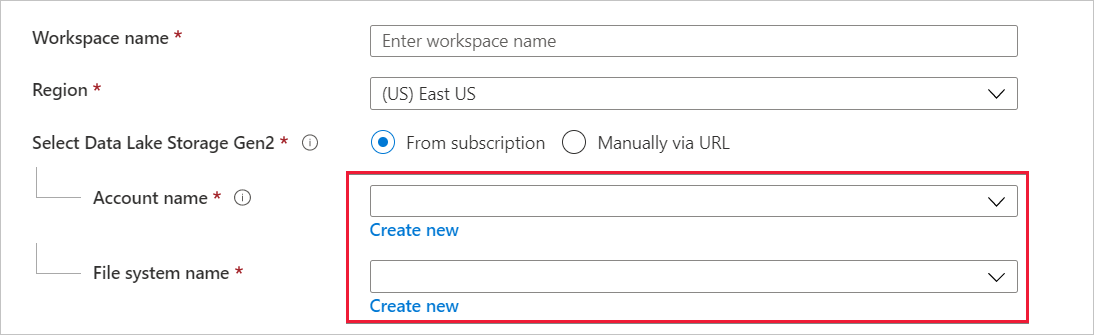
Azure Synapse attempts to grant the Storage Blob Data Contributor role to the managed identity after you create the Azure Synapse workspace using the Azure portal. You provide the Data Lake Storage account details in the Basics tab.
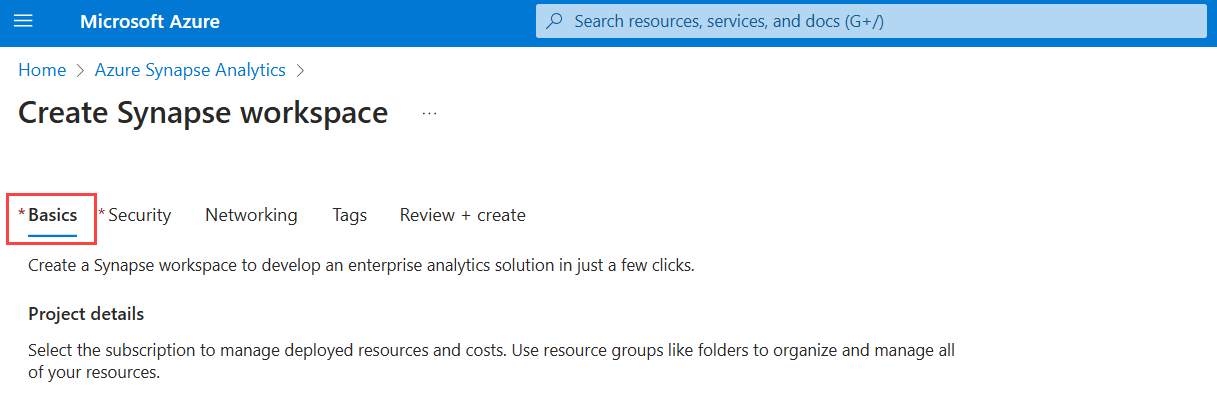
Choose the Data Lake Storage Gen2 account and filesystem in Account name and File system name.
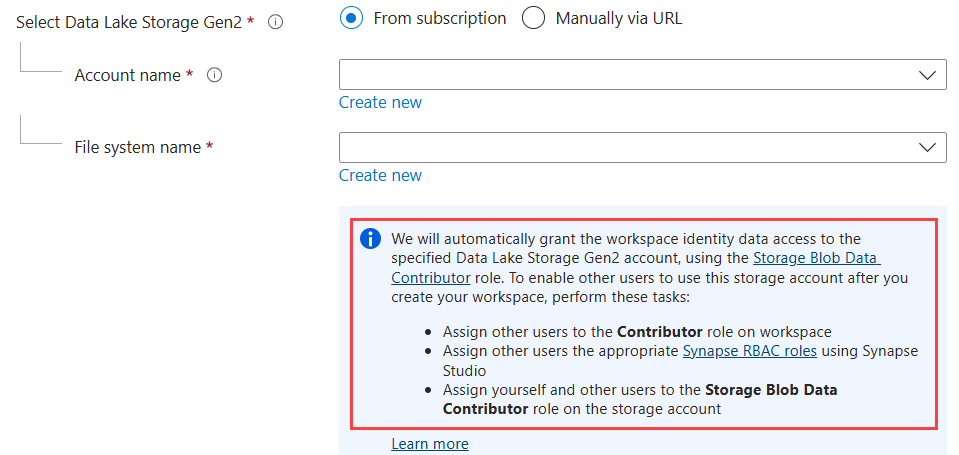
If the workspace creator is also Owner of the Data Lake Storage account, then Azure Synapse assigns the Storage Blob Data Contributor role to the managed identity. The following message appears.
If the workspace creator isn't the owner of the Data Lake Storage account, then Azure Synapse doesn't assign the Storage Blob Data Contributor role to the managed identity. The following message notifies the workspace creator that they don't have sufficient permissions to grant the Storage Blob Data Contributor role to the managed identity.
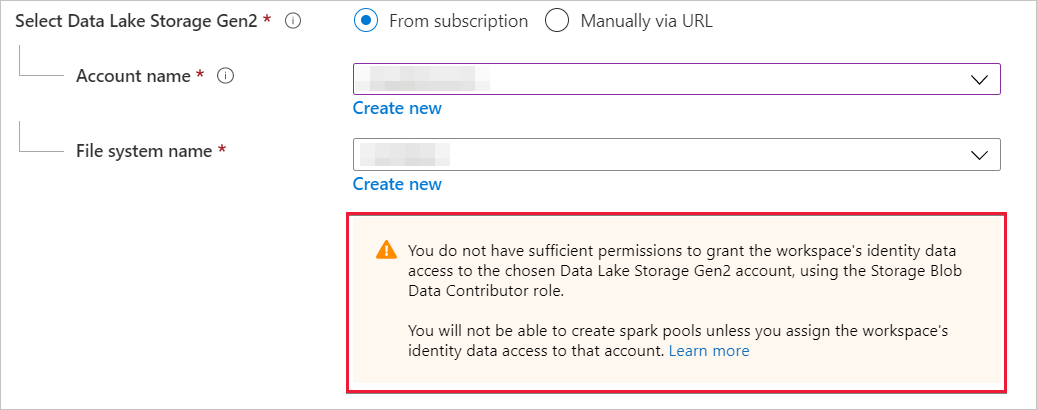
You can't create Spark pools unless the Storage Blob Data Contributor is assigned to the managed identity.
Grant permissions to managed identity after workspace creation
During workspace creation, if you don't assign the Storage Blob Data contributor to the managed identity, then the Owner of the Data Lake Storage Gen2 account manually assigns that role to the identity. The following steps help you to accomplish manual assignment.
Step 1: Navigate to the Data Lake Storage Gen2 account
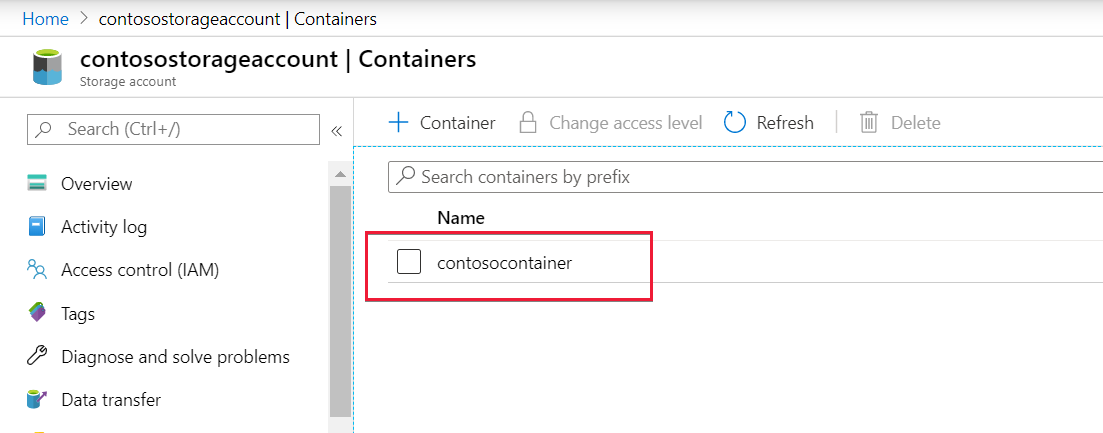
In the Azure portal, open the Data Lake Storage Gen2 storage account and select Containers from the left navigation. You only need to assign the Storage Blob Data Contributor role at the container or filesystem level.
Step 2: Select the container
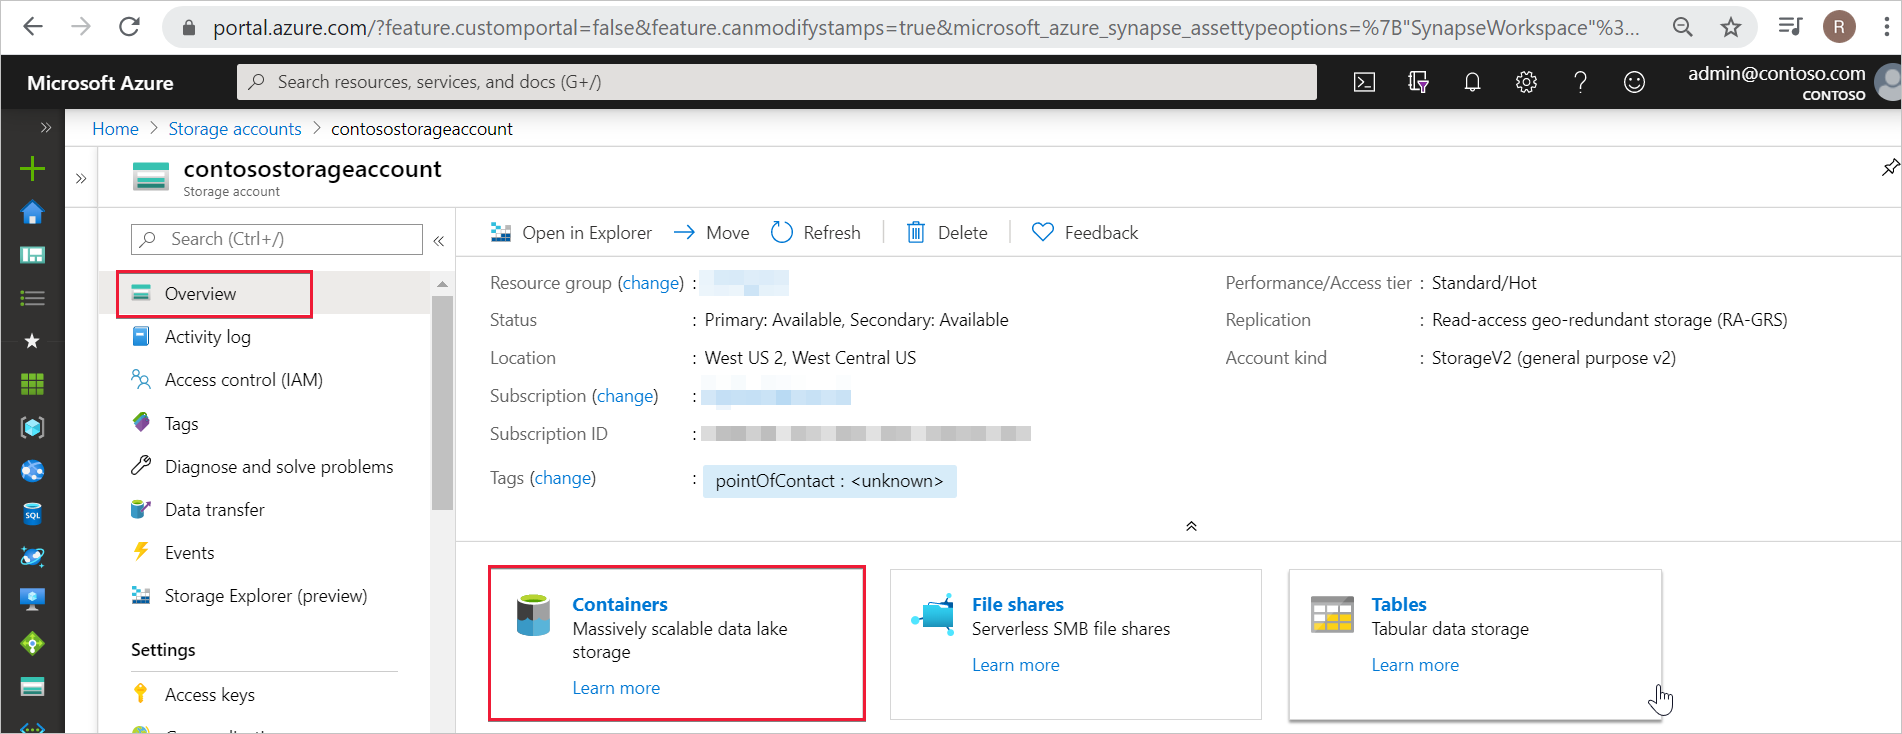
The managed identity should have data access to the container (file system) that was provided when the workspace was created. You can find this container or file system in the Azure portal. Open the Azure Synapse workspace in the Azure portal and select the Overview tab from the left navigation.

Select that same container or file system to grant the Storage Blob Data Contributor role to the managed identity.
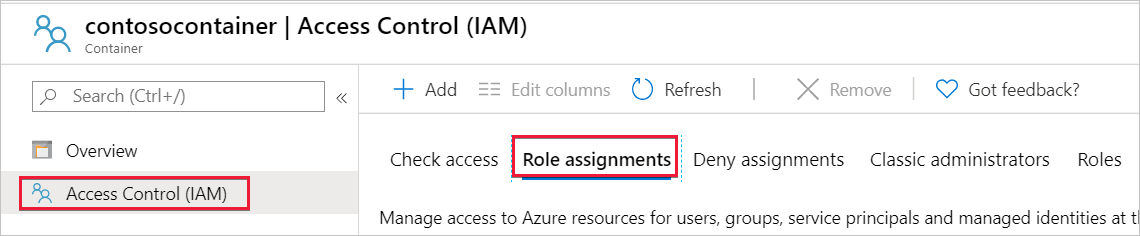
Step 3: Open Access control and add role assignment
Select Access control (IAM) from the resource menu.
Select Add > Add role assignment to open the Add role assignment page.
Assign the following role. For detailed steps, see Assign Azure roles using the Azure portal.
Setting Value Role Storage Blob Data Contributor Assign access to MANAGEDIDENTITY Members managed identity name Note
The managed identity name is also the workspace name.

Select Save to add the role assignment.
Step 4: Verify that the Storage Blob Data Contributor role is assigned to the managed identity
Select Access Control (IAM) and then select Role assignments.
You should see your managed identity listed under the Storage Blob Data Contributor section with the Storage Blob Data Contributor role assigned to it.

Alternative to Storage Blob Data Contributor role
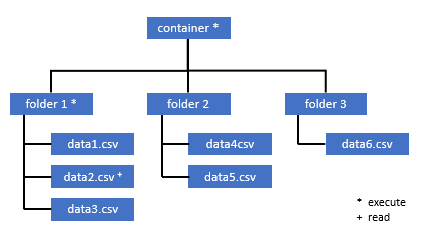
Instead of granting yourself a Storage Blob Data Contributor role, you can also grant more granular permissions on a subset of files.
All users who need access to some data in this container also must have EXECUTE permission on all parent folders up to the root (the container).
To learn more, see Use Azure Storage Explorer to manage ACLs in Azure Data Lake Storage.
Note
Execute permission on the container level must be set within Data Lake Storage Gen2. Permissions on the folder can be set within Azure Synapse.
If you want to query data2.csv in this example, the following permissions are needed:
- Execute permission on container
- Execute permission on folder1
- Read permission on data2.csv
Sign in to Azure Synapse with an admin user that has full permissions on the data you want to access.
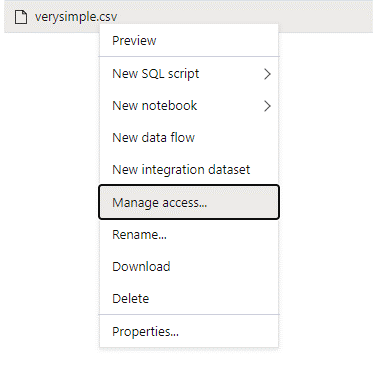
In the data pane, right-click the file and select Manage access.
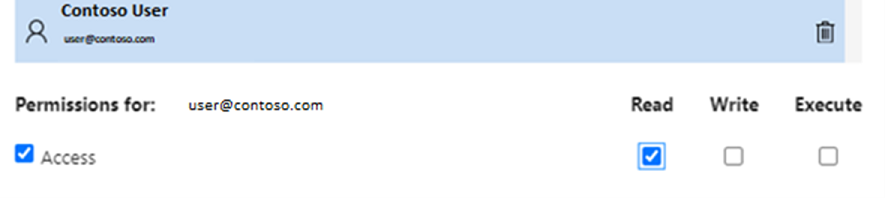
Select at least Read permission. Enter the user's UPN or object ID, for example,
user@contoso.com. Select Add.Grant read permission for this user.
Note
For guest users, this step needs to be done directly with Azure Data Lake because it can't be done directly through Azure Synapse.