Quickstart: Create a network security perimeter - Azure portal
Get started with network security perimeter by creating a network security perimeter for an Azure key vault using the Azure portal. A network security perimeter allows Azure PaaS (PaaS)resources to communicate within an explicit trusted boundary. Next, You create and update a PaaS resources association in a network security perimeter profile. Then you create and update network security perimeter access rules. When you're finished, you delete all resources created in this quickstart.
Important
Network Security Perimeter is in public preview and available in all Azure public cloud regions. This preview version is provided without a service level agreement, and it's not recommended for production workloads. Certain features might not be supported or might have constrained capabilities. For more information, see Supplemental Terms of Use for Microsoft Azure Previews.
Prerequisites
Before you begin, make sure you have the following:
- An Azure account with an active subscription and access to the Azure portal. If you don't already have an Azure account, create an account for free.
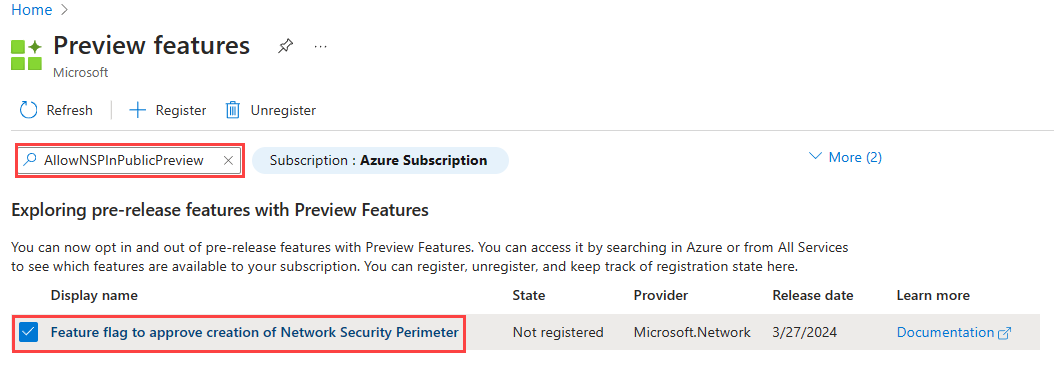
Registration for the Azure Network Security Perimeter public preview is required. To register, add the
AllowNSPInPublicPreviewfeature flag to your subscription.
For more information on adding feature flags, see Set up preview features in Azure subscription.
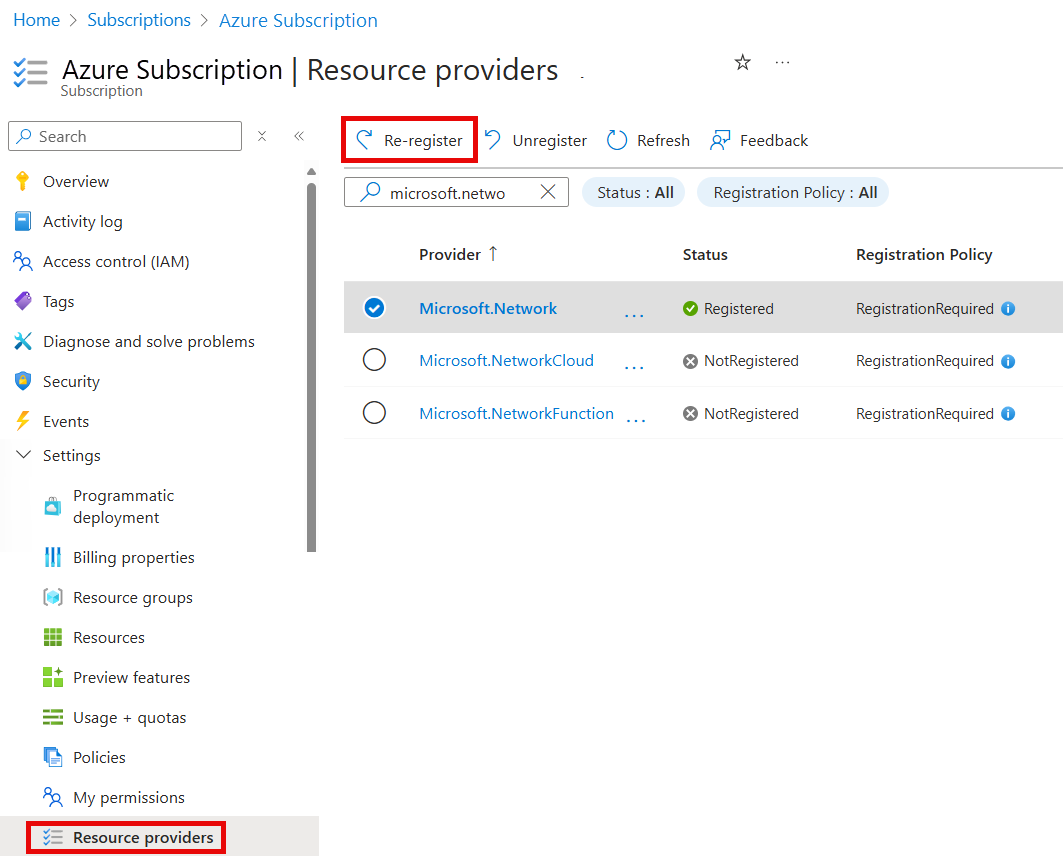
After the feature flag is added, you need to re-register the
Microsoft.Networkresource provider in your subscription.To re-register the
Microsoft.Networkresource provider in the Azure portal, select your subscription, and then select Resource providers. Search forMicrosoft.Networkand select Re-register.
To re-register the
Microsoft.Networkresource provider, use the following Azure PowerShell command:
# Register the Microsoft.Network resource provider
Register-AzResourceProvider -ProviderNamespace Microsoft.Network
To re-register the
Microsoft.Networkresource provider, use the following Azure CLI command:# Register the Microsoft.Network resource provider az provider register --namespace Microsoft.Network
For more information on re-registering resource providers, see Azure resource providers and types.
Sign in to the Azure portal
Sign in to the Azure portal with your Azure account.
Create a resource group and key vault
Before creating a network security perimeter, you create a resource group to hold all resources and a key vault that's protected by a network security perimeter.
Note
Azure Key Vault requires a unique name. If you receive an error that the name is already in use, try a different name. In our example, we use a unique name by appending Year (YYYY), Month (MM), and Day (DD) to the name - key-vault-YYYYDDMM.
In the search box at the top of the portal, enter Key vaults. Select Key vaults in the search results.
In the Key vaults accounts window that appears, select + Create.
In the Create a key vault window, enter the following information:
Setting Value Subscription Select the subscription you want to use for this key vault. Resource group Select Create new, then enter resource-group as the name. Key vault name Enter key-vault- <RandomNameInformation>.Region Select the region in which you want your key vault to be created. For this quickstart, (US) West Central US is used. Leave the remaining default settings, and select Review + Create > Create.
Create a network security perimeter
Once you create a key vault, you can proceed to create a network security perimeter.
Note
For organizational and informational safety, it's advised not to include any personally identifiable or sensitive data in the network security perimeter rules or other network security perimeter configuration.
In the search box of the Azure portal, enter network security perimeters. Select network security perimeters from the search results.
In the network security perimeters window, select + Create.
In the Create a network security perimeter window, enter the following information:
Setting Value Subscription Select the subscription you want to use for this network security perimeter. Resource group Select resource-group. Name Enter network-security-perimeter. Region Select the region in which you want your network security perimeter to be created. For this quickstart, (US) West Central US is used. Profile name Enter profile-1. Select the Resources tab or Next to proceed to the next step.
In the Resources tab, select + Add.
In the Select resources window, check key-vault-YYYYDDMM and choose Select.
Select Inbound access rules and select + Add.
In the Add inbound access rule window, enter the following information, and select Add:
Settings Value Rule name Enter inbound-rule. Source type Select IP address ranges. Allowed Sources Enter a public IP address range you wish to allow inbound traffic from. Select Outbound access rules and select + Add.
In the Add outbound access rule window, enter the following information, and select Add:
Settings Value Rule name Enter outbound-rule. Destination type Select FQDN. Allowed Destinations Enter the FQDN of the destinations you want to allow. For example, www.contoso.com. Select Review + create and then Create.
Select Go to resource to view the newly created network security perimeter.
Note
If managed identity is not assigned to the resource which supports it, outbound access to other resources within the same perimeter will be denied. Subscription based inbound rules intended to allow access from this resource will not take effect.
Delete a network security perimeter
When you no longer need a network security perimeter, you remove any resources associated with the network security perimeter and then remove the perimeter following these steps:
- From your network security perimeter, select Associated resources under Settings.
- Select key-vault-YYYYDDMM from the list of associated resources.
- From the action bar, select **Settings ** and then select Remove in the confirmation window.
- Navigate back to the Overview page of your network security perimeter.
- Select Delete and confirm the deletion by entering network-security-perimeter in the text box for the name of the resource.
- Browse to the resource-group and select Delete to remove the resource group and all resources within it.
Note
Removing your resource association from the network security perimeter results in access control falling back to the existing resource firewall configuration. This may result in access being allowed/denied as per the resource firewall configuration. If PublicNetworkAccess is set to SecuredByPerimeter and the association has been deleted, the resource will enter a locked down state. For more information, see Transition to a network security perimeter in Azure.