Migrate to an availability zone-enabled ExpressRoute virtual network gateway in Azure portal
When creating an ExpressRoute virtual network gateway, you must select a gateway SKU. Higher-level SKUs allocate more CPUs and network bandwidth, enabling the gateway to support higher throughput and more reliable connections to the virtual network.
Prerequisites
- Review the gateway migration article before starting.
- Ensure you have an existing ExpressRoute virtual network gateway in your Azure subscription.
Steps to migrate to a new gateway in Azure portal
Follow these steps to migrate to a new gateway using the Azure portal:
Navigate to your Virtual Network Gateway resource in the Azure portal.
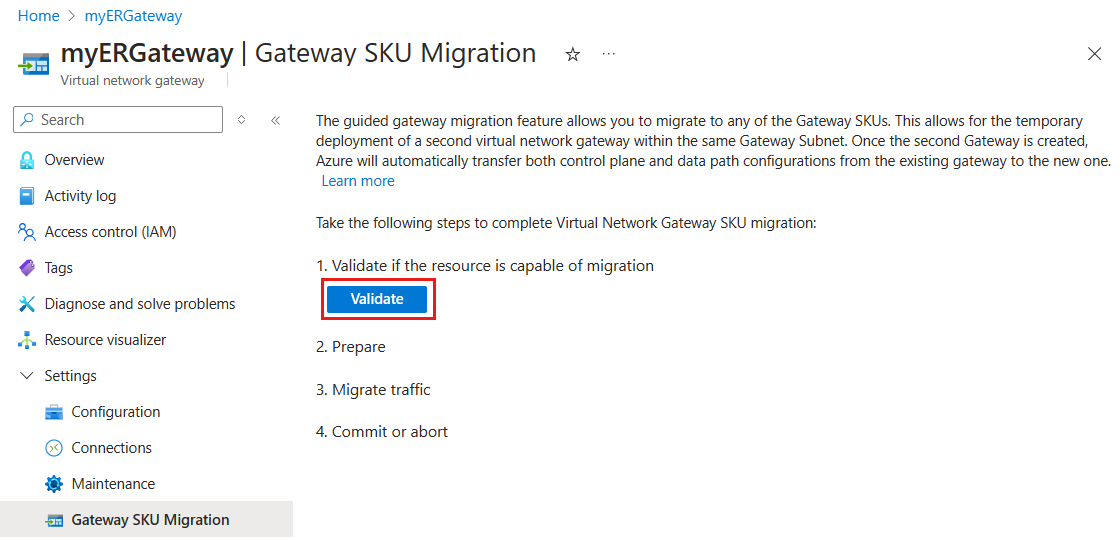
In the left-hand menu under Settings, select Gateway SKU Migration.
Select Validate to check if the gateway is ready for migration. A list of prerequisites will be displayed. If any prerequisites are unmet, validation fails, and migration can't proceed.
Once validation succeeds, proceed to the Prepare stage. A new virtual network gateway is created. Under Virtual Network Gateway Details, provide the following information:
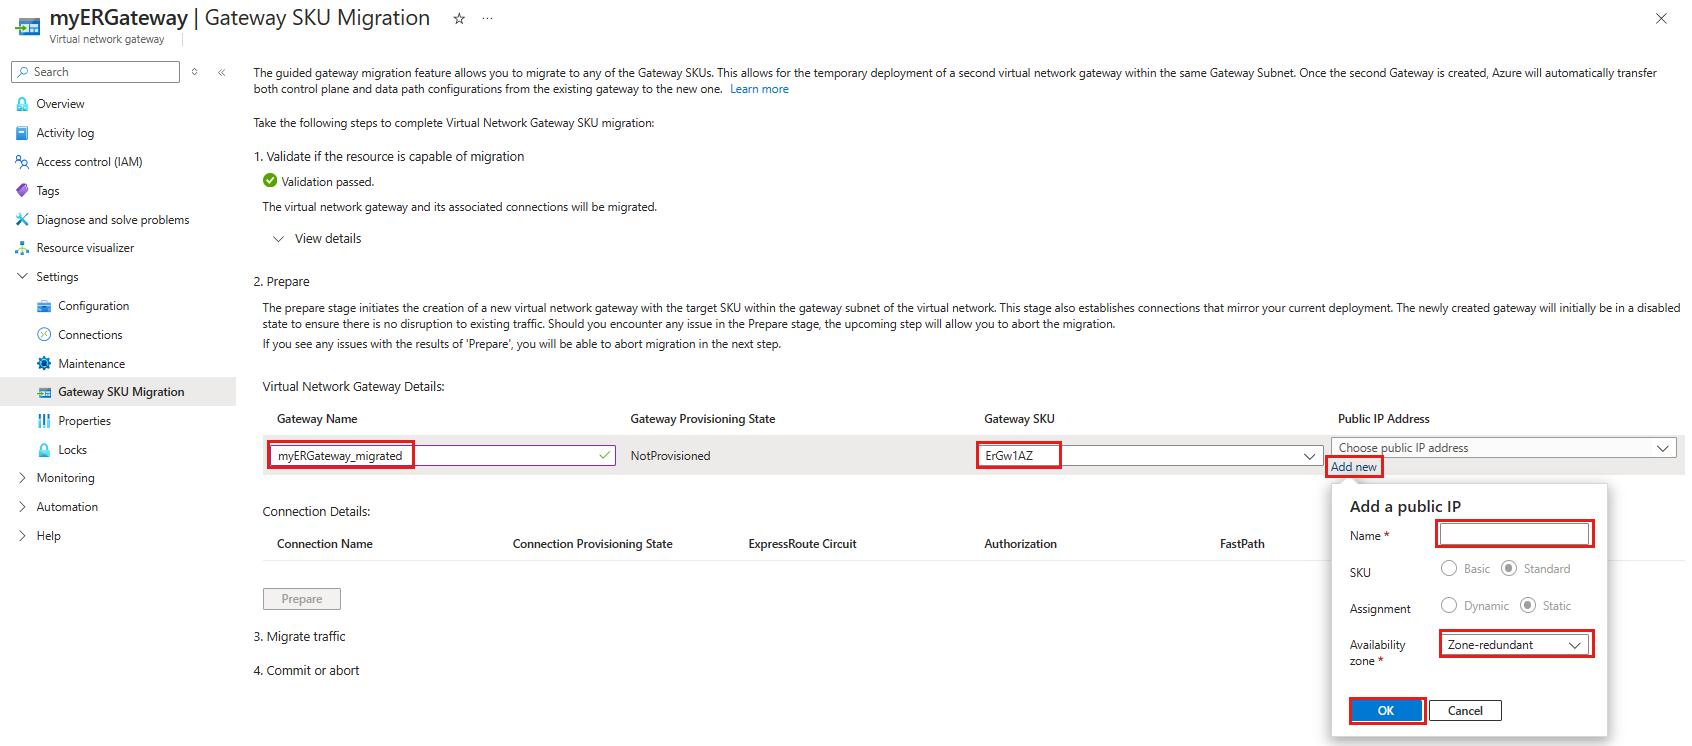
Setting value Gateway name Enter a name for the new gateway. Gateway SKU Select the SKU for the new gateway. Public IP address Select Add new, provide a name for the new public IP, choose an availability zone, and select OK. Note
During this process, your existing virtual network gateway is locked, preventing the creation or modification of connections.
Select Prepare to create the new gateway. This operation can take up to 45 minutes.
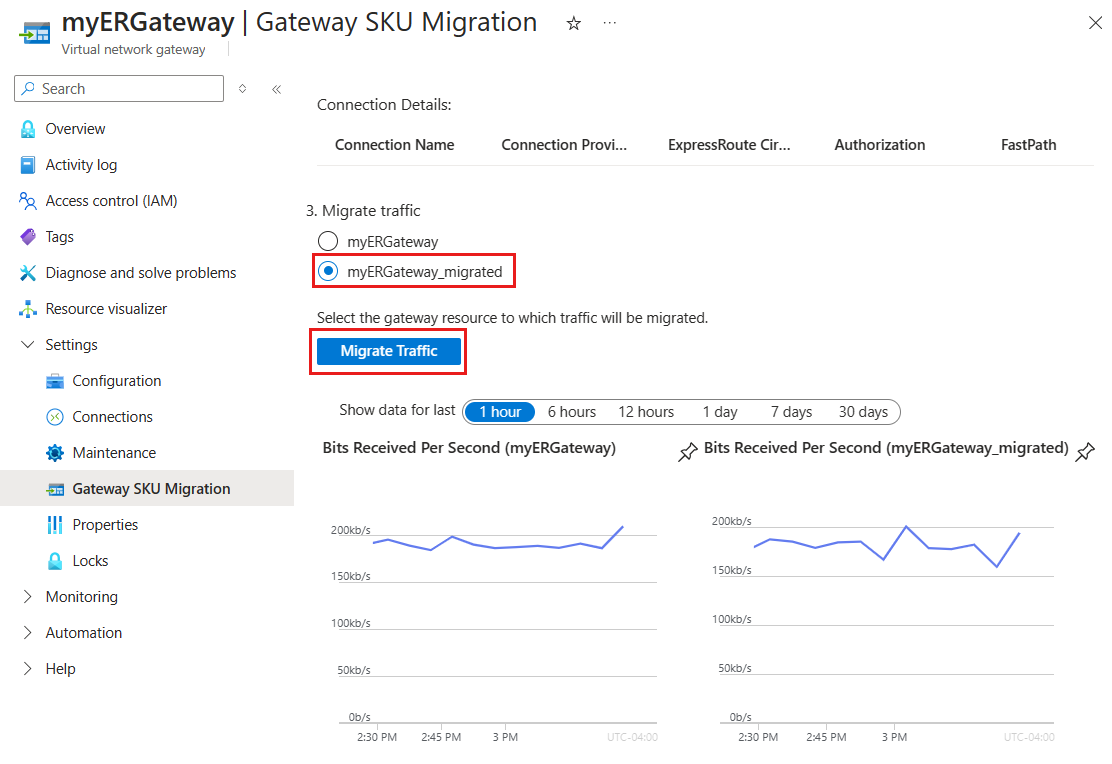
After the new gateway is created, proceed to the Migrate stage. Select the new gateway (for example, myERGateway_migrated) to transfer settings from the old gateway to the new one. All network traffic and data path connections transfer without interruptions. Select Migrate Traffic to start the process. This step can take up to 5 minutes.
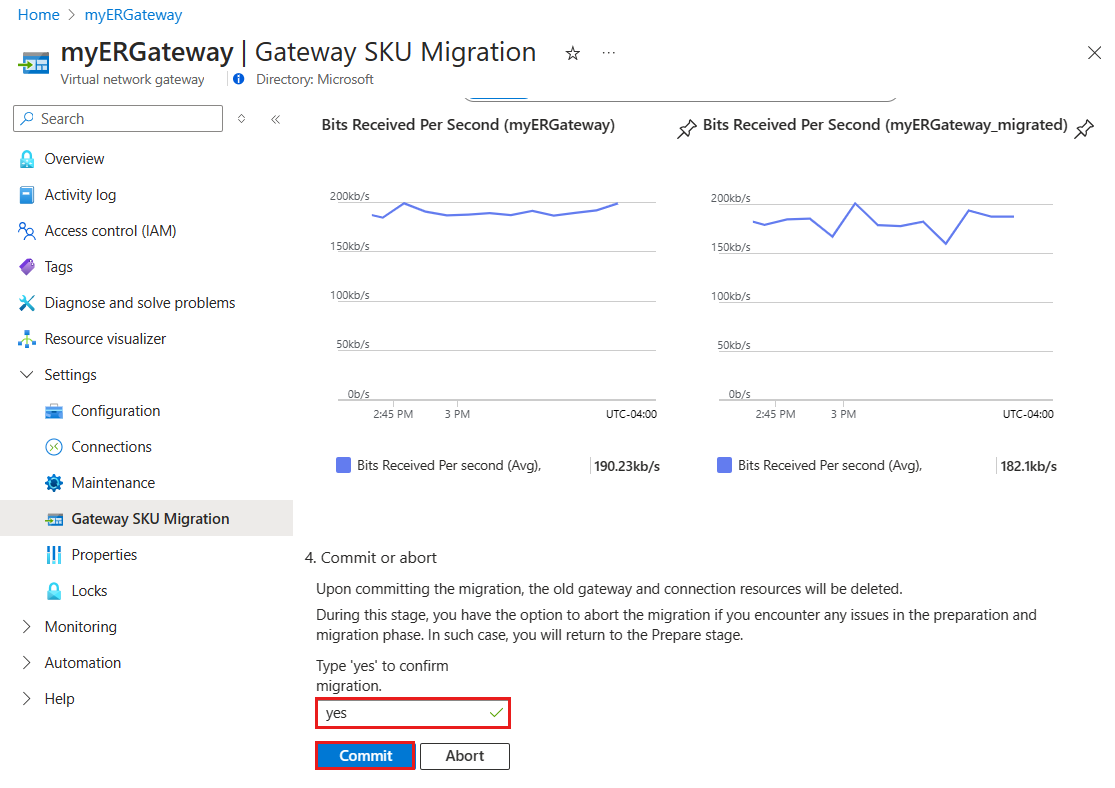
Once traffic migration is complete, proceed to the Commit stage. Finalize the migration by deleting the old gateway. Select Commit Migration to complete this step without downtime.


Important
- Before committing, verify that the new virtual network gateway has a working ExpressRoute connection and confirm traffic is flowing through the new connection.
- Expect a possible interruption of up to 30 seconds during migration.
- Once committed, the connection name can't be changed. To rename the connection, it must be deleted and recreated. Contact Azure support for assistance if needed.
Next steps
- Learn more about designing for high availability.
- Plan for disaster recovery and using VPN as a backup.