Deploy ARM templates by using GitHub Actions
GitHub Actions is a suite of features in GitHub to automate your software development workflows in the same place you store code and collaborate on pull requests and issues.
Use the Deploy Azure Resource Manager Template Action to automate deploying an Azure Resource Manager template (ARM template) to Azure.
Prerequisites
An Azure account with an active subscription. Create an account for free.
A GitHub account. If you don't have one, sign up for free.
- A GitHub repository to store your Resource Manager templates and your workflow files. To create one, see Creating a new repository.
Workflow file overview
A workflow is defined by a YAML (.yml) file in the /.github/workflows/ path in your repository. This definition contains the various steps and parameters that make up the workflow.
The file has two sections:
| Section | Tasks |
|---|---|
| Authentication | 1. Generate deployment credentials. |
| Deploy | 1. Deploy the Resource Manager template. |
Generate deployment credentials
To use Azure Login action with OIDC, you need to configure a federated identity credential on a Microsoft Entra application or a user-assigned managed identity.
Option 1: Microsoft Entra application
- Create a Microsoft Entra application with a service principal by Azure portal, Azure CLI, or Azure PowerShell.
- Copy the values for Client ID, Subscription ID, and Directory (tenant) ID to use later in your GitHub Actions workflow.
- Assign an appropriate role to your service principal by Azure portal, Azure CLI, or Azure PowerShell.
- Configure a federated identity credential on a Microsoft Entra application to trust tokens issued by GitHub Actions to your GitHub repository.
Option 2: User-assigned managed identity
- Create a user-assigned managed identity.
- Copy the values for Client ID, Subscription ID, and Directory (tenant) ID to use later in your GitHub Actions workflow.
- Assign an appropriate role to your user-assigned managed identity.
- Configure a federated identity credential on a user-assigned managed identity to trust tokens issued by GitHub Actions to your GitHub repository.
Configure the GitHub secrets
You need to provide your application's Client ID, Directory (tenant) ID, and Subscription ID to the login action. These values can either be provided directly in the workflow or can be stored in GitHub secrets and referenced in your workflow. Saving the values as GitHub secrets is the more secure option.
In GitHub, go to your repository.
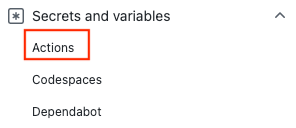
Select Security > Secrets and variables > Actions.
Select New repository secret.
Note
To enhance workflow security in public repositories, use environment secrets instead of repository secrets. If the environment requires approval, a job cannot access environment secrets until one of the required reviewers approves it.
Create secrets for
AZURE_CLIENT_ID,AZURE_TENANT_ID, andAZURE_SUBSCRIPTION_ID. Copy these values from your Microsoft Entra application or user-assigned managed identity for your GitHub secrets:GitHub secret Microsoft Entra application or user-assigned managed identity AZURE_CLIENT_ID Client ID AZURE_SUBSCRIPTION_ID Subscription ID AZURE_TENANT_ID Directory (tenant) ID Note
For security reasons, we recommend using GitHub Secrets rather than passing values directly to the workflow.
Add Resource Manager template
Add a Resource Manager template to your GitHub repository. This template creates a storage account.
https://raw.githubusercontent.com/Azure/azure-quickstart-templates/master/quickstarts/microsoft.storage/storage-account-create/azuredeploy.json
You can put the file anywhere in the repository. The workflow sample in the next section assumes the template file is named azuredeploy.json, and it's stored at the root of your repository.
Create workflow
The workflow file must be stored in the .github/workflows folder at the root of your repository. The workflow file extension can be either .yml or .yaml.
- From your GitHub repository, select Actions from the top menu.
- Select New workflow.
- Select set up a workflow yourself.
- Rename the workflow file if you prefer a different name other than main.yml. For example: deployStorageAccount.yml.
- Replace the content of the yml file with the following:
  on: [push]
  name: Azure ARM
  jobs:
    build-and-deploy:
      runs-on: ubuntu-latest
      steps:

        # Checkout code
      - uses: actions/checkout@main

        # Log into Azure
      - uses: azure/login@v1
        with:
          creds: ${{ secrets.AZURE_CREDENTIALS }}

        # Deploy ARM template
      - name: Run ARM deploy
        uses: azure/arm-deploy@v1
        with:
          subscriptionId: ${{ secrets.AZURE_SUBSCRIPTION }}
          resourceGroupName: ${{ secrets.AZURE_RG }}
          template: ./azuredeploy.json
          parameters: storageAccountType=Standard_LRS

        # output containerName variable from template
      - run: echo ${{ steps.deploy.outputs.containerName }}
Note
You can specify a JSON format parameters file instead in the ARM Deploy action (example: .azuredeploy.parameters.json).
The first section of the workflow file includes:
- name: The name of the workflow.
- on: The name of the GitHub events that triggers the workflow. The workflow is trigger when there's a push event on the main branch, which modifies at least one of the two files specified. The two files are the workflow file and the template file.
- Select Start commit.
- Select Commit directly to the main branch.
- Select Commit new file (or Commit changes).
Because the workflow is configured to be triggered by either the workflow file or the template file being updated, the workflow starts right after you commit the changes.
Check workflow status
- Select the Actions tab. You see a Create deployStorageAccount.yml workflow listed. It takes 1-2 minutes to run the workflow.
- Select the workflow to open it.
- Select Run ARM deploy from the menu to verify the deployment.
Clean up resources
When your resource group and repository are no longer needed, clean up the resources you deployed by deleting the resource group and your GitHub repository.